• Skip to primary navigation
  • Skip to main content
  • Skip to primary sidebar

My Obstacle Course: Engage, Encourage and Empower

A fun, structured, systematic way to work on your child's strengths and weaknesses at home!

  • Welcome to My Obstacle Course!
  • What is My Obstacle Course?
  • Developmental Timelines
    • What Is My Child Ready For?
  • About Us
  • Blog
  • Contact Information

Blog

My Obstacle Course Kit Item #10: Tunnels

Kit Item #10: Tunnels

Tunnels are one of my favorite items to include in My Obstacle Courses because they encourage cross patterning, creeping and crawling while creating a fun, movement filled transition from activity to activity.

Fabric tunnel
Collapsible tunnel

Tunnels can be created a number of different ways. I have used dining room chairs (ones that don’t have the foot/cross bar underneath work best) in the past which helped encourage creeping and crawling. After seeing a fabric tunnel at his OT, I made my own. Click here for the post on this easy to make fabric tunnel. But one of my favorite items are collapsible tunnels. The set we got came with 5 so I can place them around My Obstacle Course in between stations. They are super easy to set up and create an instantaneous look of fun with their bright colors.

While the chairs or collapsible tunnels may not fit into a bin, I encourage you to look around at the chairs you have to see if they’d work or consider getting some collapsible tunnels fold down flat for easy storage.
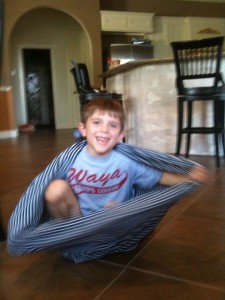
Andrew happily emerging out of the tunnel.

Tunnels provide an easy way to add some adventure to My Obstacle Course while promoting cross patterning and gross motor movement at the same time!

Engage, Encourage and Empower!

My Obstacle Course Kit Item #9: Clothesline and Clothespins

Kit Item #9: Clothesline and Clothespins

This is one of my favorite tools and the fact that I can use it to build multiple skills and concepts by combining an academic or concept driven skill with the fine motor skills and planning involved with using clothespins just makes it even more awesome! It adapts beautifully to whatever I need Andrew to be working on, which helps to keep it interesting. This is huge in keeping him engaged and motivated and I love the smirk on his face when he sees it and wonders what he’s going to be doing. 🙂

The clothesline and clothespins are easily contained in a plastic bag and the cards or cutouts can also be kept in a separate baggie which makes this tool perfect for a kit. Check out my  original post on Clothesline Clipping to get more details although it really could not be more simple – clothesline, clothespins, something to attach the clothesline to (doorknobs and chairs work well), and concepts on cards to clip together.

Sample Activities:

My Obstacle Course Station Activity: Clip the words that rhyme together.
My Obstacle Course Station Activity: Clip the opposite words together.
Opposite words to choose from lay waiting on the seat of the chair.
Matching words with word clues taken from Gingerbread themed Enchanted Learning activity. The clues are glued onto gingerbread shaped cutouts and the words are glued onto halved index cards.
My Obstacle Course Station Activity: Clip the numbers in order from 10-20. I just wrote numbers 10-20 on large snowflake shaped cutouts to go with the winter theme we were doing.
My Obstacle Course Station Activity: Clip the numbers to the bag that has the same number of candy hearts. (One to one correspondence)

While there are different kinds of clothespins out there, I prefer to use the wooden clothespins with the spring. I’ve tried some of the newer plastic clips (the white ones in the pictures) and they are really challenging to open. My advice is to try the clothespins or clips to see how hard it is to open before having a child use it who already has some fine motor weaknesses.

Click here for the search results for clothesline from my website.

Engage, Encourage and Empower!

My Obstacle Course Kit Item #8: Beach Ball or Balloon

My Obstacle Course Kit Item #8: Beach Ball or Balloon

I chose a beach ball or balloon to build gross motor skills involving ball play because they can deflate and fit perfectly into a kit. They are also colorful, light and float in the air a bit longer than a regular playground type ball, making them better for visual tracking and giving more time for motor planning. The fact that they don’t hurt when a catch is missed is a huge bonus!!

Beach ball turned into a Question ball.
Tossing and catching a pink balloon.

This is a classic example of not needing something fancy or expensive to engage with your child while also helping to build a wide range of gross motor skills.

Uses:

  • catching
  • passing
  • kicking
  • rolling
  • bouncing
Combine either one with a dice or a spinner to determine how many of each to help children who are reluctant to do these things because they are challenging. I have even used blank dice programmed with the task so when he would roll one die, it would tell him what we were going to do (ex. catch, pass, kick, roll or bounce) and another die or set of dice to tell him how many times. This could also be done by creating task and number cards, having them face down and the child gets to flip over a card from each pile to see what to do and how many of each. Something simple like this takes minutes to prepare but adds fun while removing the “mom says” aspect. Andrew also does much better when he knows how many he is going to have to do and is very reluctant to participate when it comes to completing an unknown amount. Considering that I am the same way when it comes to working out, I don’t blame him one bit!!
Click here for my original post on Beach Ball Questions.
Engage, Encourage and Empower!

My Obstacle Course Kit Item #7: A Writing Surface

Kit Item #7: A Writing Surface

There are many different writing surfaces out there that would be perfect to put into a kit. I love using things that can be used again and again
to help Andrew build his handwriting skills. I have the following items in my own My Obstacle Course materials:

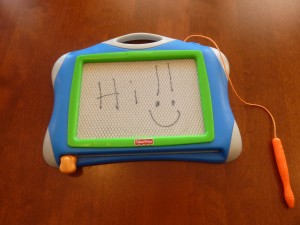
  • Magna-Doodles (I have even found small seasonal ones!)
  • Aqua-Doodles
  • white boards (write on/wipe off or dry erase) that come lined like beginning writing paper and plain white (make sure to use the correct markers and NOT permanent markers – speaking from experience here! 🙂 )
  • chalk boards
Magna Doodle
Aqua Doodle
Lined Write On/Wipe Off Board
Plain Write On/Wipe Off Board

These items make it super easy to set up, easy to clean up and are about the size of a sheet of paper so they store easily. I have also found that they are much less intimidating and more fun for Andrew than paper. He is much more willing to draw or write if he knows it was not going to be permanent. Using these tools helped a good deal because if it didn’t look the way he wanted, he could erase it easily and start again.

Andrew writing some space words on the lined write on/wipe off board.

Past Posts You May Find Helpful:

Click here for a past post on the different writing surfaces I have used as part of our stations – No Paper or Pencils Required Here!

Click here for a past post on Handwriting Helpers if you want to learn about some tools that are out there to help with finger placement on writing instruments.

Activity Suggestions:

  • Flip and Draw
  • Make the Same – writing words using models, like the space words above, flash cards or speech words
  • Practicing letters or numbers
  • Painting shapes, letters or numbers with water on a chalkboard

Handwriting is one of those skills that is a common challenge for children with motor and/or planning issues (and they know it!) so I am always looking for ways to sneak it in while making it fun. These items make it easy for me to create stations to do just that and hope that they might help you as well!

Engage, Encourage and Empower!


My Obstacle Course Kit Item #6: Food Coloring

My Obstacle Kit Item #6: Food Coloring

When thinking about how to make activities fun in order to make building more challenging skills exciting, I thought back to teaching my “Colors” unit in kindergarten. The students loved experimenting and learning how different colors are made. I started using food coloring in My Obstacle Course station activities with Andrew and got to see the same look of wonder and joy as he saw firsthand what happens when two colors blend together. So easy and so fun!!

Food Coloring

Uses:

  • drops of color into water combined with droppers, bulb syringe or turkey baster to build fine motor skills while experimenting with color
  • drops of color into shaving cream or frosting to build hand and arm muscles by mixing with spoon

Sample Activities:

These are all pretty straight forward station activities. Click here for a food coloring post search from my website but these photos give a good idea of how we have used food coloring to add some color to station activities aimed at building hand muscles and muscle control.

My Obstacle Course Station Activity: Adding food coloring to make orange shaving cream for autumn themed shaving cream writing station

Food coloring + shaving cream

My Obstacle Course Station Activity: Color fun with droppers

Droppers and Colored Water

My Obstacle Course Station Activity: Use hands to squeeze bag so frosting mixes and makes it colored

Frosting in a Ziploc bag with food coloring added. He had to squeeze and press out the frosting so the color would spread.

My Obstacle Course Station Activity: Use spoon to mix and make the frosting turn green

Making green frosting for March themed My Obstacle Course.

My Obstacle Course Station Activity: Pour colored water to fill muffin pan

Working on pouring skills using colored water and heart-shaped muffin pans for February themed course.

These are just some ways we have used food coloring in My Obstacle Courses to make them a bit more fun. Such an easy add in that helps to motivate and inspire experimentation. Have fun!!

Engage, Encourage and Empower!


My Obstacle Course Kit Item #5: Droppers, Bulb Syringes and Turkey Basters

Droppers, Bulb Syringes and Turkey Basters

Dropper, Bulb Syringe and Turkey Baster

These items are great to have in a My Obstacle Course kit because they add fun and build hand muscles with hardly any set up – just add water and some bowls or cups and you are good to go!

They also help to build some other skills, like planning, patience and focus (in a way that I found was tolerable for Andrew 🙂 ) because for it to work, the child has to do several things:

  • squeeze the top
  • hold it squeezed while putting the bottom in the liquid
  • release the bulb slowly to allow the liquid to get sucked into the tube.

These muscles also have to work to squeeze the liquid back out. He learned pretty quickly how to do it to get the most liquid and would talk to himself about how it worked and what he was going to have to do next time. (Andrew: “Oh, not a lot. Try again and get some more next time. Hooray! Look at all the water!”)

I found a package of droppers (I think 12) at my local teacher store and I do find that having more than one is helpful. The bulb syringe was something that was left over from when Andrew was a baby. They also sell these as part of ear cleaning kits. Look no further than your kitchen drawers to find the turkey baster, however, I did buy a separate one for Andrew’s use (really inexpensive one from the grocery store) to keep with my other station materials.

Uses:

  • making different colors when combined with colored water
  • transferring water from one container to another in order to fill it to a certain level
  • squirting water on something (putting out fire blog post)

Past Posts Using These Items:

  • Droppers
  • Bulb Syringe
  • Baster

Adding any of these items to a My Obstacle Course kit is a super easy way to encourage experimentation with water while also helping to build muscles that will help with handwriting. I love things that make this fun!!

Engage, Encourage and Empower!


« Previous Page
Next Page »

Primary Sidebar

Obstacle Course Mom’s Blog

  • When People Stare, Mind Your Own Business
  • ABC’s of Peaceful Parenting Tele-class
  • What’s Perfect About This?
  • Exciting News!
  • Halloween

Categories

  • Blog
  • Cool Tool
  • Fine Motor
  • Getting Started
  • Gross Motor
  • Literacy
  • Math
  • My Obstacle Course Station Ideas
  • Oral Motor
  • Problem Solving
  • Sensory
  • Social Skills
  • Uncategorized

Archives

  • July 2012 (1)
  • May 2012 (1)
  • January 2012 (1)
  • November 2011 (2)
  • October 2011 (12)
  • September 2011 (14)
  • August 2011 (15)
  • July 2011 (19)
  • June 2011 (18)
  • May 2011 (21)
  • April 2011 (20)
  • March 2011 (22)
  • February 2011 (19)
  • January 2011 (21)
  • December 2010 (22)
  • November 2010 (6)

Meta

  • Log in
  • Entries feed
  • Comments feed
  • WordPress.org