• Skip to primary navigation
  • Skip to main content
  • Skip to primary sidebar

My Obstacle Course: Engage, Encourage and Empower

A fun, structured, systematic way to work on your child's strengths and weaknesses at home!

  • Welcome to My Obstacle Course!
  • What is My Obstacle Course?
  • Developmental Timelines
    • What Is My Child Ready For?
  • About Us
  • Blog
  • Contact Information

Archives for July 2011

My Obstacle Course Kit Item #6: Food Coloring

My Obstacle Kit Item #6: Food Coloring

When thinking about how to make activities fun in order to make building more challenging skills exciting, I thought back to teaching my “Colors” unit in kindergarten. The students loved experimenting and learning how different colors are made. I started using food coloring in My Obstacle Course station activities with Andrew and got to see the same look of wonder and joy as he saw firsthand what happens when two colors blend together. So easy and so fun!!

Food Coloring

Uses:

  • drops of color into water combined with droppers, bulb syringe or turkey baster to build fine motor skills while experimenting with color
  • drops of color into shaving cream or frosting to build hand and arm muscles by mixing with spoon

Sample Activities:

These are all pretty straight forward station activities. Click here for a food coloring post search from my website but these photos give a good idea of how we have used food coloring to add some color to station activities aimed at building hand muscles and muscle control.

My Obstacle Course Station Activity: Adding food coloring to make orange shaving cream for autumn themed shaving cream writing station

Food coloring + shaving cream

My Obstacle Course Station Activity: Color fun with droppers

Droppers and Colored Water

My Obstacle Course Station Activity: Use hands to squeeze bag so frosting mixes and makes it colored

Frosting in a Ziploc bag with food coloring added. He had to squeeze and press out the frosting so the color would spread.

My Obstacle Course Station Activity: Use spoon to mix and make the frosting turn green

Making green frosting for March themed My Obstacle Course.

My Obstacle Course Station Activity: Pour colored water to fill muffin pan

Working on pouring skills using colored water and heart-shaped muffin pans for February themed course.

These are just some ways we have used food coloring in My Obstacle Courses to make them a bit more fun. Such an easy add in that helps to motivate and inspire experimentation. Have fun!!

Engage, Encourage and Empower!


My Obstacle Course Kit Item #5: Droppers, Bulb Syringes and Turkey Basters

Droppers, Bulb Syringes and Turkey Basters

Dropper, Bulb Syringe and Turkey Baster

These items are great to have in a My Obstacle Course kit because they add fun and build hand muscles with hardly any set up – just add water and some bowls or cups and you are good to go!

They also help to build some other skills, like planning, patience and focus (in a way that I found was tolerable for Andrew 🙂 ) because for it to work, the child has to do several things:

  • squeeze the top
  • hold it squeezed while putting the bottom in the liquid
  • release the bulb slowly to allow the liquid to get sucked into the tube.

These muscles also have to work to squeeze the liquid back out. He learned pretty quickly how to do it to get the most liquid and would talk to himself about how it worked and what he was going to have to do next time. (Andrew: “Oh, not a lot. Try again and get some more next time. Hooray! Look at all the water!”)

I found a package of droppers (I think 12) at my local teacher store and I do find that having more than one is helpful. The bulb syringe was something that was left over from when Andrew was a baby. They also sell these as part of ear cleaning kits. Look no further than your kitchen drawers to find the turkey baster, however, I did buy a separate one for Andrew’s use (really inexpensive one from the grocery store) to keep with my other station materials.

Uses:

  • making different colors when combined with colored water
  • transferring water from one container to another in order to fill it to a certain level
  • squirting water on something (putting out fire blog post)

Past Posts Using These Items:

  • Droppers
  • Bulb Syringe
  • Baster

Adding any of these items to a My Obstacle Course kit is a super easy way to encourage experimentation with water while also helping to build muscles that will help with handwriting. I love things that make this fun!!

Engage, Encourage and Empower!


My Obstacle Course Kit Item #4: Tweezers or Tongs

Kit Item #4: Tweezers or Tongs

Tweezers or tongs (or even kiddie chopsticks like the ones I got from Sur La Table) are great for building muscles required for handwriting. Tweezers are something that almost everyone has at home which makes it even better, almost like getting a free tool! They also pair quite nicely with kit item #3, puff balls.

Click here for a past post on tweezers.

Uses:

This item pretty much has one use, to build hand muscles by squeezing the tweezers to pick something up. Where you can get creative is with the items that you are having them pick up. Some possibilities:

  • puff balls
  • mini marshmallows
  • jelly beans
  • gummy bears (gummy anything really!)
  • cut pieces of string or pipe cleaner
  • sugar cubes (it is really fun to stack sugar cubes but requires a more steady hand so I wouldn’t start out with stacking these)

Sample Activity:

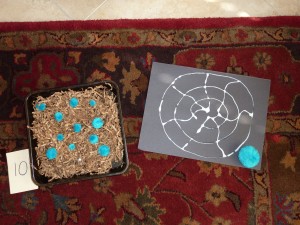
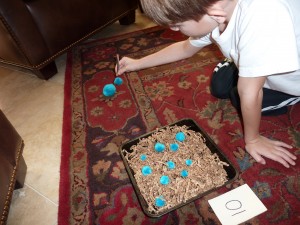
My Obstacle Course Station Activity: Help the baby spiders get back to their mom!

This was a really easy station to put together using tweezers, some brown shredded paper and colored puff balls. That is it! You don’t even need the shredded paper, you could have them scattered about on a cookie sheet or foil tray in salt or sand and pretend they are lost in the snow or desert.

My Obstacle Course Station Activity: Help the baby spiders get back to their web.

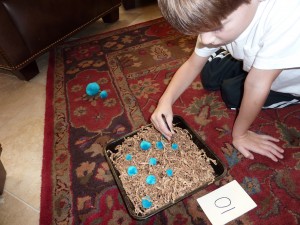
The photo above shows how the station looked when I set it up but the glue I had used to make the web was not yet dry and I didn’t want the babies to get glued onto the paper. I just took it away and as you can see from the photos below, Andrew didn’t care one bit!

Very serious about this job!
Squeezing to pick up one of the "babies."
Can you see how using this tool helps to build those handwriting muscles?

If you want to see other posts showing how I have used tweezers, just click here for the tweezers search results from my website.

Engage, Encourage and Empower!

My Obstacle Course Kit Item #3: Colored Puffs

Kit Item #3: Colored Puffs

Two sets of colored puff balls - regular and holiday

This is one of my most favorite My Obstacle Course purchases and I actually bought this package of multi-sized, multi-colored cotton puff balls at Michael’s for my first Obstacle Course with Andrew. They were great then and I am still finding ways to use them! I’d say I’m getting an excellent return on this investment :).

Using something like this requires a little bit of thought (I mean teeny, tiny because I’m giving you some suggestions) but almost no time spent putting a fun station together other than picking out the colors/sizes you want to use. I love things like this which make it super simple!!

When using them in a station activity, I first decide what skill I want to work on with him and then choose the puffs from there. I also think about the theme we are doing so, for example, around Valentine’s Day, I would pick out the red ones and do an activity with just those. I store them in a plastic bag the closes so I don’t have puffs all over the place.

Uses:

  • sorting by color
  • sorting by size
  • patterning
  • sequencing from smallest to largest (and vice versa)
  • counting (use them as counters or manipulatives)
  • one to one correspondence
  • paired with a straw to build oral motor skills
  • paired with tongs, kid chop sticks or tweezers to build fine motor skills
  • paired with a frisbee for motor planning to make one go around the edge and visual tracking when watching it as it goes around the edge (I’d pick a colored puff that really stands out from the frisbee color.)

Click here for a link to a “puff” search on past posts.

Sample Activity:

My Obstacle Course Station Activity: Puff Blowing

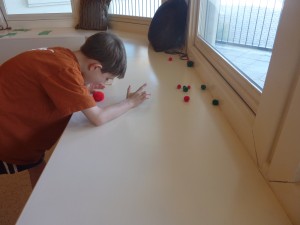
For this station activity, Andrew was working on oral motor skills, specifically getting his lips to create an “o” to blow air out of. We began this station with a straw to blow through and that helped so much. It gave his mouth something to form around. We gradually progressed to doing it without the straw. He was getting so much better at this (he used to blow air out of his nose thinking that he was doing it if it was making the same sound 🙂 ) so I thought I would throw in some larger puffs that would require more power from his breath. I also used a timer to see if he could blow all of the puffs to the window within a certain amount of time. A little motivational challenge for him!

Green and red puffs for puff blowing station during winter themed My Obstacle Course
Andrew blowing the puffs across the bench towards the window.

The puff blowing helps build oral motor skills but also provides a way to sneak in some other skills, like building receptive and expressive language. I would do this by asking him which puff he wanted to blow (ex. large or small, green or red) or tell him which one to blow and see if he understood which puff that was. This gave me a lot of great information about where he was with this stuff and he has a blast blowing them into containers, off of the counter or like above, blowing them towards the window before the timer runs out.

Remember, this is just one example activity that uses these colorful puff balls. Check out past puff posts link above to get more ideas!!

Engage, Encourage and Empower!


My Obstacle Course Kit Item #2: Scrabble or Bananagram Letters

Kit Item #2: Scrabble or Bananagram Letters

This will probably come as no surprise to any of you who read my posts, but item #2 that would definitely go in My Obstacle Course kit would be either Scrabble or Bananagram letters. I love them because they are so versatile. They can be used on their own or paired with a wide variety of things (sensory bin, flash cards, word clues) to help make building basic literacy skills fun.

Their small size also makes them perfect for building fine motor skills. Like dice, they are easily stored in a plastic bag or container and require nothing more than you choosing how to use them as a station activity.

Bananagram letters (which look just like Scrabble letters without the little numbers)

Note – If these letters are too small for your child and you worry about them putting them in their mouth, use something bigger like magnet letters. These can be found in most grocery stores, pharmacies as well as department stores like Target.

Uses:

  • letter identification (ex. Find the letter __.)
  • letter sequencing (ex. Put the letters in abc order.)
  • choosing the letter that goes with a spoken sound (ex. Choose the letter that makes a /b/ sound.)
  • building words
  • word families
  • make the same using flash cards
  • sight word building

Click here for a link to the “Scrabble” search of my past posts to see some of the ways that I have used them with Andrew.

Sample Station Idea:

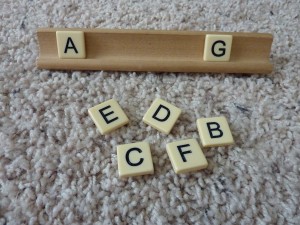
My Obstacle Course Station Activity: Letter Sequencing

Station set up for putting letters in the correct sequence.
Putting letters in order.
Letters A-G in the correct sequence.

Another Activity Idea:

My Obstacle Course Station Activity: Fill in the missing letters

Another variation - putting out every other letter for the child to fill in the missing ones.

If this is a skill that your child struggles with, provide them with a reference sheet. Remember that these activities are for reinforcement or building skills, so if they need something to refer to or check their work, provide that for them. This is as easy as writing this out on a sheet of paper or printing it off.

Engage, Encourage and Empower!


My Obstacle Course Kit Item #1: Dice

I frequently get asked about what I would put into a My Obstacle Course kit to have some basic things to help build basic skills and I definitely have some favorite things and activities that require little if any set up at all. The next few posts will feature some of these. I have lots of basic items or activities that can be turned into thematic activities but they don’t have to be thematic to be fun (if I show them using themed paper, that paper could be substituted for colored index cards). These items/materials are also easy to transport, which makes them perfect to take along on trips for those down times when the kids are hot/cold, electricity is out, it rains or they are just bored and following you around the house saying that they don’t have anything to do.

While I love having thematic My Obstacle Courses, there are times when I want to set one up quickly and having these things on hand is super helpful. Having a kit prepared allows you to quickly set them out as stations, mix in some gross motor stuff or easy games like Simon Says or Red Light, Green Light and you are engaging with your children, helping them build skills while also having a bit of fun.

I will share links to previous posts where I have used these items or activities to give more ideas but remind you to think about what skills your child is ready for or needs reinforcement on and go from there. The things I will share this week can be modified to make them more basic or more challenging and I will note some basic ways to do this.

Kit Item #1: Dice

Use for:

  • number recognition
  • one to one correspondence
  • addition
  • subtraction
  • multiplication
  • greater than/less than
  • number sequencing – (roll dice, what comes before or after the number)

Sample Station Idea

My Obstacle Course Station Activity: Addition using dice and pennies

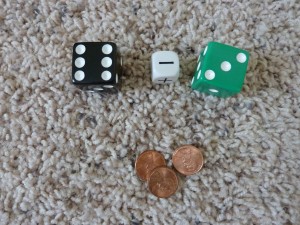
I love to use dice to practice basic math facts. This activity requires only some dice, some pennies to use as counters (if needed) and can be made to work on addition and subtraction by using a die that has the addition and subtraction symbols on it.

Dice
Dice with pennies.
Addition equation 6+5.
Add them together to get 11.
Subtraction
Subtracting 3 pennies from 6.
3 pennies left.

Something like this is easily stored in a small bag or container, taking up very little space. I show 12 pennies here for addition, since both of my dice only go up to 6. If you have dice with larger numbers, make sure to provide enough pennies by adding together the largest numbers. The same goes for multiplication. If I were doing that with him, I would provide 36 pennies with these dice.

Two colored dice, a die with addition/subtraction symbols and 12 pennies.

Click here for a previous post on dice.

Engage, Encourage and Empower!
« Previous Page
Next Page »

Primary Sidebar

Obstacle Course Mom’s Blog

  • When People Stare, Mind Your Own Business
  • ABC’s of Peaceful Parenting Tele-class
  • What’s Perfect About This?
  • Exciting News!
  • Halloween

Categories

  • Blog
  • Cool Tool
  • Fine Motor
  • Getting Started
  • Gross Motor
  • Literacy
  • Math
  • My Obstacle Course Station Ideas
  • Oral Motor
  • Problem Solving
  • Sensory
  • Social Skills
  • Uncategorized

Archives

  • July 2012 (1)
  • May 2012 (1)
  • January 2012 (1)
  • November 2011 (2)
  • October 2011 (12)
  • September 2011 (14)
  • August 2011 (15)
  • July 2011 (19)
  • June 2011 (18)
  • May 2011 (21)
  • April 2011 (20)
  • March 2011 (22)
  • February 2011 (19)
  • January 2011 (21)
  • December 2010 (22)
  • November 2010 (6)

Meta

  • Log in
  • Entries feed
  • Comments feed
  • WordPress.org