• Skip to primary navigation
  • Skip to main content
  • Skip to primary sidebar

My Obstacle Course: Engage, Encourage and Empower

A fun, structured, systematic way to work on your child's strengths and weaknesses at home!

  • Welcome to My Obstacle Course!
  • What is My Obstacle Course?
  • Developmental Timelines
    • What Is My Child Ready For?
  • About Us
  • Blog
  • Contact Information

Literacy

Word and Object Matching – Real Life Flashcards

I have been sharing what I learned by doing My Obstacle Courses with other parents and since Andrew is now 7 years old, I frequently get questions about working with children who are much younger.  I began doing this at home with him routinely when he was 4 years old but used some of the activities with him as early as 2 years old (I just hadn’t put it together that that’s how he wanted to play with me – ah, hindsight!).  My advice to these parents is to use toys that they have (perhaps in a different way from their intended purpose), use real objects as much as possible and most importantly make it fun.  Here is one station activity I have used to build literacy and vocabulary skills.

What’s In The Bag?

I shared in a post last week (A Bit of Mystery and Intrigue) how I love to use tote bags to hold items and this is an activity modeling how to find out what your child knows using the tote to add some mystery.

I gathered some items found around the house and placed them inside of the tote bag.  I wrote out the word name for these items (any paper, index card or post-it note works) and set them out.  That’s it as far as set up goes and here is a how it looks! (Note:  If this seems like it would be too easy for your child keep reading for ways to make it more challenging for your child.)
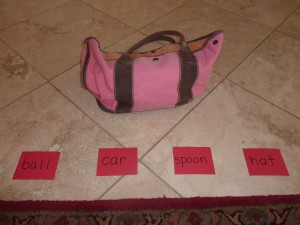
My Obstacle Course station activity: Word/Object Matching
A peek inside the bag.
A hat matched up with the word "hat."
I guess the ball is next!
Ball matched with "ball."

This station idea is like creating a real life flash card for your child with the written word name and actual object.

All of the objects matched up with their words.

How To Play:

  1. Choose a card.
  2. Say the word name.
  3. Ask them to find it in the tote bag.
  4. Match up the object with the word.

By being able to get the object, this removes the need for them to speak in order to show they know what it is.  We still work on speech skills but that is not the primary purpose for this activity.  They are also getting the benefit of receiving information through all modes of learning – visual, auditory, and kinesthetic.  If there is something that your child does not know or understand, take note of it so you can be sure to incorporate this more often.

This My Obstacle Course station activity empowered him because he could demonstrate his knowledge without speaking intelligibly and it empowered me by learning specific information about the sorts of things he knew and didn’t know.

Making It More Challenging

This activity could be made more challenging by:

  • using word clues instead of the actual word (ex.  Find something that bounces.)
  • using different objects from a category and matching according to their specific uses or descriptions (ex.  category – things to eat/drink with:  fork, spoon, child friendly knife, straw or things to write/draw with:  pencil, crayon, marker, dry erase marker, chalk, paint)
  • matching up an item with a word it rhymes with (ex.  Find an object that rhymes with cat.)
  • matching up the object with it’s function (ex.  Find something that can drive you to school.)
  • finding items that go together (ex. Find an object that goes with a bowl.)

I encourage you to think about what literacy skills your child is working on and see if there is a way to add some fun by incorporating real objects.

Personal Note:

There are many frustrations that parents of late talkers or non-verbal children experience but I think one of the things that was most difficult for us was that we did not know exactly what he knew or didn’t know.  He would point to things for us when it involved books or catalogs that he enjoyed or if it meant he would get tickles as a reward but outside of those times, we could only guess.  After his neuropsychological evaluation (which I got to sit in on and watch while he ignored the evaluator – talk about a fun morning!) showed nothing we didn’t already know, I knew it would be up to me to find out.  It was a long process, with a lot of trial and error but in the end, I realized that with a little bit of planning and creativity, I could provide ways to find out.

Engage, Encourage and Empower
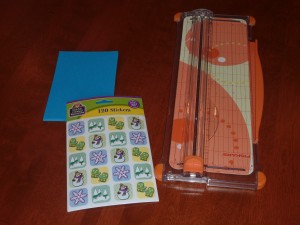
Winter Themed Memory Match

I am in the process of gathering and creating materials for Andrew’s Obstacle Courses this month and am going to share one of his favorite station activities, memory match.  This was one of my first posts but feel it’s worth revisiting because I have had many new visitors since then.  (Click here to view the original detailed Memory Match post.)

Creating Your Own Thematic Memory Match Game

This game is really easy to make and as I was shopping for the holidays, I noticed all sorts of character themed memory match games for sale out there.  I love creating my own because it allows me to incorporate vocabulary for whatever themes or concepts I can find stickers for.  Right now, he is learning about the winter season in school so I will use winter themed stickers and talk about them when they get flipped over.

These are some examples of what I might ask or comment on for the card with the snowman on it:

  • What would it feel like outside if you were building a snowman?
  • What kinds of things would you bring out to put on your snowman?
  • Do you notice how the bottom snowball is larger than the top snowball?
  • What would happen if the bottom snowball was the smallest?
  • Is a snowman a real man?
  • Was the movie Frosty the Snowman fact or fiction?

(Keep in mind I wouldn’t ask all of these at one sitting, but would choose questions that were appropriate for him during that time.)

In addition to language building, this game allowed us to work on play and social skills.  Since it is a game with few rules, it was perfect for teaching him about turn taking, something he definitely needs to work on.  I discovered that we needed to do more things like this because he did not like it all when someone else found the card he was looking for!  Once again, an activity that combines what he likes to do with building skills he needs.

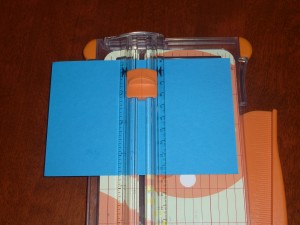
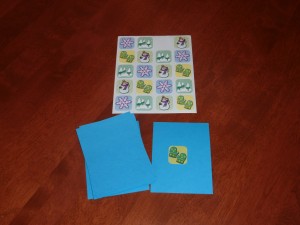
Materials needed: Â Index cards, seasonal stickers and my paper-cutter or scissors
Cut the index card in half
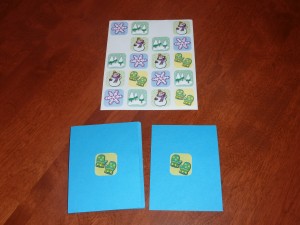
Place one sticker in the middle of one of the cards.
Place the matching sticker on another card.
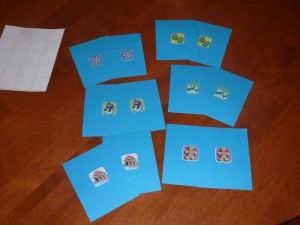
Sets of winter matching cards
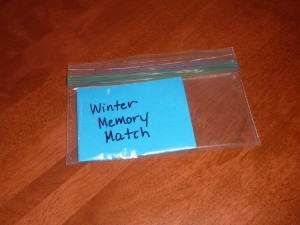
Labeled and stored in a small bag to keep them organized.

I have made a new thematic memory match game each month for two years and am now working to create some different kinds that move beyond seasonal themes.  I will share soon!

Engage, Encourage and Empower!

Calendar Cutouts- Flip and Draw

This is a My Obstacle Course station idea that is easy to put together and makes sneaking in some fine motor/drawing skills more like a game than a “sit at the counter and practice something that’s really difficult for you” session.  That hasn’t worked for us and this is much more fun!

A My Obstacle Course Flip And Draw Station

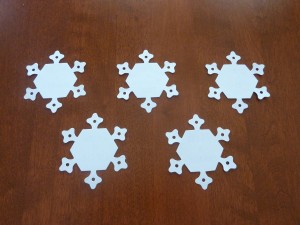
I used some calendar cutouts that I had and wrote a basic drawing skill that I wanted Andrew to work on.  This particular station was done during a winter themed Obstacle Course which explains the snowflakes.  This could also be done using index cards, strips of construction paper, ideally something that you cannot see through.

My Obstacle Course station idea: Â Flip and Draw

Some basic ideas include but are not limited to:

  • Draw a straight line.
  • Draw a wiggly line.
  • Draw a circle.
  • Draw a square.
  • Draw a triangle.
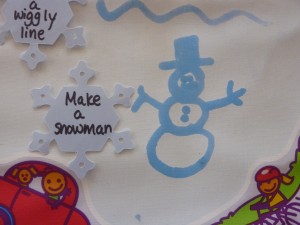
  • Make a snowman.
  • Draw a happy face.

I flip the cutouts over…

Flip and Draw Cards turned over

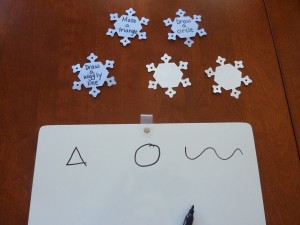
and when he gets to the station, he will turn over the cutout, we will read the instruction and he will try to do it.

Modifications:

Some children may need to have a model provided for them.  If so, draw the shape (or whatever the cutout says) first so they have one.  While you are drawing (the visual model) add an auditory piece by talking through what you are doing, where you are starting, how you are making sure to keep your lines straight (if you are making a shape), etc.  It may seem silly at first but it could help your child if they are an auditory learner!  From there, they can then draw their own shape next to the model, trace over yours or use hand over hand to help them draw it.  Another option is to try “dotting” out the shape and have them connect the dots.

Why Turn The Cards Over?

By having the cards flipped over, he was not immediately overwhelmed by all that he was going to have to do (Imagine walking into a meeting late and seeing a whole list of things you were assigned to do asap.  I don’t know about you, but I’d be overwhelmed!).  He could process each request as he flipped it over which reduced the stress and frustration that usually occurs before he even begins a drawing or writing task.  This turns it into a bit of a game, gives them some sense of control since they get to choose the one they flip and is done at their pace making it easier to handle.

(Random Note – I’ve thought about doing this for myself when I get overwhelmed with “things to do” or household chores!  One thing at a time would allow my brain to focus on whatever the card says instead of trying to remember all that I’m going to have to do.  So, if you ever come to my house and see flipped over calendar cutouts, you’ll know I’m on a mission!!)

Flip and Draw card turned over
Flip and Draw using Doodle Pro
Flip and Draw using Aqua Doodle
Flip and Draw using white board and dry erase marker

This is something that could be used with any writing tool (marker, pencil, crayon, pen, etc) and writing surface (blank sheet of paper, dry erase board, Magna Doodle, Aqua Doodle, etc).

This activity not only helps build drawing skills, it also builds basic literacy skills because they are seeing (visual) and hearing (auditory) the words while they are making the shapes (kinesthetic).  It allows me to see what he knows how to do and where he needed more assistance.  The best part of all, is that we are having fun together while building his skills.

Engage, Encourage and Empower!

Gingerbread Man Activity- No Baking Required!

This past week, with the holiday season upon us, I have noticed things related to gingerbread men and gingerbread houses all around me.  It reminded me of an activity I did with Andrew in one of My Obstacle Courses.

One of my favorite websites to get thematic ideas and printable materials is www.enchantedlearning.com.  I don’t usually use the print outs as they are unless I am working on a specific skill but I do like the literacy and math skills that they help build.  To make it more kid-friendly and interactive, I like to use thematic shapes and/or colored index cards, cutting and pasting the words and/or pictures on to create a matching activity.

Gingerbread Man Story- Matching Words with Clues

Words cut and pasted onto index cards cut in half.
Word clues cut and pasted onto precut gingerbread men.
My Obstacle Course station idea: Clothesline Clipping words with their clues

I used this as a clothesline clipping activity to incorporate fine motor skills with a literacy skill but it could also be used along with “Crawl and Match” or “Climb and Match” to combine literacy and gross motor skills.

Snowy Sensory Bin

I have posted before on how much I love using sensory bins as activity stations in My Obstacle Courses (probably as much as Andrew loves having them!) and showed how to make a Sensory Bean Bin.  This Snowy Sensory Bin is perfect for a winter themed Obstacle Course and you can see it in action by watching the YouTube video clip at the bottom of this post.

My Obstacle Course station idea: Snowy Sensory Bin

Mini-Ornaments- Not Just For Trees Anymore!

When I made my first snowy sensory bin, I found a bunch of mini-ornaments for miniature trees and knew they would be perfect for this hide and seek type activity.  (Since the ornaments come in packages with more than one, which is all you will need for this particular activity, you could get together with some friends or other caregivers and put together snowy sensory bin kits, splitting the cost!)

Packages of mini-ornaments

How to make your own Snowy Sensory Bin:

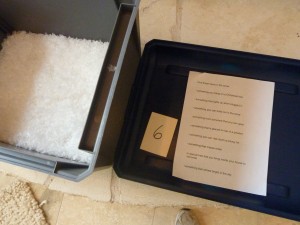
Once again, I used a storage bin that had a lid for easy storage.  The lid also serves to hold the items once found, reducing the amount of “snow” that ends up on the table or floor.  (Place a towel, sheet or a garbage bag underneath for even easier clean up!)

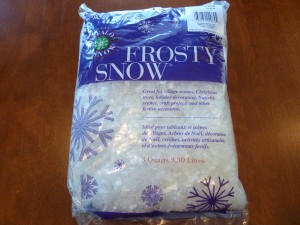
I found some fluffy fake snow at the store (Be careful not to buy the sheets of fake snow-like the kind used for winter village scenes. You want the fluffy snow that your child can dig through) and poured it into the bin.

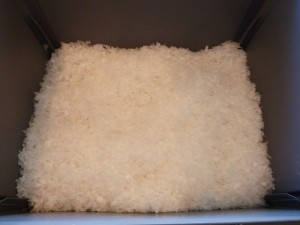
This "snow" works well because you can dig in it.
The fluffy "snow" up close.

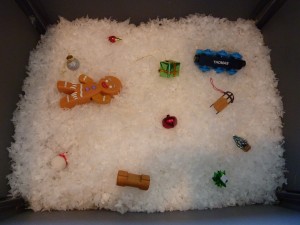
I gathered up my mini-ornaments and some toys that I associate with winter.

Here are the mini-ornaments and some toys I chose to hide in the snow.

Here is a great opportunity to add in some literacy:  print or write out the names of the items on a sheet of paper, leaving space so when found, the item can go next to its name.  Example:

  • Bell
  • Snowman
  • Colored Light
  • Gift (or present)
  • Train
  • Gingerbread Man
  • Bow
  • Sled
  • Ornament
  • Log (for a log cabin)

Using a list along with the objects helps you to know if your child understands what the word means or what the item is.  They don’t need to be able to speak to show you they know!

An extension of this is to print or write out clues for the item so your child has to think about which item goes with the clue.

Clues

Once that is done, hide the items in the snow and it is ready for your child.

Place the items in the "snow" and then bury them so they are not visible.
Items hidden and the bin is ready!

Here it is in action:

For those with sensory issues: Provide a glove or sock for your child to put over their hands so they can still dig in without having to touch the material or provide wooden spoons or sand shovels (something with a long handle) so they can use a tool to dig instead of their hands.  This is still giving them the opportunity to build motor skills by holding the handles, pushing the tool down into the snow and moving it around to find the items.

Pretend play- this is a great opportunity to engage in some pretend play skill building by talking about how cold the snow is and maybe how it snowed a lot and buried some things the people in the town need.  “Can we help the people find their things?  You bet!!”

Winter Themed Uppercase and Lowercase Letter Matching Game

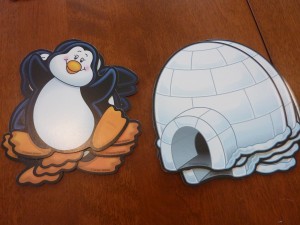
I was at the teacher supply store looking for some ideas for a winter themed Obstacle Course and found a package of these cute penguin and igloo cutouts.  I think their original purpose was for a bulletin board but I decided to use them to create an Uppercase and Lowercase Letter Matching Game.  It is so easy to prepare a station activity like this when the difficult work of cutting and theme-making is done for me!

Penguin and Igloo Bulletin Board Cutouts to be turned into an Uppercase and Lowercase Letter Matching Game!

(Note:  This idea can be adapted to use different kinds of paper, cutouts or items such as magnet letters, letter blocks, or wood letters- and I will do future posts on some of these.  I’m just showing a sample activity that I thought was cute and works well for building this skill in a Winter Themed My Obstacle Course.)

How to make the Uppercase and Lowercase Letter Matching Game:

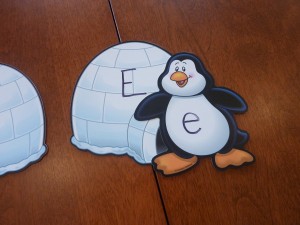
1.  Choose which cutout is going to have the uppercase letter and which one will have the lowercase.  In my game, I chose the igloo to have the uppercase letter and the penguin to have the lowercase letter.

2.  Write the letters on each.

Igloo with uppercase letter, penguin with lowercase letter

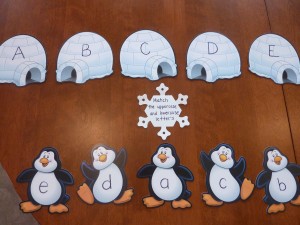
3.  Choose the letters that you want your child to match and separate them.  Arrange them so they are not in the same order on the top and the bottom.

Letters chosen, cutouts separated and placed in order ready to be matched. I used a snowflake calendar cutout to write the directions - "Match the uppercase and lowercase letters."

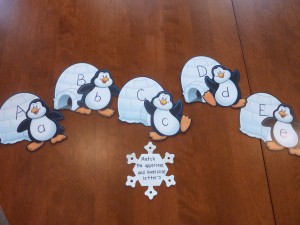
4.  Your child matches up the letters!  Take note of any letters that give your child difficulty so you know to focus on those in the future.

Letters matched!

See how easy it is!!  Activity stations like this don’t have to be elaborate, super fancy things.  Something like this is quick and easy to make and also provides you with a lot of really useful information about your child’s letter awareness.  You could even add in saying the sounds the letters make for even more literacy exposure!

(While I found these at my teacher store, Teacher Heaven, you could also click here to go right to the Carson-Dellosa webpage for the bulletin board cutouts if you are interested.  (Note:  I have no ties with this company, just sharing information.)  They come in a package of 16 penguins and 16 igloos, so you could either purchase two packages or choose which letters your child needs to work on and only use those letters.)

« Previous Page
Next Page »

Primary Sidebar

Obstacle Course Mom’s Blog

  • When People Stare, Mind Your Own Business
  • ABC’s of Peaceful Parenting Tele-class
  • What’s Perfect About This?
  • Exciting News!
  • Halloween

Categories

  • Blog
  • Cool Tool
  • Fine Motor
  • Getting Started
  • Gross Motor
  • Literacy
  • Math
  • My Obstacle Course Station Ideas
  • Oral Motor
  • Problem Solving
  • Sensory
  • Social Skills
  • Uncategorized

Archives

  • July 2012 (1)
  • May 2012 (1)
  • January 2012 (1)
  • November 2011 (2)
  • October 2011 (12)
  • September 2011 (14)
  • August 2011 (15)
  • July 2011 (19)
  • June 2011 (18)
  • May 2011 (21)
  • April 2011 (20)
  • March 2011 (22)
  • February 2011 (19)
  • January 2011 (21)
  • December 2010 (22)
  • November 2010 (6)

Meta

  • Log in
  • Entries feed
  • Comments feed
  • WordPress.org