• Skip to primary navigation
  • Skip to main content
  • Skip to primary sidebar

My Obstacle Course: Engage, Encourage and Empower

A fun, structured, systematic way to work on your child's strengths and weaknesses at home!

  • Welcome to My Obstacle Course!
  • What is My Obstacle Course?
  • Developmental Timelines
    • What Is My Child Ready For?
  • About Us
  • Blog
  • Contact Information

Archives for July 2011

Favorite My Obstacle Course Station Activities

There are some station activities that I love to use because they have a basic structure that allows me to not have to think about what to do with regards to setting it up so I can place my attention towards what concepts I want to help Andrew build. They also have worked really well to keep him engaged for almost the same reason, so this actually helps us both out! In my experiences with the children I have taught and with Andrew, they tend to like structure and predictability, which these activities provide, while also maintaining interest by using the activities in different ways so they don’t get boring.

I’ve done past posts on them but thought I would include them again since they help me when planning and setting up My Obstacle Courses, in the same way that having a kit of supplies helps. These are three of my favorite go-to station activities and can be used to build literacy skills, math skills, motor skills, motor planning, problem solving, and social skills (specifically working on turn taking while playing Memory Match). Just click on the link to see either the original post on the activity or the website search results showing a variety of posts on that particular activity.

Memory Match

  • Memory Match
My Obstacle Course Station Activity: Memory Match

Make the Same

  • Make the Same Part 1
  • Make the Same Part 2
My Obstacle Course Station Activity: Make the Same

Crawl and Match

  • Crawl and Match
My Obstacle Course Station Activity: Crawl and Match Addition Equations with Sums

These are station activities that build many different levels of skills and concepts while also being really easy to change up through the use of different themes. I especially like how combining two completely different skill sets, such as pairing motor and academic skills, creates a much more engaging learning experience. It doesn’t have to be complicated. Use these basic activity structures, modify the content to help your child with what they are ready to work on and you are set!!

Engage, Encourage and Empower!

Sample My Obstacle Course Using Kit Items

I hope you have found these past posts on what I would include in a basic My Obstacle Course kit helpful. These are just some of my favorites and are examples of items that could easily be assembled to provide activities to help build your child’s skills. I encourage you to go on a little treasure hunt through your own house and see if there’s anything else you can find. (Click here for a past post on Treasure Hunting At Home.)

Academic and Developmental Skill Areas

Just like when I set up My Obstacle Courses for Andrew, I include things to build a variety of academic and developmental skills. The areas I focus on are:

  • Literacy
  • Math
  • Fine Motor
  • Gross Motor
  • Oral Motor
  • Sensory
  • Problem Solving
  • Social Skills

Sample My Obstacle Course

With the kit items I have given you, below is a sample My Obstacle Course. Please remember that the MOST important thing to remember is to provide activities that YOUR child is ready for at the level they are ready for, regardless of their age. These activities can be modified up or down in difficulty so keep that in mind.
  1. Pass the question beach ball back and forth 5 times, asking and answering questions based on the question word in front of you when caught. (Social Skills and Gross Motor)
  2. Crawl through the fabric tunnel. (Gross Motor and Sensory)
  3. Unscramble the scrabble letters to make words that go along with clues. (Literacy and Problem Solving)
  4. Write the words you’ve made with the scrabble letters on the lined write on/wipe off board. (Literacy and Fine Motor)
  5. Crawl through the collapsible tunnel or under three chairs lined up (3 is just an example number!). (Gross Motor)
  6. Roll one die and use the tweezers to move that many puffs. Repeat with the other die and then count how many puffs in all. (Click here for a post on Easy Math Organizers with a description of this activity minus the tweezers and click here for a post on Tweezers with puffs.) (Math and Fine Motor)
  7. See how many different shades of blue you can make using the droppers and colored water. (Different Shades of Blue) (Fine Motor and Problem Solving)
  8. Clothesline clipping- matching up addition equations with their sums. Look at the equation clipped on the clothesline and find the sum. Clip them together and move onto the next equation. (This could be done easily using equations and sums written on index cards or pre-made flash cards with sums written on cards.) (Math and Fine Motor)
  9. Puff Blowing- Blowing puffs (with mouth or straw) off of a counter into a cup or bowl. (Puff Blowing) (Oral Motor)
This is just an example to show how easy it is to set up a basic My Obstacle Course using these kit items.
My next post will be on my favorite go-to station activities that are easy to make and adapt to different skills and levels.
Engage, Encourage and Empower!

My Obstacle Course Kit Item #10: Tunnels

Kit Item #10: Tunnels

Tunnels are one of my favorite items to include in My Obstacle Courses because they encourage cross patterning, creeping and crawling while creating a fun, movement filled transition from activity to activity.

Fabric tunnel
Collapsible tunnel

Tunnels can be created a number of different ways. I have used dining room chairs (ones that don’t have the foot/cross bar underneath work best) in the past which helped encourage creeping and crawling. After seeing a fabric tunnel at his OT, I made my own. Click here for the post on this easy to make fabric tunnel. But one of my favorite items are collapsible tunnels. The set we got came with 5 so I can place them around My Obstacle Course in between stations. They are super easy to set up and create an instantaneous look of fun with their bright colors.

While the chairs or collapsible tunnels may not fit into a bin, I encourage you to look around at the chairs you have to see if they’d work or consider getting some collapsible tunnels fold down flat for easy storage.

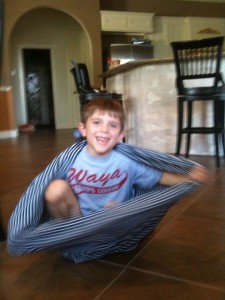
Andrew happily emerging out of the tunnel.

Tunnels provide an easy way to add some adventure to My Obstacle Course while promoting cross patterning and gross motor movement at the same time!

Engage, Encourage and Empower!

My Obstacle Course Kit Item #9: Clothesline and Clothespins

Kit Item #9: Clothesline and Clothespins

This is one of my favorite tools and the fact that I can use it to build multiple skills and concepts by combining an academic or concept driven skill with the fine motor skills and planning involved with using clothespins just makes it even more awesome! It adapts beautifully to whatever I need Andrew to be working on, which helps to keep it interesting. This is huge in keeping him engaged and motivated and I love the smirk on his face when he sees it and wonders what he’s going to be doing. 🙂

The clothesline and clothespins are easily contained in a plastic bag and the cards or cutouts can also be kept in a separate baggie which makes this tool perfect for a kit. Check out my  original post on Clothesline Clipping to get more details although it really could not be more simple – clothesline, clothespins, something to attach the clothesline to (doorknobs and chairs work well), and concepts on cards to clip together.

Sample Activities:

My Obstacle Course Station Activity: Clip the words that rhyme together.
My Obstacle Course Station Activity: Clip the opposite words together.
Opposite words to choose from lay waiting on the seat of the chair.
Matching words with word clues taken from Gingerbread themed Enchanted Learning activity. The clues are glued onto gingerbread shaped cutouts and the words are glued onto halved index cards.
My Obstacle Course Station Activity: Clip the numbers in order from 10-20. I just wrote numbers 10-20 on large snowflake shaped cutouts to go with the winter theme we were doing.
My Obstacle Course Station Activity: Clip the numbers to the bag that has the same number of candy hearts. (One to one correspondence)

While there are different kinds of clothespins out there, I prefer to use the wooden clothespins with the spring. I’ve tried some of the newer plastic clips (the white ones in the pictures) and they are really challenging to open. My advice is to try the clothespins or clips to see how hard it is to open before having a child use it who already has some fine motor weaknesses.

Click here for the search results for clothesline from my website.

Engage, Encourage and Empower!

My Obstacle Course Kit Item #8: Beach Ball or Balloon

My Obstacle Course Kit Item #8: Beach Ball or Balloon

I chose a beach ball or balloon to build gross motor skills involving ball play because they can deflate and fit perfectly into a kit. They are also colorful, light and float in the air a bit longer than a regular playground type ball, making them better for visual tracking and giving more time for motor planning. The fact that they don’t hurt when a catch is missed is a huge bonus!!

Beach ball turned into a Question ball.
Tossing and catching a pink balloon.

This is a classic example of not needing something fancy or expensive to engage with your child while also helping to build a wide range of gross motor skills.

Uses:

  • catching
  • passing
  • kicking
  • rolling
  • bouncing
Combine either one with a dice or a spinner to determine how many of each to help children who are reluctant to do these things because they are challenging. I have even used blank dice programmed with the task so when he would roll one die, it would tell him what we were going to do (ex. catch, pass, kick, roll or bounce) and another die or set of dice to tell him how many times. This could also be done by creating task and number cards, having them face down and the child gets to flip over a card from each pile to see what to do and how many of each. Something simple like this takes minutes to prepare but adds fun while removing the “mom says” aspect. Andrew also does much better when he knows how many he is going to have to do and is very reluctant to participate when it comes to completing an unknown amount. Considering that I am the same way when it comes to working out, I don’t blame him one bit!!
Click here for my original post on Beach Ball Questions.
Engage, Encourage and Empower!

My Obstacle Course Kit Item #7: A Writing Surface

Kit Item #7: A Writing Surface

There are many different writing surfaces out there that would be perfect to put into a kit. I love using things that can be used again and again
to help Andrew build his handwriting skills. I have the following items in my own My Obstacle Course materials:

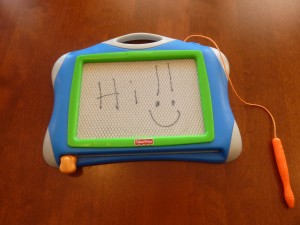
  • Magna-Doodles (I have even found small seasonal ones!)
  • Aqua-Doodles
  • white boards (write on/wipe off or dry erase) that come lined like beginning writing paper and plain white (make sure to use the correct markers and NOT permanent markers – speaking from experience here! 🙂 )
  • chalk boards
Magna Doodle
Aqua Doodle
Lined Write On/Wipe Off Board
Plain Write On/Wipe Off Board

These items make it super easy to set up, easy to clean up and are about the size of a sheet of paper so they store easily. I have also found that they are much less intimidating and more fun for Andrew than paper. He is much more willing to draw or write if he knows it was not going to be permanent. Using these tools helped a good deal because if it didn’t look the way he wanted, he could erase it easily and start again.

Andrew writing some space words on the lined write on/wipe off board.

Past Posts You May Find Helpful:

Click here for a past post on the different writing surfaces I have used as part of our stations – No Paper or Pencils Required Here!

Click here for a past post on Handwriting Helpers if you want to learn about some tools that are out there to help with finger placement on writing instruments.

Activity Suggestions:

  • Flip and Draw
  • Make the Same – writing words using models, like the space words above, flash cards or speech words
  • Practicing letters or numbers
  • Painting shapes, letters or numbers with water on a chalkboard

Handwriting is one of those skills that is a common challenge for children with motor and/or planning issues (and they know it!) so I am always looking for ways to sneak it in while making it fun. These items make it easy for me to create stations to do just that and hope that they might help you as well!

Engage, Encourage and Empower!


Next Page »

Primary Sidebar

Obstacle Course Mom’s Blog

  • When People Stare, Mind Your Own Business
  • ABC’s of Peaceful Parenting Tele-class
  • What’s Perfect About This?
  • Exciting News!
  • Halloween

Categories

  • Blog
  • Cool Tool
  • Fine Motor
  • Getting Started
  • Gross Motor
  • Literacy
  • Math
  • My Obstacle Course Station Ideas
  • Oral Motor
  • Problem Solving
  • Sensory
  • Social Skills
  • Uncategorized

Archives

  • July 2012 (1)
  • May 2012 (1)
  • January 2012 (1)
  • November 2011 (2)
  • October 2011 (12)
  • September 2011 (14)
  • August 2011 (15)
  • July 2011 (19)
  • June 2011 (18)
  • May 2011 (21)
  • April 2011 (20)
  • March 2011 (22)
  • February 2011 (19)
  • January 2011 (21)
  • December 2010 (22)
  • November 2010 (6)

Meta

  • Log in
  • Entries feed
  • Comments feed
  • WordPress.org