• Skip to primary navigation
  • Skip to main content
  • Skip to primary sidebar

My Obstacle Course: Engage, Encourage and Empower

A fun, structured, systematic way to work on your child's strengths and weaknesses at home!

  • Welcome to My Obstacle Course!
  • What is My Obstacle Course?
  • Developmental Timelines
    • What Is My Child Ready For?
  • About Us
  • Blog
  • Contact Information

Sensory

Building Letter Recognition – Sensory Bin Letter Hunt

I recently received a letter asking about activities to work on beginning letter identification and uppercase/lowercase matching. As with any concept I work on with Andrew, I begin by providing him with very basic activities and build according to what he needs. This is one of my favorite ways to approach this and lots of other skills.

Note: Remember that these station activities are not meant to be long, drawn out projects that take all afternoon for your child to complete. They have short attention spans which is why doing stations that are quick and to the point work so well.

My Obstacle Course Station Activity: Sensory Bin Letter Hunt

My Obstacle Course Station Activity: Sensory Bin Letter Hunt

For this station activity I would choose some letters, either strategically if I knew he was struggling with them or randomly.

The letters I chose for this particular hunt.

I have used magnet letters, Scrabble or Bananagram letters, wooden letters from a Melissa and Doug game or letter tiles I found at Michael’s.

Magnet letters, wooden Melissa and Doug letters, colored letter tiles from Michael's and Bananagram (or Scrabble) letters

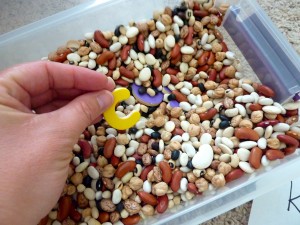
I combined these with a sensory bean bin that I have made. (Now that summer is approaching, it might be fun to go with the summer theme and make a sensory bin with sand! Just remember to put a towel or sheet underneath it for easy clean-up.)
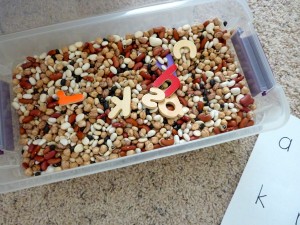
Place the letters in the sensory bin and bury them.

I include a sheet with the letters on it so they can be matched up and so that he knows how many more he needs to find. This does not have to be fancy, just a sheet of paper with the letters neatly written on it or even printed from the computer using a large font size.

Now that the set up is complete (super simple huh!!), it’s time to start digging!

Dig around until a letter appears.
Take the letter out...
and place it on the sheet.
Continue until they have all been found!
What it would look like matching uppercase and lowercase letters.

If your child knows their letters, an extension of this would be to place letters into the bin that form a word. Write the word on a piece of paper or a piece of a sentence strip and the child can put the letters in the correct order to form the word.

It really doesn’t take much to make a fun activity to help your child build letter recognition skills.

Engage, Encourage and Empower!


Jelly Beans Tweezing

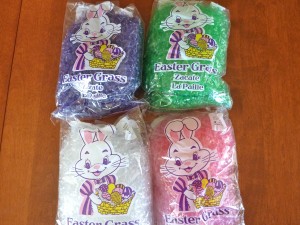
I was at our grocery store and found these different colors of Easter grass.

Easter Grass in fun colors!

I purchased them not for our Easter baskets but rather to use in My Obstacle Course along with tweezers or tongs for fine motor skill building. While Andrew’s handwriting is really improving, we still need to build his pencil grasping muscles and tweezers are a great tool to use for this. Since Easter is just around the corner and I like to use things that are thematic and seasonal, I bought some jelly beans to put in the grass for him to get out.

I always try things out before putting them into the Obstacle Course so I know what he is going to be experiencing. This activity requires more pinching pressure to grab the jelly bean, which is going to help him build those finger and hand muscles. If this is too difficult for your child, use something that is larger, like ice-cube tongs or switch the jelly beans with colored marshmallows.

My Obstacle Course Station Activity: Jelly Bean Tweezing

Set Up:

I used an old baking tray…

Easter grass and an old baking tin

and placed some grass in, spreading it out so it wasn’t just one big clump.

Easter grass in the tin.

I put some jelly beans in…

Jelly beans scattered in the grass.

set out the tweezers and it is set!

Tweezers grabbing the jelly bean

At The Station:

Your child will use the tweezers to grab the jelly beans out of the grass. You could work on color recognition by having your child hunt for a certain color or choose a certain number you’d like them to find, especially if this is challenging for them.

Going into the grass to get a jelly bean.
Got it!

You could provide a container for them to place the jelly beans in after they find them. I may even use a different color grass in another bowl to make a nest for the pretend play add-on I describe below.

Pretend Play:

Activities like this one also lend themselves to a bit of pretend play. We have pretended that these were bird eggs that fell out of the nest onto the ground and we have to get them back to the nest before the mother bird returns. Get creative and have some fun!

Combining thematic or seasonal items with household items to create a fun station activity.

Engage, Encourage and Empower!


Stir Up Some Fun With Spring Colored Whisks!

I found these colored whisks at Target and besides being perfect for using in a spring themed My Obstacle Course, I realized they would be perfect for building a skill I was working on with Andrew.

Spring colored whisks

If At First It Doesn’t Work, Try Something Different

I had introduced a stirring activity with him (stirring frosting with a spoon) and realized that it was too challenging for him because he didn’t have the hand muscle strength to dig in and move it around. I thought that these whisks would be perfect for him to build his hand muscles while grasping the handles and moving it through something that would provide just a little resistance…water!

This is such a simple activity, and probably one that many of you have done with your children, however as Andrew grew up we never really had those pretending to “make soup” on the kitchen floor with pots and wooden spoons or “splash in the kitchen sink” water experiences. While he loves swimming, bathing and showering, he doesn’t like the possibility of getting wet and having wet clothes on.

(Recent story about to illustrate this…Last week when we went to Morgan’s Wonderland and there was a really cool water experimentation-station. There were lots of spinning parts, which he LOVES, but I could tell he was anxious about getting wet. He even came up to me and said, “Next time I wear my swim suit and swim shirt so I can’t get wet.” In his mind, the rule must be – “It’s okay to be wet in a swim suit.” I showed him the complete change of clothes that I had in my bag and assured him that he could change his clothes when he wanted. This helped tremendously and he was then willing to step in closer and really experiment with some cool things! I will post pictures of him at this station to my Facebook page.)

I have learned to reintroduce things that didn’t work before by making small tweaks, which also gives me a lot of insight as to what is standing in his way or what he is ready to handle at that time.

My Obstacle Course Station Activity: Stirring Water With A Whisk

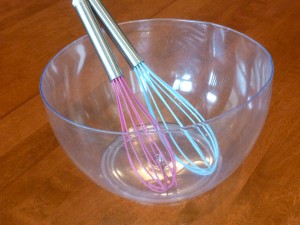
I used a large plastic bowl…

Large plastic bowl

added the whisks…

Whisks and bowl waiting for water

some water and a few drops of food coloring when we got to the station! I also placed a rimmed cookie sheet under the bowl to catch any spills. The food coloring is not essential but I do find that it helps give this activity purpose, especially for someone who needs to see the purpose in doing something before fully engaging.

At first he hesitated, worrying that he wouldn’t be able to do it like he wanted but I could see he was curious about what would happen with the food coloring if he gave it a stir! I began by placing my hand over his so he could feel the pressure necessary to hold the whisk and also to show him how to move it around the bowl.

Stirring the water to make it green.
Really stirring now!

Sometimes you have to look no farther than your kitchen cupboards to help your child build skills. The colorful whisks just add a bit of fun and also keep his tools separate from mine 🙂 .

Engage, Encourage and Empower!


St. Patrick’s Hat “Search and Find”

My Obstacle Course Station Activity: St. Patrick's Hat "Search and Find"

I got this idea from a game that Andrew’s class had been playing called “Ned’s Head.” The idea for this and the “Ned’s Head” game comes from using the sense of touch to locate or identify an object. (Here is a google link to show what I’m talking about.)

Last year I found this St. Patrick’s Day themed hat in the dollar section of Target (I was just there today and they still have them!). When I bought it, I didn’t know what I would do with it but I knew it would come in handy for something. After looking through what skills I was working on and what sorts of things I could do with a hat like this, I decided to make my own Ned’s Head game (their’s costs $19.99, mine costs $1 when used with things we already have!)

I gathered up some objects…

Things I found around the house - toothbrush, straw, top, tissue, spoon, truck, cow

used some shamrock shaped calendar cutouts and wrote some clues. The clues were written to get him thinking about what the items are used for or certain characteristics that would be easy to detect by feel.

Clues written on cutouts.

When doing the station, we would read the clue, he would put his hand in and with “no peeking,” see if he could locate the object.

Variations:

  • This could be done in a very explicit way by using word names – “Find the ___.”
  • FInding an object that goes with something – ex. toothbrush and toothpaste.
  • Finding an object that goes with a certain function – ex. Find something you use to help you drink.

This is another way to add mystery and intrigue to My Obstacle Course while strategically working on skills that your child needs.

Engage, Encourage and Empower!


No “Ick” Finger Painting

Finger Painting! A wonderful, soothing activity to express creativity with cold, wet paint on a blank canvas of white paper – for some that is. For others, it is definitely a non-preferred, “avoid if possible” activity. Why is this? Some people, especially those with sensory sensitivities, do not like getting things on their skin. There is something about the feeling of something that doesn’t belong there that they cannot stand. When I imagine a child like that finger painting, I see them literally paying no to attention to what they are doing and spending the entire time trying to find a way to keep from touching the paint and if they do, how to get it off of their fingers and hands. How can I imagine this? Because Andrew is one of those children. He does not like having things on his skin and if something gets on it, he needs to have it wiped off right away. If he had to do an activity like this, he would be done in 2 seconds after making a few swipes with his fingers and then yelling about needing help getting the paint off.

My Obstacle Course Station Activity: No “Ick” Finger Painting

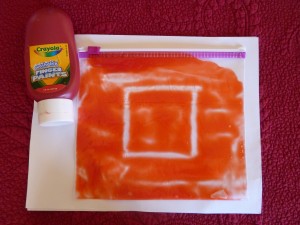
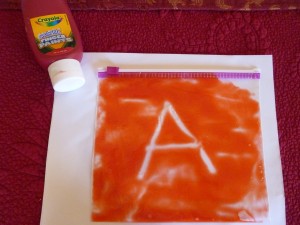
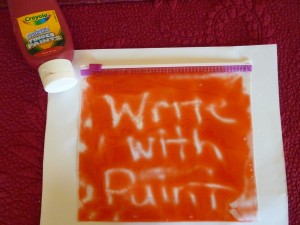
I was cleaning out my art supply box one day and found some containers of finger paint. Poor finger paint, never getting a chance to be used! I almost threw them out and then I thought about what it was that made it so unappealing to him. What would happen if I took away the “ick” factor? Would that encourage him to experiment with it? Since I am always trying new things to see if they work for him, I have found that it never hurts to try! So, I did a little experiment of my own and squeezed some finger paint into a sealable plastic bag. I closed it tight and began playing around. Turns out that it works great! Plus there is no mess to clean up or worries about getting it onto one’s skin.

I tried it as a My Obstacle Course station activity and he loved it! He got to experience something other children do in a way that made it not only tolerable but also enjoyable for him. It also gave us another fun, easy way to practice his fine motor skills.

Finger Painted Square

It is great because once he is done with one shape, letter or whatever he draws, he can “erase” it by smoothing the paint to create something else.

Finger Painted Letter A

It also lasts for a long time when left sealed.

Finger Paint Writing

Now, I do realize that he will need to build up a bit of a tolerance for things getting onto his skin but if the purpose of playing with finger paint is to have another way to practice drawing or writing skills than this works great. Plus, this is still a sensory activity for him because he gets to feel the squishiness of the paint (which feels “gel”-like) without the anxiety of it getting on him.

Engage, Encourage and Empower!

Make Your Own Tunnel

Andrew began getting OT (occupational therapy) services this year and it has made such a big difference for him.  I would sit in the waiting room and listen to the laughter coming from the kids and the therapists – what a fun job!!  One day they had me come back and Andrew was creeping and crawling through this stretchy tunnel and when he would get to the end he would come out with this huge smile on his face.  I love anything that gets him creeping and crawling and when I saw that smile, I knew I had to have one of those at home!

Professionally Made Sensory Tunnels Cost What?!?!?!?!

I did what most parents like me do when they see smiles like that, I got on my computer and searched to see if I could find one.  I found some sold at stores specializing in sensory tools and toys but was shocked to see how much they cost!  So, the next time I brought him to OT, I looked closely at the tunnels that they had, saw how basic they were and knew I could make one at home on my sewing machine.

I went to the fabric store, bought 3 or 4 yards of some stretchy, jersey-like fabric that was on the clearance table (didn’t matter to me the pattern or color) and some heavy duty thread.

Perfectly Imperfect

I am not a perfectionist by any means so when I got home and began to work, I decided to use clothespins instead of pinning the entire piece (If you are a perfectionist and need to pin it carefully, by all means go for it!  I just know that I don’t have the time or patience and realized that it wasn’t going to matter to either of us if the hem was a little crooked.).  The tunnel is not perfect but it works perfectly!!

Close up of the stretchy fabric with clothespins holding the two long ends together.
Pinned and ready to sew!!
My sensory tunnel with clothespins showing open ends on each side so the child can crawl through.
Sewing the hem for my sensory tunnel.

I sewed a hem about 2 inches in to create a  long tube.  I did go back and sew over my hem to make sure it would hold tight.  Once that was done, I turned it inside out so that the hem was on the inside.

I then gave it to Andrew to try out and…

Getting ready to creep and crawl through.
Andrew getting in and modeling the stretchiness of the tunnel.

he LOVED it!!  His very own tunnel at home.

A HUGE success!! Look at that smile 🙂 ! Â (Sorry for the blurriness but he just moves so fast!)

I have plans to make another one a little bit tighter to provide even more sensory input as he is crawling through.  The one we have now has enough room for him to do somersaults in – huge bonus for him!!  We have also used this like those stretchy body socks, positioning it so he is standing on it with enough tunnel to sit on top of his head while his arms can push against the sides.

« Previous Page
Next Page »

Primary Sidebar

Obstacle Course Mom’s Blog

  • When People Stare, Mind Your Own Business
  • ABC’s of Peaceful Parenting Tele-class
  • What’s Perfect About This?
  • Exciting News!
  • Halloween

Categories

  • Blog
  • Cool Tool
  • Fine Motor
  • Getting Started
  • Gross Motor
  • Literacy
  • Math
  • My Obstacle Course Station Ideas
  • Oral Motor
  • Problem Solving
  • Sensory
  • Social Skills
  • Uncategorized

Archives

  • July 2012 (1)
  • May 2012 (1)
  • January 2012 (1)
  • November 2011 (2)
  • October 2011 (12)
  • September 2011 (14)
  • August 2011 (15)
  • July 2011 (19)
  • June 2011 (18)
  • May 2011 (21)
  • April 2011 (20)
  • March 2011 (22)
  • February 2011 (19)
  • January 2011 (21)
  • December 2010 (22)
  • November 2010 (6)

Meta

  • Log in
  • Entries feed
  • Comments feed
  • WordPress.org