• Skip to primary navigation
  • Skip to main content
  • Skip to primary sidebar

My Obstacle Course: Engage, Encourage and Empower

A fun, structured, systematic way to work on your child's strengths and weaknesses at home!

  • Welcome to My Obstacle Course!
  • What is My Obstacle Course?
  • Developmental Timelines
    • What Is My Child Ready For?
  • About Us
  • Blog
  • Contact Information

Cool Tool

Autumn Manipulatives

You have heard me mention the word “manipulatives” many times and in case you don’t know what they are, they are basically items that children can manipulate while working math problems.

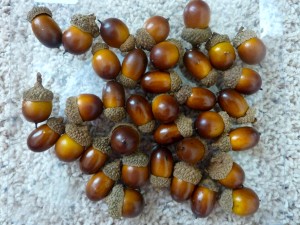
Here are some manipulatives that are perfect for an autumn themed My Obstacle Course:

From our yard
From Pottery Barn
Some colorful, plastic pieces from Michael's in the shapes of acorns and leaves.

These are great to pair with math equations to help the child have a good understanding of what the exactly they are doing – what the numbers represent and what it looks like. I think this is so important in building a strong math foundation.

Example: 4+2= ? Have your child get 4 things and then 2 more before counting them altogether.

Really simple but so often neglected as people try to get children ahead by starting them on flash cards and working to know the facts by memory before there is a good understanding. This becomes quite apparent when the child cannot explain what it is they are doing or how they came up with their answer.

Uses:

  • one to one correspondence
  • addition
  • subtraction
  • multiplication
  • division
  • patterning (if you have items that would work as patterns)

These are just some fun, seasonal items to use as manipulatives and I encourage you to be on the lookout for other items that can be used. I’ve got a bunch that I will share soon that are great for a Halloween themed My Obstacle Course – stay tuned!!

Engage, Encourage and Empower!
Back To School Tip #2

Use A Checklist

A basic checklist with words or picture symbols can make a huge difference for you and your child. This has helped us because like the timer, it removes the “mom” (or “dad”) aspect of telling him what to do over and over again.

Start Small AND With Things You Know They Can Do

While you may have a whole list of things you’d like your child to do, I have found that we’ve been most successful when we focus on 3 things at a time. These things can eventually be combined as part of a more general step once he understands what is means and what he is expected to do but to start out, I suggest starting small and use things that you know they can do independently while using a title that describes what they are doing. We come up with 3 things that he can do independently and print those out.

A sample for us would be:

Andrew’s “Get Ready For School” Checklist

  1. Get dressed (underpants, shorts, shirt, socks, shoes) – I would actually put the clothing items below, perhaps with a check box next to them so he can check them off as he goes, I just can’t figure out how to do this for this post – sorry 🙁
  2. Brush teeth with toothpaste.
  3. Put lunchbox in backpack.

For us, we need to be specific about what we want him to do and would only be giving ourselves more work by just saying, “Andrew, go get ready for school.” Some children get what that means but we are not there yet and this works well to give him the exact things he needs to do. As he progresses, we could stretch the checklist to say:

Andrew’s “Before School” Checklist

  1. Make your bed – put pillows on mattress, put blankets on mattress, turn off light and sound machine.
  2. Get ready: Get dressed and brush your teeth.
  3. Put lunchbox in backpack.

One Has To Know What To Do Before They Can Be Expected To “Just Know” What To Do

That may seem odd but it is so true, with adults as well as children. Please remember that not all children just know what certain word phrases mean, such as, “get ready,” “behave yourself,” “be a good listener,” and we need to make sure we are being specific about what those phrases mean. We had a checklist for a while that described what “a good listener” looks like. Here was our checklist for that:

Andrew’s “Good Listener” Checklist

  1. sit with your bottom on the seat or floor
  2. no talking when teacher or friend is talking
  3. puts eyes on the person talking

These three basic things may seem obvious to us but for someone like Andrew, we needed to be very specific and start really basic. The checklist gives them something to refer back to if they get stuck, distracted or forget. Think about something that you may do for your child that they can actually do for themselves and build some personal management skills while also removing something from your already full plate.

P.S. This strategy is not only handy at home but is also really helpful for students at school!

Engage, Encourage and Empower!
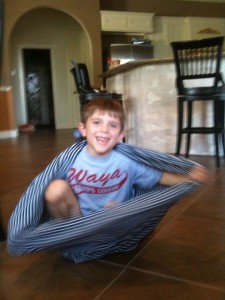
Back To School Tip #1

It is back to school time and I have seen several questions posed on different forums asking for tips and strategies to help kids get back to school. I thought I would share some things that not only help Andrew but also help me BIG TIME!

Tip 1: Use A Timer

Time To Go Helper

This is helpful if you tend to be rushed when it is time to get people out of the door. Try setting a timer for 5-10 minutes before you actually have to leave. This gives you and your child/children some buffer time between the time it goes off and the time you (or they) need to leave. This simple thing helps keep everyone focused while also giving some “extra” time if someone got distracted.

In our house, it is not just Andrew who needs the timer. I easily get caught up in what I am doing (computer, laundry, watching squirrels play outside of my window :), etc.) and since I know that about myself, I use a timer in the mornings to help keep me on track. I set it to go off 5 minutes before we actually need to leave so if there is something that comes up that we haven’t done, I’m not feeling rushed but it also puts gentle pressure on Andrew so he knows that it is almost time to go.

Timer As Homework Helper

This is a strategy that could be very helpful for homework time as well. I used timers with students who would lose track of time, get distracted or needed more structure around the amount of time they were expected to work on something. I’d place a timer on their desk and they could refer to it when needed to see how much time they had left to work on something.

This is helpful for you as a parent in several ways.

  • It removes the parent aspect a bit and puts more responsibility on the child.
  • It allows you to see how your child works independently (if they are ready for that). Do they get distracted? Do they get discouraged? Are they bored? These are all things that are helpful to know and share with those working with your child (teachers, therapists, doctors, etc.).
  • Lastly, if they are diligently working on their homework but the hours are racking up, this may be something to bring up to the teacher. I have heard some crazy hours of homework that kids are getting. Add in things like therapies or sports participation plus being in school all day and it can lead to some serious school burnout (for the kids and the parents!).

Homework Use:

  • Set a timer for specific time increments so that child has an opportunity to work, take a break, work, break, etc. This helps reduce the homework time power struggles that can occur while the child experiences frustration and overwhelm with no opportunity to regroup. Combining this with breaking down assignments into the time increments also helps while teaching time management skills (perhaps I should start using this strategy with myself!!).
  • Set a timer for a specific amount of reading time – oral or silent reading.
  • Set a timer so they know how much time they have to work on it before a specific event – practice, dinner, tv time, bed time, etc.
  • Turn it into a game/challenge to see if they can finish a certain part (or all depending on how much there is) by the time the timer goes off.
  • Use the timer to give a set amount of time for them to “try their best” with something that is challenging (we do this for writing activities).

Below is a previous post I did in March about timers and thought it was worth reposting as an extension of my Back To School Tips.

Using Timers For Motivation and Self-Regulation (March 3, 2011)

I am someone who LOVES  (and needs) to use a timer. I tend to get distracted easily (wonder where Andrew gets it from!) but there is something about a timer that helps me to focus. It is great because when the timer is on, I think, “Ok, I can do ___ for x amount of time.” It seems like the same is true with Andrew. If there is something that he is not really into or is avoiding while doing My Obstacle Course, I will bring out a timer and say, “Ok, let’s see how much we can do before the timer runs out.” This really helps because he knows there is an end and that as long as he is working or trying, the timer keeps counting down time (I also make a mental note to revisit why he wasn’t into it or why he was avoiding.).

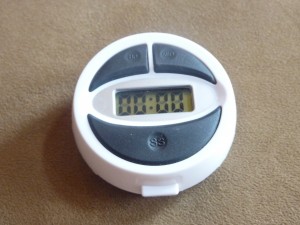
Digital Timer

I have a digital kitchen timer that I got at our grocery store that clips on my pants so I can set it and forget about it until it goes off.

Hourglass timers

I have some hourglass timers that I found at the teacher store - one is for 3 min. and the other is for 1 min. These work well when doing an activity that I know he can do but is “stimming” on something (or giggling uncontrollably which frequently happens 🙂 ). If it is an activity that is very challenging for him, then I will say, “Just try your best and let’s see how many we can do before the sand goes down!”

“Clock” application on my iPhone – My new favorite!!

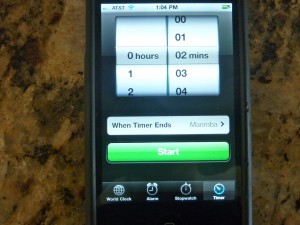
and my most recent favorite is the “Clock” app on my iPhone. It has a timer…

Timer

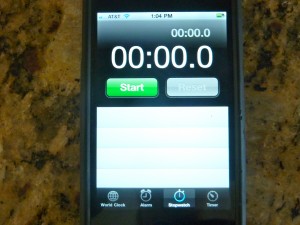
as well as a stopwatch…

Stopwatch

which challenges him to see how fast he can do something as well as setting a limit on an activity (works with activities that are preferred or non-preferred!).

Useful beyond My Obstacle Course:

I have found that timers are also really helpful for limiting time on things like electronics or showers, both of which he could do all day long some days! It works because he knows up front that I am setting the timer and when it goes off, he needs to shut it off or he doesn’t get it the next time. The first few times he would put up a fuss but once he knew that I was going to be consistent, he got it. This is another way to remove the, “Mom says!” aspect because it is the timer that is telling him his time is up, not me.

I have also just started using the stopwatch for him to earn time for his preferred activities. Whatever amount of time he spends playing with his toys or reading books is the amount of time he can earn to watch video clips of ceiling fans, play his DS or computer games. You could vary it depending on what works for you in your house but it has been working really well, particularly on weekends where he is home with a greater amount of unstructured time.

Engage, Encourage and Empower!

My Obstacle Course Kit Item #10: Tunnels

Kit Item #10: Tunnels

Tunnels are one of my favorite items to include in My Obstacle Courses because they encourage cross patterning, creeping and crawling while creating a fun, movement filled transition from activity to activity.

Fabric tunnel
Collapsible tunnel

Tunnels can be created a number of different ways. I have used dining room chairs (ones that don’t have the foot/cross bar underneath work best) in the past which helped encourage creeping and crawling. After seeing a fabric tunnel at his OT, I made my own. Click here for the post on this easy to make fabric tunnel. But one of my favorite items are collapsible tunnels. The set we got came with 5 so I can place them around My Obstacle Course in between stations. They are super easy to set up and create an instantaneous look of fun with their bright colors.

While the chairs or collapsible tunnels may not fit into a bin, I encourage you to look around at the chairs you have to see if they’d work or consider getting some collapsible tunnels fold down flat for easy storage.

Andrew happily emerging out of the tunnel.

Tunnels provide an easy way to add some adventure to My Obstacle Course while promoting cross patterning and gross motor movement at the same time!

Engage, Encourage and Empower!

My Obstacle Course Kit Item #9: Clothesline and Clothespins

Kit Item #9: Clothesline and Clothespins

This is one of my favorite tools and the fact that I can use it to build multiple skills and concepts by combining an academic or concept driven skill with the fine motor skills and planning involved with using clothespins just makes it even more awesome! It adapts beautifully to whatever I need Andrew to be working on, which helps to keep it interesting. This is huge in keeping him engaged and motivated and I love the smirk on his face when he sees it and wonders what he’s going to be doing. 🙂

The clothesline and clothespins are easily contained in a plastic bag and the cards or cutouts can also be kept in a separate baggie which makes this tool perfect for a kit. Check out my  original post on Clothesline Clipping to get more details although it really could not be more simple – clothesline, clothespins, something to attach the clothesline to (doorknobs and chairs work well), and concepts on cards to clip together.

Sample Activities:

My Obstacle Course Station Activity: Clip the words that rhyme together.
My Obstacle Course Station Activity: Clip the opposite words together.
Opposite words to choose from lay waiting on the seat of the chair.
Matching words with word clues taken from Gingerbread themed Enchanted Learning activity. The clues are glued onto gingerbread shaped cutouts and the words are glued onto halved index cards.
My Obstacle Course Station Activity: Clip the numbers in order from 10-20. I just wrote numbers 10-20 on large snowflake shaped cutouts to go with the winter theme we were doing.
My Obstacle Course Station Activity: Clip the numbers to the bag that has the same number of candy hearts. (One to one correspondence)

While there are different kinds of clothespins out there, I prefer to use the wooden clothespins with the spring. I’ve tried some of the newer plastic clips (the white ones in the pictures) and they are really challenging to open. My advice is to try the clothespins or clips to see how hard it is to open before having a child use it who already has some fine motor weaknesses.

Click here for the search results for clothesline from my website.

Engage, Encourage and Empower!

My Obstacle Course Kit Item #8: Beach Ball or Balloon

My Obstacle Course Kit Item #8: Beach Ball or Balloon

I chose a beach ball or balloon to build gross motor skills involving ball play because they can deflate and fit perfectly into a kit. They are also colorful, light and float in the air a bit longer than a regular playground type ball, making them better for visual tracking and giving more time for motor planning. The fact that they don’t hurt when a catch is missed is a huge bonus!!

Beach ball turned into a Question ball.
Tossing and catching a pink balloon.

This is a classic example of not needing something fancy or expensive to engage with your child while also helping to build a wide range of gross motor skills.

Uses:

  • catching
  • passing
  • kicking
  • rolling
  • bouncing
Combine either one with a dice or a spinner to determine how many of each to help children who are reluctant to do these things because they are challenging. I have even used blank dice programmed with the task so when he would roll one die, it would tell him what we were going to do (ex. catch, pass, kick, roll or bounce) and another die or set of dice to tell him how many times. This could also be done by creating task and number cards, having them face down and the child gets to flip over a card from each pile to see what to do and how many of each. Something simple like this takes minutes to prepare but adds fun while removing the “mom says” aspect. Andrew also does much better when he knows how many he is going to have to do and is very reluctant to participate when it comes to completing an unknown amount. Considering that I am the same way when it comes to working out, I don’t blame him one bit!!
Click here for my original post on Beach Ball Questions.
Engage, Encourage and Empower!
Next Page »

Primary Sidebar

Obstacle Course Mom’s Blog

  • When People Stare, Mind Your Own Business
  • ABC’s of Peaceful Parenting Tele-class
  • What’s Perfect About This?
  • Exciting News!
  • Halloween

Categories

  • Blog
  • Cool Tool
  • Fine Motor
  • Getting Started
  • Gross Motor
  • Literacy
  • Math
  • My Obstacle Course Station Ideas
  • Oral Motor
  • Problem Solving
  • Sensory
  • Social Skills
  • Uncategorized

Archives

  • July 2012 (1)
  • May 2012 (1)
  • January 2012 (1)
  • November 2011 (2)
  • October 2011 (12)
  • September 2011 (14)
  • August 2011 (15)
  • July 2011 (19)
  • June 2011 (18)
  • May 2011 (21)
  • April 2011 (20)
  • March 2011 (22)
  • February 2011 (19)
  • January 2011 (21)
  • December 2010 (22)
  • November 2010 (6)

Meta

  • Log in
  • Entries feed
  • Comments feed
  • WordPress.org