• Skip to primary navigation
  • Skip to main content
  • Skip to primary sidebar

My Obstacle Course: Engage, Encourage and Empower

A fun, structured, systematic way to work on your child's strengths and weaknesses at home!

  • Welcome to My Obstacle Course!
  • What is My Obstacle Course?
  • Developmental Timelines
    • What Is My Child Ready For?
  • About Us
  • Blog
  • Contact Information

Blog

My Obstacle Course Kit Item #4: Tweezers or Tongs

Kit Item #4: Tweezers or Tongs

Tweezers or tongs (or even kiddie chopsticks like the ones I got from Sur La Table) are great for building muscles required for handwriting. Tweezers are something that almost everyone has at home which makes it even better, almost like getting a free tool! They also pair quite nicely with kit item #3, puff balls.

Click here for a past post on tweezers.

Uses:

This item pretty much has one use, to build hand muscles by squeezing the tweezers to pick something up. Where you can get creative is with the items that you are having them pick up. Some possibilities:

  • puff balls
  • mini marshmallows
  • jelly beans
  • gummy bears (gummy anything really!)
  • cut pieces of string or pipe cleaner
  • sugar cubes (it is really fun to stack sugar cubes but requires a more steady hand so I wouldn’t start out with stacking these)

Sample Activity:

My Obstacle Course Station Activity: Help the baby spiders get back to their mom!

This was a really easy station to put together using tweezers, some brown shredded paper and colored puff balls. That is it! You don’t even need the shredded paper, you could have them scattered about on a cookie sheet or foil tray in salt or sand and pretend they are lost in the snow or desert.
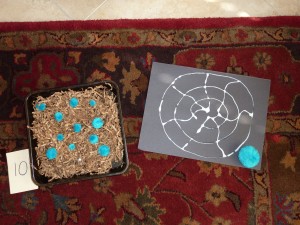
My Obstacle Course Station Activity: Help the baby spiders get back to their web.

The photo above shows how the station looked when I set it up but the glue I had used to make the web was not yet dry and I didn’t want the babies to get glued onto the paper. I just took it away and as you can see from the photos below, Andrew didn’t care one bit!
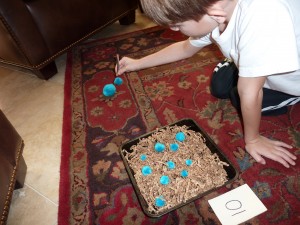
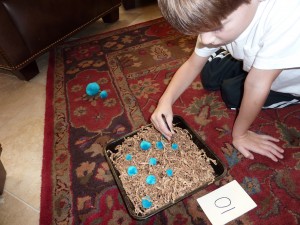
Very serious about this job!
Squeezing to pick up one of the "babies."
Can you see how using this tool helps to build those handwriting muscles?

If you want to see other posts showing how I have used tweezers, just click here for the tweezers search results from my website.

Engage, Encourage and Empower!

My Obstacle Course Kit Item #3: Colored Puffs

Kit Item #3: Colored Puffs

Two sets of colored puff balls - regular and holiday

This is one of my most favorite My Obstacle Course purchases and I actually bought this package of multi-sized, multi-colored cotton puff balls at Michael’s for my first Obstacle Course with Andrew. They were great then and I am still finding ways to use them! I’d say I’m getting an excellent return on this investment :).

Using something like this requires a little bit of thought (I mean teeny, tiny because I’m giving you some suggestions) but almost no time spent putting a fun station together other than picking out the colors/sizes you want to use. I love things like this which make it super simple!!

When using them in a station activity, I first decide what skill I want to work on with him and then choose the puffs from there. I also think about the theme we are doing so, for example, around Valentine’s Day, I would pick out the red ones and do an activity with just those. I store them in a plastic bag the closes so I don’t have puffs all over the place.

Uses:

  • sorting by color
  • sorting by size
  • patterning
  • sequencing from smallest to largest (and vice versa)
  • counting (use them as counters or manipulatives)
  • one to one correspondence
  • paired with a straw to build oral motor skills
  • paired with tongs, kid chop sticks or tweezers to build fine motor skills
  • paired with a frisbee for motor planning to make one go around the edge and visual tracking when watching it as it goes around the edge (I’d pick a colored puff that really stands out from the frisbee color.)

Click here for a link to a “puff” search on past posts.

Sample Activity:

My Obstacle Course Station Activity: Puff Blowing

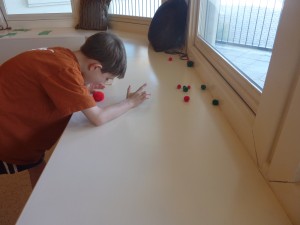
For this station activity, Andrew was working on oral motor skills, specifically getting his lips to create an “o” to blow air out of. We began this station with a straw to blow through and that helped so much. It gave his mouth something to form around. We gradually progressed to doing it without the straw. He was getting so much better at this (he used to blow air out of his nose thinking that he was doing it if it was making the same sound 🙂 ) so I thought I would throw in some larger puffs that would require more power from his breath. I also used a timer to see if he could blow all of the puffs to the window within a certain amount of time. A little motivational challenge for him!

Green and red puffs for puff blowing station during winter themed My Obstacle Course
Andrew blowing the puffs across the bench towards the window.

The puff blowing helps build oral motor skills but also provides a way to sneak in some other skills, like building receptive and expressive language. I would do this by asking him which puff he wanted to blow (ex. large or small, green or red) or tell him which one to blow and see if he understood which puff that was. This gave me a lot of great information about where he was with this stuff and he has a blast blowing them into containers, off of the counter or like above, blowing them towards the window before the timer runs out.

Remember, this is just one example activity that uses these colorful puff balls. Check out past puff posts link above to get more ideas!!

Engage, Encourage and Empower!


My Obstacle Course Kit Item #2: Scrabble or Bananagram Letters

Kit Item #2: Scrabble or Bananagram Letters

This will probably come as no surprise to any of you who read my posts, but item #2 that would definitely go in My Obstacle Course kit would be either Scrabble or Bananagram letters. I love them because they are so versatile. They can be used on their own or paired with a wide variety of things (sensory bin, flash cards, word clues) to help make building basic literacy skills fun.

Their small size also makes them perfect for building fine motor skills. Like dice, they are easily stored in a plastic bag or container and require nothing more than you choosing how to use them as a station activity.

Bananagram letters (which look just like Scrabble letters without the little numbers)

Note – If these letters are too small for your child and you worry about them putting them in their mouth, use something bigger like magnet letters. These can be found in most grocery stores, pharmacies as well as department stores like Target.

Uses:

  • letter identification (ex. Find the letter __.)
  • letter sequencing (ex. Put the letters in abc order.)
  • choosing the letter that goes with a spoken sound (ex. Choose the letter that makes a /b/ sound.)
  • building words
  • word families
  • make the same using flash cards
  • sight word building

Click here for a link to the “Scrabble” search of my past posts to see some of the ways that I have used them with Andrew.

Sample Station Idea:

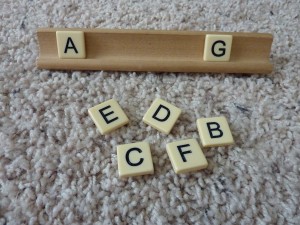
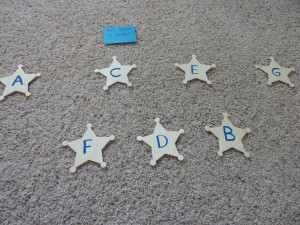
My Obstacle Course Station Activity: Letter Sequencing

Station set up for putting letters in the correct sequence.
Putting letters in order.
Letters A-G in the correct sequence.

Another Activity Idea:

My Obstacle Course Station Activity: Fill in the missing letters

Another variation - putting out every other letter for the child to fill in the missing ones.

If this is a skill that your child struggles with, provide them with a reference sheet. Remember that these activities are for reinforcement or building skills, so if they need something to refer to or check their work, provide that for them. This is as easy as writing this out on a sheet of paper or printing it off.

Engage, Encourage and Empower!


My Obstacle Course Kit Item #1: Dice

I frequently get asked about what I would put into a My Obstacle Course kit to have some basic things to help build basic skills and I definitely have some favorite things and activities that require little if any set up at all. The next few posts will feature some of these. I have lots of basic items or activities that can be turned into thematic activities but they don’t have to be thematic to be fun (if I show them using themed paper, that paper could be substituted for colored index cards). These items/materials are also easy to transport, which makes them perfect to take along on trips for those down times when the kids are hot/cold, electricity is out, it rains or they are just bored and following you around the house saying that they don’t have anything to do.

While I love having thematic My Obstacle Courses, there are times when I want to set one up quickly and having these things on hand is super helpful. Having a kit prepared allows you to quickly set them out as stations, mix in some gross motor stuff or easy games like Simon Says or Red Light, Green Light and you are engaging with your children, helping them build skills while also having a bit of fun.

I will share links to previous posts where I have used these items or activities to give more ideas but remind you to think about what skills your child is ready for or needs reinforcement on and go from there. The things I will share this week can be modified to make them more basic or more challenging and I will note some basic ways to do this.

Kit Item #1: Dice

Use for:

  • number recognition
  • one to one correspondence
  • addition
  • subtraction
  • multiplication
  • greater than/less than
  • number sequencing – (roll dice, what comes before or after the number)

Sample Station Idea

My Obstacle Course Station Activity: Addition using dice and pennies

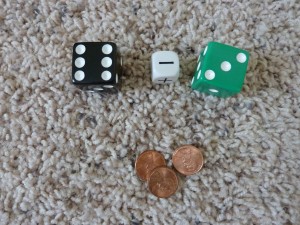
I love to use dice to practice basic math facts. This activity requires only some dice, some pennies to use as counters (if needed) and can be made to work on addition and subtraction by using a die that has the addition and subtraction symbols on it.

Dice
Dice with pennies.
Addition equation 6+5.
Add them together to get 11.
Subtraction
Subtracting 3 pennies from 6.
3 pennies left.

Something like this is easily stored in a small bag or container, taking up very little space. I show 12 pennies here for addition, since both of my dice only go up to 6. If you have dice with larger numbers, make sure to provide enough pennies by adding together the largest numbers. The same goes for multiplication. If I were doing that with him, I would provide 36 pennies with these dice.

Two colored dice, a die with addition/subtraction symbols and 12 pennies.

Click here for a previous post on dice.

Engage, Encourage and Empower!

More Nature, Less Electronics

Just as I like to share practical ideas for ways to work on building academic and developmental skills with your children, I’d also like to share something that has made a huge difference in my life (and now Andrew’s) over the past two years – reconnection to nature.

My "love notes" from nature.

Two weeks ago I participated in a tele-class with Michael Trotta, special educator, naturalist and Martha Beck life coach, called, “7 Ways To Help Your Child Become the Natural Genius He/She Was Meant To Be.” While listening to him describe the 7 ways, one of the things that really struck me was how allowing boredom can really help to inspire creativity and imagination. I thought back to growing up, being bored and going off to create forts armed with clothesline, clothespins and old sheets. I can still remember all of the pretending I did sitting in a tree or inside of my fort. It was so much fun to create spaces that were my own, figuring out what worked best through trial and error, really feeling like I was on my own living in this place until it was time to eat. Ah…the good old days!

I’ve been working on getting Andrew to have a balance between time spent with electronics and time spent outside (or even inside playing with things that do not require a plug or battery). Left to do what he wants, he would spend all day watching ceiling fan videos on YouTube (his version of cartoons). With him having more time at home this summer, we began setting limits on the amount of time he can spend doing this. He works well with structure and timers so we give him set amounts of time and use a timer so he can see. We also have passwords for every electronic gadget we have because he’ll sneak things upstairs. While we are the ones who are setting the limits for this, it helps to have them reinforced by something that is not us – a useful way for us to use electronics in our favor!

At first, he would grumble, complain and weep dramatically (And the Oscar goes to…Andrew for the best emotional performance of a child not getting to use electronics!) while we ignored his pleas and locked all of the electronics away until the timer went off. This is also something that I wanted to model for him so it meant that I was not going to use electronics during this break time. Let’s just say I had to be really focused to get posts done when it was “electronics time!” We started slowly with 20 minute breaks and are now up to having 1 1/2 hour breaks at a time which for us is huge! An unexpected benefit of this is that he has learned to tell time! He can even look at my watch (which is not digital) and tell me how many more minutes is left in his break.

I have really been enjoying seeing the little “games” he has made for himself when he knows he is going to be outside for a certain period of time with no electronics. Suddenly, an empty water bottle becomes fascinating to watch as it fills and sinks, rolls down a pool float or pours water on mom’s head :). He has created an OT-like obstacle course in the yard, talking to himself as he reminds himself to “get ready to jump.” He gives himself little challenges like jumping over hoses, swimming with his eyes closed and squirting water into the water wheel to make the wheels spin like they are on high-speed (sneaking in a ceiling fan reference!). The child I thought would never pretend play outside is now doing so and when he doesn’t feel like doing anything, he comes and just sits with me while I soak in the beauty of the nature around me.

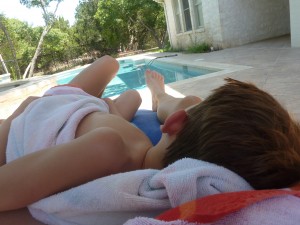
Nature boy allowing me to get a picture of him as takes a break from climbing the walls around our yard.
I'm now getting some rare snuggling - love it!!

If you are interested in learning more about increasing your child’s time in nature or building/re-building your own connection with nature, I highly recommend checking out Michael’s website, www.sagefireinstitute.com. He is offering a free tele-course to groups of 10 or more so if you are part of a parent group you may wish to contact him about this.

Soon I will be sharing some exciting news about something that has changed my life and have become quite passionate about – life coaching, and how it is going to be another way for me to help people engage, encourage and empower themselves (and their families through the process)! Stay tuned!!

P.S. -As I am finishing this, Andrew came in with his computer and said, “It’s 5:00. Time for our electronics break! No electronics until 6:00.” Love this! I gave him his 2 minute break warning and he just did what I asked without me having to go in and get it. He also gave himself a time limit greater than his usual declaration of wanting only a 4 minute break! Now it’s time for me to start my electronics break :).

Engage, Encourage and Empower!


Alphabet Stars

These wooden alphabet stars were one of the first My Obstacle Course station materials that I came up. I purchased some blank, wooden star-shaped pieces from Michael’s and wrote the letters A-Z with permanent marker on each piece. That’s it! I still have them and they are in great shape!

Alphabet Stars!

When I made these, Andrew was 4 and was not saying any consonants and so we didn’t know if he knew his letters. He must have been so frustrated with us because he would say the letter but since we didn’t understand him, it was hard to know if he was understanding the difference between them. Turned out he was and I will one day thank him for his patience with me!! He wasn’t crazy about sitting and pointing to things (so many other more interesting things to do!) so I decided to work on letter recognition in a ways that would get him moving.

1. Hopping Through the ABC’s!

I set out the stars in alphabetical order but had them winding around on the floor. The purpose of the station was for him to hop from letter in order from A to Z. I said the letters out loud as he jumped to them.

2. Stand On the __!

I set out the stars in a random way. When he got to the station, I would call out a letter and he would have to go and stand on it. I would do this about 10 times before moving on to the next station. He really liked things like this and so I wanted to keep it something that he’d want to do again, perhaps in different ways, but still keep it fun and not beat it into the ground, if you know what I mean!

3. Fill in the Missing Letters

My Obstacle Course Station Activity: Fill in the missing letters
Letters in order!

This is a great activity to work on letter sequencing and abc order. It can be done with any letter sequences and can even be accompanied with a sheet showing the letters in order as a reference. Remember, if they need it, let them use it! Learning to refer to something and check one’s work is also an important skill to learn. I refer to lots of things even as I write these posts to try my best to spell things correctly.

4. Word Building

Provide letters needed to make a word, like their name or something that goes with a theme. Show them the word, tell it to them or give them a clue, whatever they are ready for, and have them put the letters in the correct order to make that word. This could be combined with crawling from one end of a room to the other to add some physical movement (kind of like the Crawl and Match activities I have posted on before).

Something so basic yet allowed me to engage with him in a fun way, showed me what he knew and helped me to provide ways to build the literacy skills he was ready for.

Engage, Encourage and Empower!

« Previous Page
Next Page »

Primary Sidebar

Obstacle Course Mom’s Blog

  • When People Stare, Mind Your Own Business
  • ABC’s of Peaceful Parenting Tele-class
  • What’s Perfect About This?
  • Exciting News!
  • Halloween

Categories

  • Blog
  • Cool Tool
  • Fine Motor
  • Getting Started
  • Gross Motor
  • Literacy
  • Math
  • My Obstacle Course Station Ideas
  • Oral Motor
  • Problem Solving
  • Sensory
  • Social Skills
  • Uncategorized

Archives

  • July 2012 (1)
  • May 2012 (1)
  • January 2012 (1)
  • November 2011 (2)
  • October 2011 (12)
  • September 2011 (14)
  • August 2011 (15)
  • July 2011 (19)
  • June 2011 (18)
  • May 2011 (21)
  • April 2011 (20)
  • March 2011 (22)
  • February 2011 (19)
  • January 2011 (21)
  • December 2010 (22)
  • November 2010 (6)

Meta

  • Log in
  • Entries feed
  • Comments feed
  • WordPress.org