• Skip to primary navigation
  • Skip to main content
  • Skip to primary sidebar

My Obstacle Course: Engage, Encourage and Empower

A fun, structured, systematic way to work on your child's strengths and weaknesses at home!

  • Welcome to My Obstacle Course!
  • What is My Obstacle Course?
  • Developmental Timelines
    • What Is My Child Ready For?
  • About Us
  • Blog
  • Contact Information

Archives for May 2011

Geoboards – Fine Motor Skill Building Tool

The “geoboard” is something that is found in most elementary school classrooms and is generally used for the purpose of building math skills like making geometric shapes and finding area and perimeter. This is something that I will definitely work on with Andrew someday but when I looked at this tool I realized that it would be a fun way to help him build his fine motor skills and fine motor planning.

The geoboard is made of a grid of pegs and comes with rubber bands. By fitting the rubber bands around the pegs, you can create different shapes. I was not focused on creating shapes though. I wanted him to work on the basic skill of putting the rubber band around one peg, stretching it and putting it around another peg. Sounds easy enough but it was quite a challenge and I was glad I started basic.

My Obstacle Course Station Activity: Secure rubber bands around the matching stickers

I placed small stickers on the pegs I wanted him to put the rubber band around. Each pair of stickers matched so he’d know which ones to connect. Some were closer together and others farther apart so he’d have to stretch the rubber band a bit more, working on doing it so the rubber band didn’t fling off!

A "Geoboard." I placed small matching stickers so he would know which pegs to put the rubber band around.

At the station:

I modeled what we were going to do before giving him the rubber band. Working with rubber bands requires more attention from the adult so it doesn’t hurt them or someone else. Like I said, I knew that it was going to be challenging for him so I did hand over hand while also holding one end of the rubber band on the peg so it wouldn’t come off. His job was to stretch the rubber band and fit it around the peg with the matching sticker. It was great for him to feel the tension and push himself to pull it farther. He wanted me to do it for him but I simply helped his hand stretch it so it would reach around the peg.

Checking his work.

Once he got done with the three rubber bands, he was very proud of himself. We continued to work on this in a basic way until he got the hang of it and knew what he needed his fingers to do.

Andrew making a geoboard spider.

Geoboard Simple Substitution:

I found my geoboard at the teacher supply store but this is something that could also be done using a thick piece of styrofoam with some screws, nails or golf tees secured into the foam so they are firm and don’t wiggle. They can be placed randomly or in an orderly fashion, whatever you like. Just provide some rubber bands for your child to secure around the screws, nails or tees and you can help them build fine motor skills! (Here is a previous post I did combining styrofoam, golf tees and a hammer called Hammer Away!)

(Click here for a link on Amazon)

Engage, Encourage and Empower!

Recognizing Feelings Using Photographs

This is an early My Obstacle Course station activity that I did with Andrew (he was four at the time). I wanted to help him recognize and understand facial expressions in other people and thought that it would be a good idea to start with pictures of himself.

My Obstacle Course Station Activity: Match the photograph with the expression/feeling state.

I looked through pictures and found some that were very obvious in what they were showing – happy (pictures of him while he was laughing or smiling), tired (pictures of him while he was sleeping) and serious (pictures of him studying something or just looking intently at something). Some other categories could be sad, silly, frustrated, embarrassed, angry, etc.

I printed out the pictures and cut them into cards. I took a sheet of white printer paper, drew some basic faces to go along with the feeling word (I am most definitely not an artist!) and the station was set.

Station activity is set and ready to go.

When he got to this station, he had the best look on his face because he was surprised and excited to see pictures of himself with these different expressions. He didn’t need to be able to speak or read because he could use the pictures and the faces I drew to match up with the expression.

Station activity completed.

Such a fun station activity to help build this important skill. He loved looking at all of the pictures of himself and I was able to point out specific aspects of each picture that supported the feeling state it was showing. This activity is a perfect example of not needing anything fancy to create a station that is meaningful while also providing information about where a child is with a certain skill or ability.

Engage, Encourage and Empower!

P.S. My apologies for the poor photo quality! These were taken years ago, long before I had any idea that I would be posting them on a website/blog.

Building Letter Recognition – Letter Sort

This is another really basic station activity to reinforce letter recognition. I love to use the concept of sorting because it gives a lot of reinforcement in a short amount of time. If you are looking for something more challenging, it could also be done with word families, words with common vowel patterns, or beginning blends.

I took some colored index cards, cut them in half and wrote the letters I wanted to work on. I made 4 cards per letter and shuffled them up so they wouldn’t be in order. That is it!

At the station, the child will pick a card, identify the letter and match it up with the letter that is the same. These cards can be mixed and matched with others later on to create very specific sorts depending on letters that may confuse them, especially with lowercase letters like “b” and “d”!

My Obstacle Course Station Activity: Sort the Uppercase Letters

Sort completed!

My Obstacle Course Station Activity: Sort the Lowercase Letters

Sort completed!

My Obstacle Course Station Activity: Match the Uppercase and Lowercase Letters

A station activity really can be this basic while building and reinforcing literacy skills. Just think about what your child needs to work on (letters, vowel patterns, or word families they need more exposure to) and see for yourself how easy it is to make a sort to reinforce it.

Engage, Encourage and Empower!

Building Letter Recognition – Sensory Bin Letter Hunt

I recently received a letter asking about activities to work on beginning letter identification and uppercase/lowercase matching. As with any concept I work on with Andrew, I begin by providing him with very basic activities and build according to what he needs. This is one of my favorite ways to approach this and lots of other skills.

Note: Remember that these station activities are not meant to be long, drawn out projects that take all afternoon for your child to complete. They have short attention spans which is why doing stations that are quick and to the point work so well.

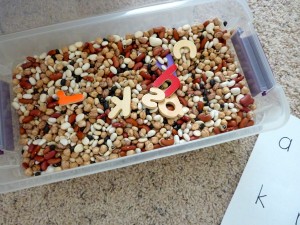
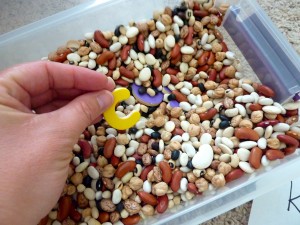
My Obstacle Course Station Activity: Sensory Bin Letter Hunt

My Obstacle Course Station Activity: Sensory Bin Letter Hunt

For this station activity I would choose some letters, either strategically if I knew he was struggling with them or randomly.

The letters I chose for this particular hunt.

I have used magnet letters, Scrabble or Bananagram letters, wooden letters from a Melissa and Doug game or letter tiles I found at Michael’s.

Magnet letters, wooden Melissa and Doug letters, colored letter tiles from Michael's and Bananagram (or Scrabble) letters

I combined these with a sensory bean bin that I have made. (Now that summer is approaching, it might be fun to go with the summer theme and make a sensory bin with sand! Just remember to put a towel or sheet underneath it for easy clean-up.)

Place the letters in the sensory bin and bury them.

I include a sheet with the letters on it so they can be matched up and so that he knows how many more he needs to find. This does not have to be fancy, just a sheet of paper with the letters neatly written on it or even printed from the computer using a large font size.

Now that the set up is complete (super simple huh!!), it’s time to start digging!

Dig around until a letter appears.
Take the letter out...
and place it on the sheet.
Continue until they have all been found!
What it would look like matching uppercase and lowercase letters.

If your child knows their letters, an extension of this would be to place letters into the bin that form a word. Write the word on a piece of paper or a piece of a sentence strip and the child can put the letters in the correct order to form the word.

It really doesn’t take much to make a fun activity to help your child build letter recognition skills.

Engage, Encourage and Empower!


Make the Same – Part 2

I modeled this My Obstacle Course station activity after several packaged toys I’ve seen that come with pattern cards for children to replicate. It’s so easy to make your own and custom fit them to what your child needs to work on.

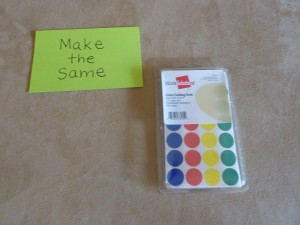
To make them, I used some color coding dot stickers that I found in the school supply/household utility aisle of our grocery store…

Make the Same station activity using color coding dots.

and some index cards (I used colored but plain white cards might work even better).

I used the sticker dots to make basic patterns – ABAB, AAB, ABB, ABC, etc.

My Obstacle Course pattern cards - ABAB pattern (the yellow dots can be seen in person but didn't photograph well)
My Obstacle Course pattern cards - ABB pattern
My Obstacle Course pattern cards - ABC pattern

At the station, I provide paper and stickers, have him choose a pattern card and using the stickers, he peels and sticks the dots on to make the same pattern. If this activity is easy for him, I would have him choose several different cards to do. If it is too challenging, I would limit it to two.

I like that this works on the skill of patterning as well as building the fine motor skill of using their fingers to peel, hold and place the sticker onto another sheet of paper. This also requires some planning because they have to put the sticker in a place that will allow the others will fit. If planning is challenging, you can place lines or x’s on the paper for them to place the sticker on or above.

These sticker dots have other uses as well that I will post on in the near future. I really like finding inexpensive items that have multiple purposes for building different skills!

Engage, Encourage and Empower!


Make the Same – Part 1

One of my favorite My Obstacle Course station activities is something I call, “Make the Same.” This is a station activity that I came up with to help Andrew build imitation skills. After using it a few times, I realized that this activity not only helps with imitation, but also fine motor skills, visual and spatial planning, and is helpful if your child has toys that they do not play with (maybe it’s because they don’t know how!).  By breaking down the toy into smaller, more manageable tasks that they can copy, you can help build these play skills.

I love the versatility of this activity. It is an activity that can incorporate almost anything, like blocks, pattern pieces, objects, stickers, shape drawing, and eventually letter and word writing.

It is so easy to set up and works on skills that provide the foundation for more complex skills needed in the future.  The basic idea is to make something, provide your child with the same parts or pieces that they will need to make what you’ve made and then work with them to make it.  When beginning, provide the exact blocks or pieces they’ll need and as they progress you can make it more challenging by providing more blocks or pieces so they have to choose only the ones they’ll need.

Here are some ways I have used it in past My Obstacle Courses:

My Obstacle Course station activity: "Make the Same" using blocks.
My Obstacle Course station activity: "Make the Same" using pattern beads and pipe cleaner.
"Make the Same" activity completed.

These next two station activities could also be combined with a clothesline and clothespins to incorporate fine motor skill building.

My Obstacle Course station activity: "Make the Same" using ocean themed pattern cards.
"Make the Same" activity completed.
My Obstacle Course station activity: "Make the Same" using soccer themed pattern cards.
"Make the Same" activity completed.

A toy that had not been played with is broken down into manageable parts.

My Obstacle Course station activity: "Make the Same" using Magformers

The great thing about “Make the Same” is that you can make it as basic as you need or as complicated as your child needs (right now I’m thinking Lego creations since we haven’t gotten into Lego-mania yet!).

Tomorrow’s post will be another version of “Make the Same” using some basic, easy to find materials to help your child with more intricate fine motor skills and planning.

Engage, Encourage and Empower!


« Previous Page
Next Page »

Primary Sidebar

Obstacle Course Mom’s Blog

  • When People Stare, Mind Your Own Business
  • ABC’s of Peaceful Parenting Tele-class
  • What’s Perfect About This?
  • Exciting News!
  • Halloween

Categories

  • Blog
  • Cool Tool
  • Fine Motor
  • Getting Started
  • Gross Motor
  • Literacy
  • Math
  • My Obstacle Course Station Ideas
  • Oral Motor
  • Problem Solving
  • Sensory
  • Social Skills
  • Uncategorized

Archives

  • July 2012 (1)
  • May 2012 (1)
  • January 2012 (1)
  • November 2011 (2)
  • October 2011 (12)
  • September 2011 (14)
  • August 2011 (15)
  • July 2011 (19)
  • June 2011 (18)
  • May 2011 (21)
  • April 2011 (20)
  • March 2011 (22)
  • February 2011 (19)
  • January 2011 (21)
  • December 2010 (22)
  • November 2010 (6)

Meta

  • Log in
  • Entries feed
  • Comments feed
  • WordPress.org