• Skip to primary navigation
  • Skip to main content
  • Skip to primary sidebar

My Obstacle Course: Engage, Encourage and Empower

A fun, structured, systematic way to work on your child's strengths and weaknesses at home!

  • Welcome to My Obstacle Course!
  • What is My Obstacle Course?
  • Developmental Timelines
    • What Is My Child Ready For?
  • About Us
  • Blog
  • Contact Information

Search Results for: tweezers

Packing Bubble Popping

Did you know that packing bubble sheets are great for building fine motor skills? I grabbed a bunch out of a package we received a few months ago and stashed it away, knowing that I would be able to use it for something (I’m kind of like a squirrel this way, seeing things and storing them knowing I’ll put them to good use someday. 🙂 ). Well, as I was cleaning up a closet, there it was and I began playing around. I noticed that pinching and popping the bubbles required the same muscles I was working on with Andrew for building handwriting skills. Try it using your thumb on the top (or bottom) and your first two fingers (pointer and middle) on the opposite side as your thumb and pinch (like you are pinching tweezers together). Something so basic to work on such an important skill!

Packing bubble sheet

This is a My Obstacle Course station activity to build those finger and hand muscles that was made even better by my assistant Katie who suggested using the dot stickers (garage sale kind I’ve used for patterning and “Make the Same” stations) to show the child specific bubbles to pop. While not necessary, the stickers help to provide focus as well as give a purpose.

My Obstacle Course Station Activity: Pop the bubbles with red dots

Colored dots to pop.

An extension of this is to put numbers on the dots in order to help with number recognition.

My Obstacle Course Station Activity: Pop the bubbles in order from 1-5

Colored dots with numbers on them

Write the numbers or letters on the sticker dots and then place them randomly on un-popped bubbles. Have the child use their pincer grip fingers to pop the bubbles in the correct order.

Popping the bubbles requires same pinching as pincer grasp so it helps build those muscles.

My Obstacle Course Station Activity: Pop the bubbles in order from 1-5.

or

My Obstacle Course Station Activity: Listen to the number I say and pop the bubble with that number.

Numbers 1-5 scattered for number recognition and number order.
Popping the #1 bubble!

This could also be done to work on:

  • letter recognition
  • letter sequencing
  • letters of the child’s name
  • letters of words
  • odd and even numbers

Engage, Encourage and Empower!


Reusing Egg Coloring Cups

It’s Earth Day and I thought it would be nice to combine the practice of reusing with something you may have purchased in the past weeks – the colored cups that come with egg dying kits. Once you’re done coloring Easter eggs, the containers are perfect for using in My Obstacle Courses! They stack well for storing purposes and are bright and colorful. I especially like them because they keep things we are using at a station contained until we get there or they can be set out with labels as part of a sorting station. Here are some photos showing how I have used them over the past 4 years…

My Obstacle Course Station Activity: Sort the puffs into the same colored cup using a tweezers.

Colorful containers match colored puffs for station activity of sorting by color.

My Obstacle Course Station Activity: Sort the items

Containers used to hold materials and also provide a place to sort into.

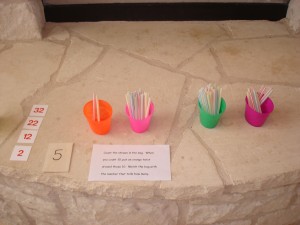
My Obstacle Course Station Activity: How many straws?

Containers hold straws for number/place value station.

My Obstacle Course Station Activity: Blow the puffs off of the counter into the cup.

Container perfect for holding puffs for "puff blowing" station.

If I haven’t done a post on the station activity, I will do so at a later date. Andrew is off today so I’m going to keep this short and sweet because we are off to do our own Easter themed My Obstacle Course! Have a great weekend!! 🙂

Engage, Encourage and Empower!

Jelly Beans Tweezing

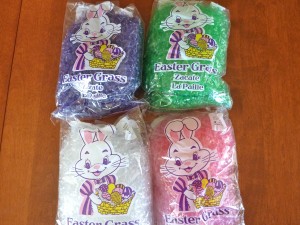
I was at our grocery store and found these different colors of Easter grass.

Easter Grass in fun colors!

I purchased them not for our Easter baskets but rather to use in My Obstacle Course along with tweezers or tongs for fine motor skill building. While Andrew’s handwriting is really improving, we still need to build his pencil grasping muscles and tweezers are a great tool to use for this. Since Easter is just around the corner and I like to use things that are thematic and seasonal, I bought some jelly beans to put in the grass for him to get out.

I always try things out before putting them into the Obstacle Course so I know what he is going to be experiencing. This activity requires more pinching pressure to grab the jelly bean, which is going to help him build those finger and hand muscles. If this is too difficult for your child, use something that is larger, like ice-cube tongs or switch the jelly beans with colored marshmallows.

My Obstacle Course Station Activity: Jelly Bean Tweezing

Set Up:

I used an old baking tray…

Easter grass and an old baking tin

and placed some grass in, spreading it out so it wasn’t just one big clump.

Easter grass in the tin.

I put some jelly beans in…

Jelly beans scattered in the grass.

set out the tweezers and it is set!

Tweezers grabbing the jelly bean

At The Station:

Your child will use the tweezers to grab the jelly beans out of the grass. You could work on color recognition by having your child hunt for a certain color or choose a certain number you’d like them to find, especially if this is challenging for them.

Going into the grass to get a jelly bean.
Got it!

You could provide a container for them to place the jelly beans in after they find them. I may even use a different color grass in another bowl to make a nest for the pretend play add-on I describe below.

Pretend Play:

Activities like this one also lend themselves to a bit of pretend play. We have pretended that these were bird eggs that fell out of the nest onto the ground and we have to get them back to the nest before the mother bird returns. Get creative and have some fun!

Combining thematic or seasonal items with household items to create a fun station activity.

Engage, Encourage and Empower!


Colored Marshmallow Sorting Station

It was springtime last year and I was on the hunt for things that reminded me of spring to use with Andrew’s My Obstacle Courses. I was in our grocery store, (which is a great place to find fun, thematic materials- especially in the “holiday” aisle and the shelves at the end of the aisle), and my eye caught a package of colored mini-marshmallows. They appealed to me because of their pastel colors, they could be used with tweezers for fine motor skill building and also because there were so many of them, which means that they make great math manipulatives (patterning, counting, sorting, graphing, use with dice for addition and subtraction, grouping for multiplication and division, etc.). For this post, I thought I would share a sorting station we did and the question cards we used after.

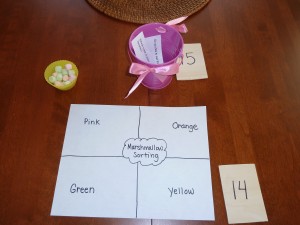
My Obstacle Course Station Activity: Colored Marshmallow Sorting

My Obstacle Course Station Activity: Colored Marshmallow Sorting

Station Preparation:

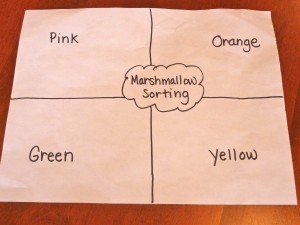
There were four different colors of marshmallows so I divided a sheet of regular white printer paper into four sections, writing the color word in each. I also labeled it “Marshmallow Sorting” because I like things like this to have a title :). You could place this inside of a sheet protector so it stays in better shape than mine!

Sorting Sheet

I typed and printed out some questions for after they were sorted, cut them into question cards and put them into one of my small, spring colored pails. It seems like these cards would be unnecessary since I could just ask him the questions, but for us it makes all the difference in the world when he sees it written out on paper. It’s official My Obstacle Course business for him and not just another pestering question coming from mom.

I poured some marshmallows into one of my colored muffin cups and the station was ready!

At The Station:

When he got to the station, he read the directions, “Sort the marshmallows by color.” He squished them a little bit, smelled them a little bit (which made me realize that he probably hadn’t had much marshmallow exposure before, particularly since my husband and I don’t ever have them around!) and then sorted them. He likes to sort one color at a time but I know other children who sort as they remove items. Interesting to watch!

Once he was done sorting, we looked at the question cards and answered them. You can choose how many questions your child answers or have them “close their eyes and pick” to add some mystery. Here are some questions I wrote out to go with this station: marshmallow sorting questions. I like to incorporate math language in the questions as well ask some questions about personal preferences.

Engage, Encourage and Empower!


Droppers

Unexpected Find = Fun, Engaging Activity

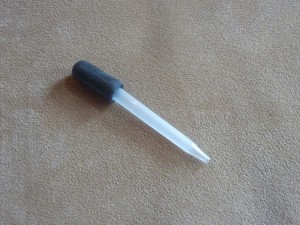
I was wandering through the aisles of my teacher supply store and saw a package of these droppers in the science section.

Dropper found in the Science section of my teacher supply store.

I thought that they would be great to introduce a little bit of experimentation while also building his grasping skills.

Using same fingers as tweezers...
to build fine motor, squeezing skills.

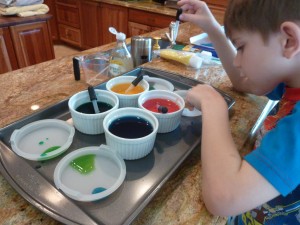
My Obstacle Course Station Activity: Experimenting with Color

When teaching kindergarten I always loved teaching about the primary colors (red, yellow and blue) and how to use them to make the secondary colors (orange, green and purple).  The children were always so excited and amazed as though I were a magician magically creating different colors right before their eyes!

I decided that I would set up a My Obstacle Course station that would combine the droppers with making colors. This station activity was not only easy to set up and take down, it was also a huge hit!  Andrew’s exact words were, “This is fun. It is just like Easter!”

My Obstacle Course Station Set Up:

  • droppers
  • food coloring
  • 3 small bowls, cups or ramekins with some water
  • 3 small bowls, cups or ramekins that are empty
  • rimmed cookie sheet to catch spills
  • paper towel or old towel to wipe spills and hands

I used one of my rimmed cookie trays (I have to use them for something since I don’t bake!!), some ramekins (If you worry about breaking the ramekins, you could also use small Dixie or plastic cups or bowls.) and added a few drops of red, yellow and blue food coloring in: red, yellow and blue food coloring. I did this part with Andrew so he could also work on stirring but you could do this for them or ahead of time.  It is kind of cool for them to see the water take on the color of the food coloring drops.

We talked about the colors we were seeing as we added and stirred the food coloring. I told him he was going to use the dropper to get some colored water from one bowl, squeeze it into an empty bowl and repeat with a different color.

These are some questions I asked him as we were doing this:

  • What do you think is going to happen?
  • What color is going to be in the new bowl?
  • Which colors combine to make new colors?
  • What happens when you add more of one color?
Dropper in and squeeze! Look at his focus!!
Checking out the blue liquid in the dropper.
Checking out and commenting on the color he had made.

He used the droppers to combine red and yellow to make orange, yellow and blue to make green, and red and blue to make purple. He had a ball experimenting with these colors and had no idea that he was building skills like motor planning, fine motor grasping skills as well as going through the scientific method by questioning, predicting, experimenting and making conclusions based on his personal experience with the materials. All of that AND he was totally engaged and having fun with me.

Engage, Encourage and Empower!

What is My Obstacle Course?

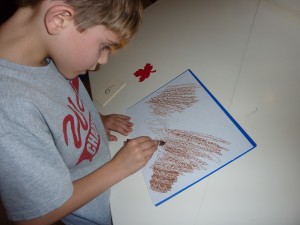
My Obstacle Course station idea: coloring on different textures

My Obstacle Course uses the structure of stations (numbered spaces to work- think life size dot to dot, where the child goes in order from one activity station to the next), combined with thematic activities to build developmental and academic skills so that parents are able to work with their child at home.

  • It ties together activities to create meaning instead of having your child working on random things at random times.
  • The activities include all modes of learning- visual, auditory and kinesthetic.
  • The activities can put to use things that are already in your home or can be easily created using calendar cut-outs, colored index cards and stickers.
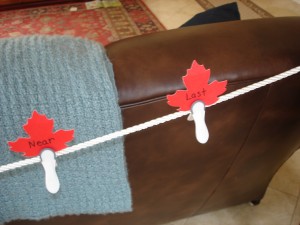
My Obstacle Course station idea: clothesline clipping opposite words

My Obstacle Course activity stations can transform any room into one where flat surfaces become work spaces for sorting, sequencing or matching.  Chairs hold a clothesline so opposites, rhymes or function words can be clipped together.  Crawling, jumping, ball tossing are paired with math and language concepts as part of the fun and learning.

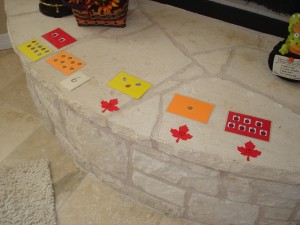
My Obstacle Course station idea: combining sticker cards to make a given number

My Obstacle Course is an event where you and your child are spending quality time working together on the skills and concepts that they need and are ready for.

  • The skills and concepts are specific to where your child is developmentally, not where they are “supposed” to be purely based on their chronological age.
  • My Obstacle Course allows you to work on the peaks and valleys that exist in your child’s learning without insulting them.
  • It is important to work on your child’s strengths, not only focusing on their weaknesses.
My Obstacle Course station idea: using tweezers to move colored puffs out of shredded paper (we were actually pretending they were baby spiders needing to get back with their mom)

Check my blog often to get activity station ideas!

« Previous Page

Primary Sidebar

Obstacle Course Mom’s Blog

  • When People Stare, Mind Your Own Business
  • ABC’s of Peaceful Parenting Tele-class
  • What’s Perfect About This?
  • Exciting News!
  • Halloween

Categories

  • Blog
  • Cool Tool
  • Fine Motor
  • Getting Started
  • Gross Motor
  • Literacy
  • Math
  • My Obstacle Course Station Ideas
  • Oral Motor
  • Problem Solving
  • Sensory
  • Social Skills
  • Uncategorized

Archives

  • July 2012 (1)
  • May 2012 (1)
  • January 2012 (1)
  • November 2011 (2)
  • October 2011 (12)
  • September 2011 (14)
  • August 2011 (15)
  • July 2011 (19)
  • June 2011 (18)
  • May 2011 (21)
  • April 2011 (20)
  • March 2011 (22)
  • February 2011 (19)
  • January 2011 (21)
  • December 2010 (22)
  • November 2010 (6)

Meta

  • Log in
  • Entries feed
  • Comments feed
  • WordPress.org