• Skip to primary navigation
  • Skip to main content
  • Skip to primary sidebar

My Obstacle Course: Engage, Encourage and Empower

A fun, structured, systematic way to work on your child's strengths and weaknesses at home!

  • Welcome to My Obstacle Course!
  • What is My Obstacle Course?
  • Developmental Timelines
    • What Is My Child Ready For?
  • About Us
  • Blog
  • Contact Information

Math

Coins – Part 1

Coin Counting

Coin counting is always a bit of a challenge for young children.  I think that perhaps the way coins are used in real life creates this urgent need to get them counting different coins all together right away before they have a chance to fully grasp what the coins are and what they represent on their own. (I happened to love sorting and counting coins when I was young and would do so to entertain myself at my grandparents’ house but that’s just me!) Now that credit and debit cards are the main form of payment for many people, children’s exposure to coins and paper money is much less which makes it even more of a challenge to reinforce this concept.

I have heard “Ughhh!” and “Oh no! He/she just cannot grasp this!” from parents when the concept of working on money comes up (same thing happens with the concept time!) but I want you to know that there are fun ways to build this skill at home with your child. I have a number of different ideas and will do separate posts on them so as not to overwhelm you with information.

Start At A Skill They Can Handle And Build From There

When introducing a new skill or if I know that Andrew is learning about something in school but don’t know how much he fully understands it, I start at a skill I know he can handle. The first My Obstacle Course station activity to work on coins with Andrew involved sorting the coins to make sure that he could recognize the difference between them. This is what we did…

My Obstacle Course Station Activity: Coin Sorting

The materials for a coin sorting station: coins, cups, bowls or plates to sort into and index cards (or Post-It Notes) to label where the coins go.

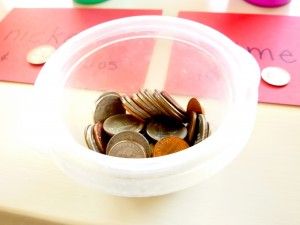
I provided a small cup of coins,

Coins (pennies, nickels, dimes and quarters)

had some sorting cups (I love to use the colorful cups that come with Easter Egg Dying Kits!) with the word label, monetary value written and a sample coin in front so he could match it up to make sure he was sorting it into the correct bowl…

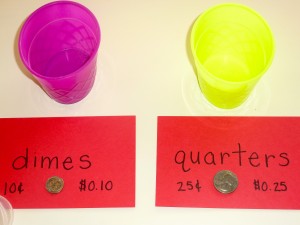
Cups with index card labels providing the name of the coin, the value and the coin itself (just set on top).
The other two cups with their cards.
My Obstacle Course station activity: Coin Sorting

and he sorted them.  We also discussed who was on each of the coins (Abraham Lincoln – penny, Thomas Jefferson – nickel, Franklin D. Roosevelt – dime and George Washington – quarter) to help distinguish them even more from one another while also sneaking in a little history 🙂 .

My Obstacle Course station activity: Coin Sorting complete

Note: I provide the sample coin because I am not doing this to trick him or test him to see if he can do it.  I want him to be making his choices and decisions based on the information he has available – just like we do as adults!!

You could also add “How many ___?” and/or “Which has the most/least?” questions but I would see how their attention span is after sorting. Having them count the coins to answer “How many ___?” could be a station activity on its own more to build counting skills.

Tomorrow’s post will focus on the next step of coin counting. Once they are able to easily sort the coins, it’s time to count them – not mixing coins quite yet – but counting coins and their values.

Engage, Encourage and Empower!

Domino Math

If you have been following my posts, you know that one thing I try to do when putting together activities for My Obstacle Courses is use things I already have, whether they are toys, pouches or calendar cutouts.  I love it when I look around the house and find something that can help me make developmental and academic skill building fun by using it in a different way.

One Christmas, years ago, we received one of those game sets with dice, cards, dominos, chess pieces and wooden circles to be used as checkers all stored inside a wooden box.  I was trying to reduce the amount of stuff and clutter that had accumulated and found this game set just sitting in a cupboard.  While we had packed and moved it a few times, we never really used the game set for it’s original purpose. Now that I was thinking with a different mindset, trying to use things around the house to help Andrew, I was glad we still had it because of all the possibilities for the pieces inside.  The box (which was broken) went, the pieces stayed!

Domino Math

Dominos

These dominos were found in the game set and while they may not seem very exciting to you, I was thrilled! You may think that all you can do with them is line them up and watch them fall down…

Lining dominos up requires steady hands and strong fine motor skills.

or match up sides that have the same.

Matching up sides that have the same amount.
Sides with same amounts matched up (4's, 3's, and 6's).

While these are both great activities for fine motor skill building (having to place them so they line up) and the latter is good for number awareness, there are other ways to use them at home, specifically to build and reinforce math skills.

I do My Obstacle Courses with Andrew so I can have fun and really engage with him. Having some unexpected tools like dominos helps to keep things interesting and since there are usually 28 in a box or package, it allows for a good deal of randomness. When I place some in a pouch and he has to reach in and take one out, neither of us know what it’s going to be and that alone turns it into a bit of a game – more fun than flash cards in my opinion! Once you have your dominos, preparing these station activities is a piece of cake!

My Obstacle Course Station Activity:  Matching Dominos With Total Number Of Dots

  • I chose 8 dominos. (The number of dominos you choose is up to you.)
  • I wrote out the total number of dots from each domino on a Post-It Note and arranged them at the station in random order.  You could put them in number order as well, I just wanted him to be really looking at the number on the paper.  Note:  Instead of writing the numbers or facts for them, you could provide a white board or chalk board and have them write the numbers or facts as they pull them out to build writing skills.
  • I placed them in the black pouch (adds some mystery!).
My Obstacle Course station activity: Matching dominos with the total number of dots.
Reach in a get a domino. Count the total number of dots ("How many dots in all?").
The first domino matched with correct number.
More dominos matched with their total number of dots.
All of the dominos from the pouch matched with their numbers.

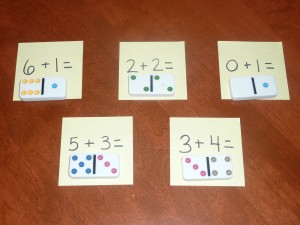
My Obstacle Course Station Activity:  Matching Dominos With Their Addition Equation

My Obstacle Course station activity: Matching dominos with addition equations.
Addition equation and domino matched up.
Dominos matched up with their addition equations.

Same activity using the colored dominos.

My Obstacle Course station activity: Match up dominos with addition equations.
A colored domino matched up with its addition equation.
Colored dominos matched up with their addition equations.

I love how easy (and inexpensive!) these activities are to set up and how by adding a little bit of mystery and randomness, they become a fun way to build math skills.

Engage, Encourage and Empower!

Sticker Cards

Two of my favorite items to use when making My Obstacle Course stations are colored index cards and stickers.  I love how they make things colorful and bright while also allowing me to change up the theme easily with stickers.

Snowflake stickers and colored index cards

Building Math Skills

Before setting up My Obstacle Courses, I always think about what skills Andrew needs to build and how I can incorporate them in a fun way.  Early on, I was thinking of the math skills he needed and was trying to find out more about what he knew.  At that point in time we were working with him on numbers (the actual number and what that number represents) and number order.  I had used some regular playing cards found in a drawer and one day had the idea of creating my own “playing cards” using index cards and stickers.  This would be a perfect way for me to combine concept and theme.

Sticker Cards:

What you need:

  • 10 4×6 index cards
  • 3 sheets of stickers from 1 package of 120 stickers (Ideally they should match but can vary a bit like these snowflakes.  I just try to not make them too busy with lots of details.)

How to:

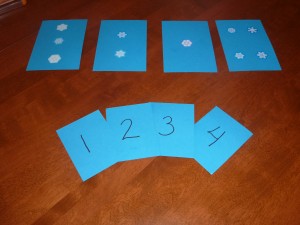
This is really easy and quick to make.  Take a card and place the same number of stickers on it as you want it to represent (ex. one sticker on the 1 card, two stickers on the 2 card, etc.).  The photo below shows my completed sticker cards in order from 1-10.  I do not put the numbers on the cards because I want to be able to see how he is counting.

Sticker cards 1-10

My Obstacle Course Station Activity Ideas:

Put sticker cards in order:

My Obstacle Course station activity: Put these cards in order from 1-10.

Matching sticker cards with numbers:

  • Choose some sticker cards and set out in a random order.  Note:  They do not have to be in order like the photo shows, you can choose whatever numbers you think will challenge your child appropriately.  (Ex.  Using 6 and 9 in the same set would let you know if they are confusing them because they look similar.  Using two consecutive number cards would show you if they are counting properly (1:1 correspondence) or if they are miscounting by counting randomly, skipping over stickers or double counting them.)
  • Make number cards that match up with the sticker cards you’ve chosen.  The numbers shown below are made with same index cards cut in half.
  • Set out the numbers for the child to match up with the sticker cards.
My Obstacle Course station activity: Match the number with the card that has the same number of stickers.
Matching up numbers with correct card.
Numbers matched up with correct sticker cards.

Make This Number:

  • I choose a number and write it down.
  • I then select sets of cards that when put together, they make that number.
  • When putting the station together, I separate the cards so that one card from each set is put out underneath the number and I mix up the other cards.   This activity is giving them the sum and one addend and they have to figure out what the other addend is!
My Obstacle Course station activity: Make This Number

How To Play:

  • When he gets there he will look at the number to make  (10 in this photo).
  • He will count the number of stickers on the first card under the number.
  • Then he will choose a second card from below that he thinks will help to make the given number.
  • He’ll count the stickers on the two cards to see if they make the number.  If he doesn’t get it, he’ll choose another one from below and see if it works.  If he gets it, he moves on to the next set, continuing until all sets are matched up.

Note:  When we first began doing this, Andrew went about this in a fairly random way but I have seen him grow and begin to strategize a bit.  I can see him really thinking about the number he is starting with and choosing his next card based on what makes the most sense.

Two cards matched up to make 10 in "Make This Number" (In this photo, 3+7 are matched together to make 10)
Cards matched up for Make This Number. Â This photo shows 9+1, 3+7, 8+2 and 4+6 which all make 10.
Andrew making 9 while doing My Obstacle course station "Make This Number."

Storage and organization:

Winter sticker cards stored and labeled

These cards are quick and easy to make yet provide many different ways to build math skills at many different levels.  I have shown you just some of the ways I have used them in my home.  I encourage you to think about the skills your child needs to build and see if there is a way to use these fun, colorful sticker cards to help!

Engage, Encourage and Empower!

Winter Themed Graph

Math was one of my favorite subjects to teach and is something that I find easy to incorporate into My Obstacle Courses with Andrew.  One of my favorite station activities is graphing.  This one activity builds many different skills – sorting (visual discrimination), arranging (fine motor skill), counting (math), and answering questions using the graph (problem solving).

My Obstacle Course station idea: Winter Themed Graph

We have made graphs with all sorts of different things and when I found these mini-cutouts I knew they would not only make this easy for me but there were so many in the package that we could do lots of different graphs showing different results.

These were my favorite and I used to be able to get them at my teacher supply store but haven't been able to find them lately. They worked well because they were small, bright and blank.
I did find these at the teacher supply store. The package has three different kinds of snowflakes and the backs are blank.
These were some that I got for our Christmas themed My Obstacle Courses, but I can still use two of the three patterns for my winter themed graph.
I would combine the cutouts and use these if I was working with someone who had trouble with visual discrimination.
These cutouts are a bit more difficult because they have similar coloring. Â I would use these with children who are working on this sort of visual discrimination.

Creating A Graph Doesn’t Have To Be Anything Fancy!

Once you have something to graph, you are almost ready.  Here’s how I set up my graphing stations for My Obstacle Courses:

Here are the materials I used to make these activity stations: Â paper, cutouts, markers (a gold photo marker for the black paper). and glue.
Start with blank sheet of paper (white or colored, printer sized or larger)
Draw a line down the left hand side (y-axis) and along the bottom (x-axis). Â The paper could be turned to make the graph the other way as well.Â
Write and underline the title.
My graph is ready! Â The numbers are on the side and the cutouts are glued on the bottom. Â Note: Â Make sure your numbers are about the same size as the cutouts or it may cause confusion if the number doesn't line up with the item amount.
The other graph numbered and labeled.

I choose how many of each specific cutout I want to have in the graph and place them in a container (small plates, cups or cupcake foils work great for this!).

That’s all the preparation necessary for this station!

Graphing Station How To:

  1. When the child gets to this station, they will sort the cutouts into the correct row.
  2. Gluing is not necessary but if you want to work on that skill, the pieces can then be glued in the row.
  3. The child counts how many in each row.
  4. Incorporate math vocabulary and answering questions either by asking your own questions or by using question cards.
Calendar cutouts used as question cards.

Sample questions:

How many ___?

How many in all?

Which one has the most/greatest?

Which one has the smallest amount/least?

Do any of the rows/cutouts have the same amount?

Completed graph with question card pile
The child flips over the card, reads (with assistance if necessary) and answers the question.

The level of difficulty can be adjusted and if you have a child who is ready for more representational thinking, you could have each cutout represent a given amount (ex. one snowflake cutout=10 snowflakes falling), even cutting snowflakes in half to make it more challenging!

I encourage you to have fun doing math with your child.  It doesn’t always have to be scary and boring.  This is such an easy thing to do and the finished graph looks cool hanging on the refrigerator or pantry door!

Engage, Encourage and Empower!

Clothesline Clipping- Ornaments

As a child I always loved playing with a little clothesline that I would tie between trees while hanging my little doll clothes on it.  When I taught kindergarten, I used a clothesline as a station center but instead of hanging clothes on it, the children used it to work on building fine motor skills of pinching open clothespins, placing pieces to be clipped in the right place and making patterns or matching items together.  They loved it and would have the cutest, serious expressions on their faces while they were working and concentrating so hard on completing this task.

Clothesline Clipping Not Always As Easy As It Looks

I decided to use it in My Obstacle Course with Andrew and got to see firsthand how challenging this is for little fingers and all that goes into taking an item and clipping it onto the line.  Adults make it look so easy!  So many things have to be done at the same time, in the right place so that the item actually stays where it belongs.  For someone with motor planning and fine motor issues, this was going to be a perfect opportunity to practice.

Make Your Own Clothesline Clipping Station:

  • clothesline (we got ours at Lowe’s)- you can cut it down to the length you have room for in your space or do what I do which is to just tie one end to the chair and then clip the other end like it is tied, allowing the remainder of the clothesline to sit on seat of the chair.
  • clothespins that you need to pinch
  • two chairs to attach each end of the clothesline to

My Obstacle Course station idea:  Clothesline Clipping Patterns

I had been wanting to work on patterns with my son and found a package with large ornament pieces, with 6 of a kind (you could also make your own with construction paper or wrapping paper, they would just be a little more flimsy).  These could be used on the floor to make patterns but they were also sturdy enough to be used in the same way but on the clothesline.  Combining two skills, one that he struggled with (fine motor planning) and one that he enjoyed doing (patterns) has been key in getting his to work on more challenging things.

Note:  Keep this in mind when you are trying to build skills your child is struggling with.  Is there a way to mix it in with something they do enjoy?

My Obstacle Course station idea: Clothesline Clipping Ornament patterns

It doesn’t take much to make an activity that your child may remember into their adult years like I did.  Once you have the materials, it takes about 2 minutes to set up – piece of cake!!

Engage, Encourage and Empower!!

Holiday Hershey Kiss Patterning

Here is a great way to motivate a child who loves chocolate to work on some patterning skills.  A VERY easy My Obstacle Course station idea that requires little in preparation other than purchasing the Kisses and with the holiday break fast approaching, I am looking for every activity I can to help me keep my son engaged in purposeful activities!

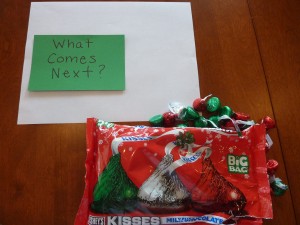
All that is needed for a Holiday Hershey Kiss Patterning Station: Holiday Hershey Kisses, a card that says "What Comes Next?" and an optional white sheet of paper used for specifying work space.

I have found that when working on patterns with my son, using the phrase, “What comes next?” works really well.  I incorporate the term “pattern” while we are doing the activity  (ex. “Oh, look at this pattern!  or “What comes next in this pattern?”) but feel like sometimes the less words I use in the directions, the better.

An "ABAB" pattern, which uses only two colors, alternating between the two (in this case, green-red-green-red).
The child adds the Hershey Kiss that comes next in the pattern...
until that pattern reaches the end of the paper or the Hershey Kisses are used up.
A Different Pattern: ABCABC . This pattern uses three colors repeated in the exact same order. The example shown is green-red-silver .
More of the ABCABC pattern.
Another pattern option: AABBCC
More of the AABBCC pattern.

These are obviously only a few of the patterning possibilities so feel free to use patterns that you feel your child can do and if it turns out to be too difficult, work through it with them!

Note:  My son does not like chocolate, in fact when he was younger, I have a vague memory of chasing him around our Phoenix apartment trying to get him to eat chocolate pudding.  He did not but I did!  Even so, I still use these holiday themed Hershey Kisses with him to practice patterning.  It helps to keep things interesting and is also a sensory activity because he slowly works up to smelling the kisses before placing them where they belong in the pattern.

« Previous Page
Next Page »

Primary Sidebar

Obstacle Course Mom’s Blog

  • When People Stare, Mind Your Own Business
  • ABC’s of Peaceful Parenting Tele-class
  • What’s Perfect About This?
  • Exciting News!
  • Halloween

Categories

  • Blog
  • Cool Tool
  • Fine Motor
  • Getting Started
  • Gross Motor
  • Literacy
  • Math
  • My Obstacle Course Station Ideas
  • Oral Motor
  • Problem Solving
  • Sensory
  • Social Skills
  • Uncategorized

Archives

  • July 2012 (1)
  • May 2012 (1)
  • January 2012 (1)
  • November 2011 (2)
  • October 2011 (12)
  • September 2011 (14)
  • August 2011 (15)
  • July 2011 (19)
  • June 2011 (18)
  • May 2011 (21)
  • April 2011 (20)
  • March 2011 (22)
  • February 2011 (19)
  • January 2011 (21)
  • December 2010 (22)
  • November 2010 (6)

Meta

  • Log in
  • Entries feed
  • Comments feed
  • WordPress.org