• Skip to primary navigation
  • Skip to main content
  • Skip to primary sidebar

My Obstacle Course: Engage, Encourage and Empower

A fun, structured, systematic way to work on your child's strengths and weaknesses at home!

  • Welcome to My Obstacle Course!
  • What is My Obstacle Course?
  • Developmental Timelines
    • What Is My Child Ready For?
  • About Us
  • Blog
  • Contact Information

Gross Motor

Jack-O-Lantern Ball

A jack-o-lantern ball like this one is a super fun addition to an October/Halloween themed My Obstacle Course! I saw one of these the other day at the grocery store and I think I got mine at Target.

Jack O Lantern Ball

Use for:

  • bouncing
  • tossing
  • catching
  • passing
  • kicking
  • rolling
  • making a basket (whether with little basketball hoop or even a laundry basket!).

Note: I use balls in the house because Andrew is not very strong with his ball skills. I say this because if he were a child who could really kick or throw, I would probably not use kicking or throwing as a station. (I saw a child at Andrew’s sports league the other day who I fully expect to see punting field goals for the pros someday with his kicking ability at age 5!) If this is the case in your house, you don’t have to scrap incorporating balls altogether. It could be used along with math facts or spelling words as a passing or rolling back and forth activity. (ex. “treat” “t” – pass/roll, “r” pass/roll, “e” pass/roll, “a” pass/roll, “t” pass/roll or you: 5+2= (pass/roll), child: 7 (pass/roll) )

Engage, Encourage and Empower!

Apple Themed Tally Mark Crawl and Match

I created this Crawl and Match activity because I wanted Andrew to begin understanding what tally marks were, how they were written and how to count them. The Crawl and Match concept can be used to reinforce a wide variety of skills and concepts, this is just one example of how I did it to build a specific math concept.

Other Concept Examples To Use With Crawl and Match:

  • letter matching (uppercase and lowercase)
  • word and picture matching (this would even be a cute way to match up classmates pictures and names)
  • color and color word or item matching
  • shape and shape word or item matching
  • beginning sound matching
  • ending sound matching
  • rhyming word matching
  • opposite word matching
  • number and number word matching
  • coins and their value matching
  • math fact and sum/difference/product/quotient matching
  • state and capital matching
I could go on and on with examples but wanted to give you some other ideas 🙂 .

My Obstacle Course Station Activity: Tally Mark Crawl and Match

I used a package of apple-shaped calendar cutouts and wrote the regular numbers on half of the cutouts and wrote the corresponding tally marks on the other half. I explained to him that each tally mark represented “1” and every fifth mark went diagonally across the other 4.

What this station looked like at our house.

He would choose an apple with tally marks on it…

Apple cutouts with tallies.

and crawl down to match them with the apple that had the correct number. Crawling requires cross patterning of the body (moving one side along with the other – like using right arm and left leg and then left arm and right leg to crawl forward) which activates both sides of the brain during this learning process – pretty cool, huh! 🙂

Apple cutouts with numbers on them at the other end of Crawl and Match.

I really like reinforcing concepts like this because it is physical work for him while building an academic skill. The distance between the items to match gives him time to process the information on his way down to make his choice.

Engage, Encourage and Empower!

Pass the “Apple”

This is a super basic activity to set up yet was one of the more challenging for Andrew. I set out a red plastic bouncy ball (the “apple”) for us to pass back and forth 10 times. A red balloon would also work well for this activity and you could make it as big or as little as your child is ready for. Of course, I told him that we wouldn’t want to drop it or throw it too hard or it could fall and get bruised (a little pretend play here!).

Red Plastic Bouncy Ball

Activity Suggestions:

  • Passing
  • Bouncing
  • Rolling
  • Tossing Up

The addition of two dice can help determine how many times this needs to be done, plus helps to build fine motor skills of shaking and rolling the dice while incorporating counting and adding the two numbers together.

Passing:

If this is challenging for your child, begin close together so that they get the practice of hands out and squeezing to catch the ball. I especially liked to use red when Andrew was working on this because it is an easy color to see and track. Once your child gets the hang of it, try it against a wall. It will probably come back faster and require a little quicker reflexes but if they are ready, go for it!

Bouncing:

Bouncing was a huge challenge with Andrew’s motor planning issues so we started with him bending over or squatting while holding the ball so that the ball was only a few inches off of the ground. He would just have to let go and then work on catching the ball which was easier because his hands were right there in a good position to catch. We also did some hand over hand at first to show him how his hands would have to move to let go of and grasp the ball. From there, he slowly worked on standing up a bit more until he got how to push down on the ball to bounce it and then get his hands ready for the catch. We are still not perfect with this but practicing and building from really basic steps helped him understand what his body needed to do as well as figuring out the timing of it all.

Rolling:

A good way to practice rolling is to sit with legs out in a V shape with your child facing you doing the same thing and touching your feet together so the ball cannot roll away.

Note: I am not an Occupational Therapist. These are just ideas and suggestions that worked for us at home while building these skills. If your child sees an OT, ask them for recommendations on how to build ball skills they are working on in therapy at home.

Engage, Encourage and Empower!

Sports Themed My Obstacle Course Idea #4

Oops!

When I opened the email version of my post from yesterday, I realized that I was not really clear about  the link I had provided for the sports activities page. It was the very first link (in green on my website, purple if you subscribe). You can also click here for it: Enchanted Learning’s Sports Activities. Sorry for any confusion!!

Sports Cutouts from Creative Teaching Press

I also wanted to share some small (1 inch) sports cutouts that I got from Creative Teaching Press. I would use these in ways similar to how I use the felt stickers I shared earlier this week. They come in a package of 150 (25 of each sport) and are perfect for stations working on patterning, graphing, sorting or counting. (Note: I do not have any affiliation with Creative Teaching Press. I just love their materials and find them so helpful in making thematic station activities.)

Use What You Already Have!

The final post for a sports themed My Obstacle Course is just a reminder to look around your child’s toy box, your house or your garage for different kinds of balls you already have that can be incorporated into stations.

Important Note: If you have a child with a good throwing arm or a powerful kick, you may want to incorporate ball activities as “outside” stations. That is not something we have a problem with 🙂 so I make sure to include balls in our My Obstacle Courses to build bouncing, tossing, catching, rolling, and kicking skills.

Red bouncy ball.
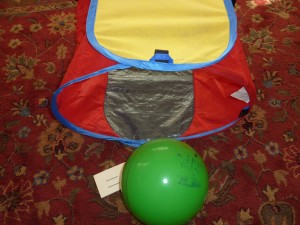
Green bouncy ball.
Green ball to be rolled back and forth through the tunnel.
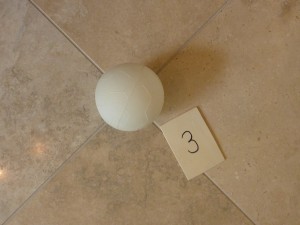
Small white ball originally meant for pool volleyball. We called it a snowball and used it for tossing and catching something smaller.
No balls? Bean bags or rolled up socks work too! Building tossing skills by tossing socks into a bin.

I like to combine ball skills with academic skills to provide more of a purpose for Andrew since kicking the ball back and forth with me is not a preferred activity. When he was younger, we would pass the ball while taking turns counting or saying the alphabet. We progressed onto counting by 10’s, 5’s and 2’s or spell out words as we’d pass the ball.

I hope that those of you with children who are crazy about sports found some ways to combine their love of sports with building some different, academic skills. Next week I will focus on some back to school tips and strategies.

Engage, Encourage and Empower!
Sports Themed My Obstacle Course Idea #3

Enchanted Learning Website – Sports Theme

I have mentioned this website before (click here for previous Enchanted Learning post) because I love how easy they make it to be thematic while building academic skills. It is a subscription site with some free materials but I have found it to be worth the fee for what I do with Andrew and My Obstacle Course.

My intention is to provide you with some alternatives for what would typically be worksheet, pencil/paper activities. If your child is into that, than by all means go for it! I have just found that with Andrew, the more engaged he is, the more willing he is to put time and energy into building skills in all areas.
I will often cut the pages apart to create crawl and matching stations or combine them with Scrabble letters to get him more involved with actually making words.

Based on the activity sheets that they have on the page I’ve linked to above (there are lots!), these are some ways I would incorporate them into a sports themed My Obstacle Course:

  • Matching pictures with words from the “Sports Word Wheel” or the “Match Sports Words with Pictures” pages (I would cut them apart and combine with clothespins)
  • Combining syllables to make sports words (combine with crawl and match station)
  • Filling in missing letters to form sports words (I’d use the pictures and combine them with Scrabble letters)
  • Unscrambling letters to form sports words (I’d use the pictures and combine them with Scrabble letters)
  • Using the sports question page, I would cut apart the words, set them out and use it as a questioning station where I ask him the question and have him choose the correct word.
  • ABC order page, I would cut apart the words and have him actually put them in ABC order. If this was a challenge, I would include a written out alphabet to use as a reference.
  • Compound words – I’d either cut them apart or use this sheet as a sample and write out the word parts on small index cards or Post-It notes so he can combine them to form the words.
  • There are also a ton of anagram activity pages, which use the letters from one word to create another word. I would use Scrabble letters with something like this and would only do a few anagrams at a time as a station, starting with some smaller, easier words to introduce this to him.
  • I would use the “Sports Alphabet Code” page as is.
  • I would cut out the words at the top of the Venn Diagram page but would keep the bottom section as is and have him sort the words into the correct section.
Note: I do not have any affiliation with Enchanted Learning. I discovered their site while teaching 3rd grade, loved using it with my students for research purposes and found it to be extremely helpful when working with Andrew at home.
Engage, Encourage and Empower!!

Plunger + Dive Rings = Summer Themed Ring Toss

This is an activity idea I got from the Recycling Occupational Therapist: (http://recyclingot.blogspot.com/2009/06/plunger-ring-stack-activity.html)

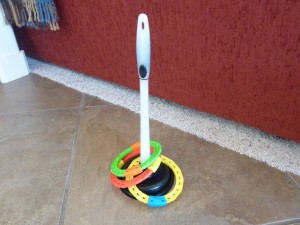
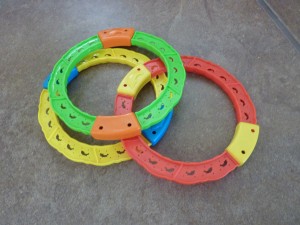
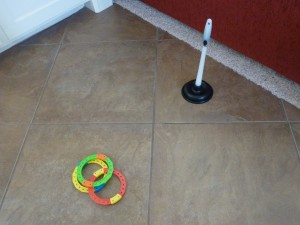
She had posted about using a plunger for ring stacking and when I was at Target, I found these dive rings in the dollar section (I also grabbed an inexpensive new plunger. 🙂 ). While the dive rings are meant to go into a pool, combined with a plunger, they make a fun, super inexpensive, summer themed ring tossing game! This is a great way to work on tossing, motor planning, and can be set up almost anywhere you have a flat surface to suction the plunger to!

Plunger
Dive rings from dollar section of Target
My Obstacle Course Station Activity: Dive Ring Toss
Rings tossed!

We will start as close as we need to get the idea of how to toss, how hard, etc. and move back slowly to build this skill. Finger placement, hand/wrist movement and timing the release of the ring are all necessary for this activity. Having just tried a game of horseshoes with him, which is similar, we will probably be standing pretty close for a while and that is okay! I want him to get a chance to experiment, see what happens when he tries different approaches and work on the motor planning of this as much as he needs. We did this in front of a couch and it worked well for stopping some of the more “enthusiastic” tosses :).

Engage, Encourage and Empower!
 

Next Page »

Primary Sidebar

Obstacle Course Mom’s Blog

  • When People Stare, Mind Your Own Business
  • ABC’s of Peaceful Parenting Tele-class
  • What’s Perfect About This?
  • Exciting News!
  • Halloween

Categories

  • Blog
  • Cool Tool
  • Fine Motor
  • Getting Started
  • Gross Motor
  • Literacy
  • Math
  • My Obstacle Course Station Ideas
  • Oral Motor
  • Problem Solving
  • Sensory
  • Social Skills
  • Uncategorized

Archives

  • July 2012 (1)
  • May 2012 (1)
  • January 2012 (1)
  • November 2011 (2)
  • October 2011 (12)
  • September 2011 (14)
  • August 2011 (15)
  • July 2011 (19)
  • June 2011 (18)
  • May 2011 (21)
  • April 2011 (20)
  • March 2011 (22)
  • February 2011 (19)
  • January 2011 (21)
  • December 2010 (22)
  • November 2010 (6)

Meta

  • Log in
  • Entries feed
  • Comments feed
  • WordPress.org