• Skip to primary navigation
  • Skip to main content
  • Skip to primary sidebar

My Obstacle Course: Engage, Encourage and Empower

A fun, structured, systematic way to work on your child's strengths and weaknesses at home!

  • Welcome to My Obstacle Course!
  • What is My Obstacle Course?
  • Developmental Timelines
    • What Is My Child Ready For?
  • About Us
  • Blog
  • Contact Information

Fine Motor

Cookie Cutter Decorating

While I love to cook, I cannot bake.  When I say I cannot bake, I mean I really cannot bake, not even cookies you drop onto a tray. This has been an issue all of my life and whenever I get up the courage to try again, I always end up with cookies that are either still raw or very crunchy (my husband kindly refers to them as “cookie crackers”).  At first I thought it was the oven but when my mother came to visit she was able to bake cookies just fine.  I think it’s just me and I am fine with that.

Providing Opportunities

I tell you this because while “everyone” else was baking and decorating Christmas cookies with their children, we didn’t do that in our house. Now, I don’t beat myself up too badly because I am pretty sure that even if I did bake cookies, Andrew would have very little interest in helping me decorate for more than a minute.  What I feel strongly about is giving him the same opportunities as other children, I just have to structure it differently.  I knew that if I created a cookie decorating station as part of My Obstacle Course, he’d only have to engage in this for a short time but would still get the chance to experience this holiday activity.

Since I don’t bake, I don’t have a lot of baking tools so while I was at our grocery store I purchased a fairly inexpensive cake decorating kit with different tips on it (I think it was $2.99), some holiday shaped cookie cutters and some whipped frosting.  I decided not to get actual cookies to decorate (which you could) but figured I could have him use the cookie cutters instead.  The cookie cutters provide a specific place to put the frosting so he doesn’t have to worry about it looking one way or another and the task was specific – “Fill the cookie cutter with frosting.”  I placed a cookie sheet underneath the cookie cutters to create an easy to clean work surface but you could go one step further and use either a piece of waxed or parchment paper or a paper plate.

Memories + Skill Building

Once I got thinking about this I realized that in addition to getting the chance to use a different kind of tool, he was also going to be working through some sensory discomfort (frosting on hands/fingers and the sweet smell of the frosting) while working on fine motor skills (squeezing the plastic bag so the frosting comes out) and planning (moving his hands back to the top, squeezing the frosting back down when the bottom was empty).  Anytime I can find an activity that targets lots of different skills like this I am thrilled!!

Cookie Cutter Decorating Station

My Obstacle Course station idea: Cookie Cutter Decorating

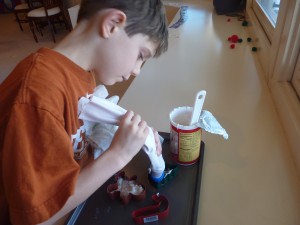
This was a very easy station to set up (the photograph above shows exactly what it looked like when we did it last week) and all I had to do was gather the materials.  I used the spatula to help scoop the frosting into the cake decorating bag and got some damp paper towels ready for him to wipe his hands when necessary.  He was very curious about this station and I first showed him how it worked, what to do and did some hand over hand to give him an idea of the amount of pressure needed to squeeze frosting out into the cookie cutter.  After that it was trial and error to figure out the best way to do it.

I am holding the top at first while he figures out how to squeeze the frosting to fill the inside of the cookie cutter.
He's not quite got it yet. Â His fingers are still sitting lightly on the bag, using very little pressure. Â I showed him how to squeeze with his fingers to get more frosting out of the bag.
Now he's got the hang of it! Note the change in hand position and the squeezed fists- great fine motor work!! Also note the wet paper towels nearby to help with the sticky frosting.
He is taking this task very seriously. It is something that has a beginning, an end and he knows what the expectation is - fill those three cookie cutters.

Extensions:

  • Change the tips of the decorator to compare and contrast them.
  • Use the decorator to make shapes, different kinds of lines (straight, wavy, horizontal, vertical, etc.), letters or numbers with the frosting.

Just A Thought: There are many things that we do that are a little bit different from other people and that is okay.  I always say, our normal is different from other people’s normal and when you think about it, everyone’s normal is different and that’s what keeps things interesting!!  Embrace your own normal today 🙂 !

Engage, encourage and empower!!

Gingerbread Man Activity- No Baking Required!

This past week, with the holiday season upon us, I have noticed things related to gingerbread men and gingerbread houses all around me.  It reminded me of an activity I did with Andrew in one of My Obstacle Courses.

One of my favorite websites to get thematic ideas and printable materials is www.enchantedlearning.com.  I don’t usually use the print outs as they are unless I am working on a specific skill but I do like the literacy and math skills that they help build.  To make it more kid-friendly and interactive, I like to use thematic shapes and/or colored index cards, cutting and pasting the words and/or pictures on to create a matching activity.

Gingerbread Man Story- Matching Words with Clues

Words cut and pasted onto index cards cut in half.
Word clues cut and pasted onto precut gingerbread men.
My Obstacle Course station idea: Clothesline Clipping words with their clues

I used this as a clothesline clipping activity to incorporate fine motor skills with a literacy skill but it could also be used along with “Crawl and Match” or “Climb and Match” to combine literacy and gross motor skills.

Clothesline Clipping- Ornaments

As a child I always loved playing with a little clothesline that I would tie between trees while hanging my little doll clothes on it.  When I taught kindergarten, I used a clothesline as a station center but instead of hanging clothes on it, the children used it to work on building fine motor skills of pinching open clothespins, placing pieces to be clipped in the right place and making patterns or matching items together.  They loved it and would have the cutest, serious expressions on their faces while they were working and concentrating so hard on completing this task.

Clothesline Clipping Not Always As Easy As It Looks

I decided to use it in My Obstacle Course with Andrew and got to see firsthand how challenging this is for little fingers and all that goes into taking an item and clipping it onto the line.  Adults make it look so easy!  So many things have to be done at the same time, in the right place so that the item actually stays where it belongs.  For someone with motor planning and fine motor issues, this was going to be a perfect opportunity to practice.

Make Your Own Clothesline Clipping Station:

  • clothesline (we got ours at Lowe’s)- you can cut it down to the length you have room for in your space or do what I do which is to just tie one end to the chair and then clip the other end like it is tied, allowing the remainder of the clothesline to sit on seat of the chair.
  • clothespins that you need to pinch
  • two chairs to attach each end of the clothesline to

My Obstacle Course station idea:  Clothesline Clipping Patterns

I had been wanting to work on patterns with my son and found a package with large ornament pieces, with 6 of a kind (you could also make your own with construction paper or wrapping paper, they would just be a little more flimsy).  These could be used on the floor to make patterns but they were also sturdy enough to be used in the same way but on the clothesline.  Combining two skills, one that he struggled with (fine motor planning) and one that he enjoyed doing (patterns) has been key in getting his to work on more challenging things.

Note:  Keep this in mind when you are trying to build skills your child is struggling with.  Is there a way to mix it in with something they do enjoy?

My Obstacle Course station idea: Clothesline Clipping Ornament patterns

It doesn’t take much to make an activity that your child may remember into their adult years like I did.  Once you have the materials, it takes about 2 minutes to set up – piece of cake!!

Engage, Encourage and Empower!!
Hammer Away!

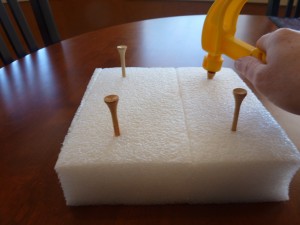
My Obstacle Course Station Idea: Golf Tee Hammering (note the directions written out- it's not me telling you what to do, it's the paper!)

I love this activity and have used it with my kindergarten students as well as with my son.  So easy and so fun!

What You Need For A Hammering Station:

a sturdy piece of foam, like the kind found protecting electronics while in the box - be on the lookout while people are opening gifts next week!!
some golf tees
a toy hammer

These three things, put together, help build fine motor skills as well as motor planning.

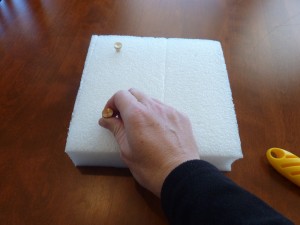
Make sure the foam is thicker than the tee so that the surface underneath does not get ruined.
Start by pushing the tee in just a bit.
Your child uses the hammer to strike the tee.

If they have difficulty with this, help them by placing your hand over theirs (called “hand over hand”) and striking the tee together.

They keep hammering until the tee is almost all the way down.
All of the tees are hammered in!
Another fine motor building activity- pulling them out!!

Handwriting Helpers

My Obstacle Course Station: "Finding What's Different"- using a triangular crayon to build fine motor skill of circling

Need To Help Your Child build Fine Motor Skills?  You’re Not Alone!

One thing that has come up over and over again when working with other parents is a desire to build fine motor skills with their children.  Since I also have a child who has difficulties with fine motor skills, handwriting in particular  (he didn’t start writing letters until he was 6 and we are still working on legibility), I have searched for and tried lots of things to help him.  Some of them worked great for him others not so much.  As with most things, finding something that will work for your child is a bit of trial and error but when you do find something that works, it is worth it!

Personal Note:  I was in a bit of denial about Andrew’s fine motor skill weakness, since he could spin a dime with no problem, and just thought he was just a child who wasn’t too interested in drawing or writing.  It wasn’t until he became school-age and he wasn’t even close to being able to write letters or numbers that we could see it was a weakness in several issues like planning and applying pressure.  I thought about the motor planning involved in doing something like handwriting that I realized he needed help practicing at home as well with an Occupational Therapist.  Looking back, this all makes sense considering he has issues in another developmental area that requires lots of planning and very particular fine motor skills- speech!

Handwriting Helpers:  Tools To Help With Finger Placement

One major issue that Andrew has with handwriting is finger placement.  You may have seen these crayons and markers in the arts and crafts aisle of your local department store and thought that making them triangular in shape was just the new craze.  I think that the crayon and marker manufacturing companies are realizing the increased need for building fine motor skills that don’t involve pushing a button, toggle or touch screen.  The shape of these crayons and markers actually help place your child’s fingers in the proper position with each of the first three fingers (thumb, pointer and middle fingers) getting their own side.

Triangular Crayon
Proper finger placement is easy with this shape- each finger gets a side.
Using the Triangular Crayon to write
Triangular Marker by Crayola

Auditory and Visual Cues Learned From Andrew’s Handwriting Camp OT: Andrew attended a “Handwriting Camp” this past summer and the Occupational Therapist teaching it divided the fingers into “go” fingers (thumb, pointer finger and middle finger) which are allowed to touch the tool and “stop” fingers (the fourth finger and the pinkie) which don’t touch the writing tool.  She even put a green and red marker dot on their fingers so they would have a visual cue!  Awesome!

Get A Grip On It!

There are pencil grips that you can place on the pencil that helps position the fingers.

Pencil Grip
Grip positioner on pencil
Writing with fingers placed in grip

Click here to access an Amazon.com link for these grips.

This next pencil grip tool, the Writing C.L.A.W., is the tool that helps Andrew with his writing.

Finger tip pencil grip called the Writing C.L.A.W.
Where your fingers go in this pencil grip
Grip on pencil
Fingers in grip- you may have to help them get their fingers in the right spot but once in, they can only be in the correct writing position.
Writing with fingers in pencil grip

Click here to go to the Writing C.L.A.W. website.

Note:  I do not have any associations with these companies, I am just sharing what I have found useful and would recommend to help other people like me.

This post is only focused on some of the tools I have found.  There are so many more activities and items to help with fine motor skills so check back often to see what I have found and used in my home with my child!!

Button Sorting

Years before I had Andrew, I was a teacher.  I taught kindergarten for 4 years and loved it!  I loved it because of the emphasis on play and discovery when given common household items, such as buttons.  One year I requested that families send in any unused buttons that they may have lying around their drawers or sewing kits.  I filled half of a shoebox with a marvelous collection of buttons.  The children would have a ball playing with and sorting the buttons.  They were encouraged to find new and unique categories for a button sort.  An activity like this helps with visual discrimination and also basic problem solving, being able to group like items in a logical manner.  My students always had so much fun doing this!

Now this might just be me, but when I was a child, I loved playing in button boxes.  I recall mine being stored in an old cigar box and remember quite clearly how it was kind of a treasure hunt each time the box was opened.  I would sort them by color, shape, size and the number of holes they had.  I have my own collection of buttons now to use in the same way with Andrew and you may have your own that you can use with your child.

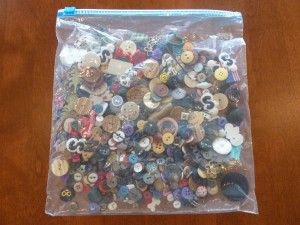
My Button Bag

Using buttons as a station in My Obstacle Course:

  1. Pour some of your buttons into a bowl
  2. Look to see what ways they could be sorted and choose 3 or 4 ways, including a misfit category for any buttons that don’t belong in the other categories
  3. Write those categories on a piece of paper or on an index card, providing a picture clue as well (nothing fancy, anyone who has seen me draw knows I am an expert at stick figures!).  This not only helps them to know how to sort, but also shows them what the category word looks like.
  4. Provide a specific place for them to place the buttons- muffin liners and the cups from Easter Egg dying kits work great!

This only takes a few minutes and you have a station ready for them to get sorting!

No Buttons?  No Problem!

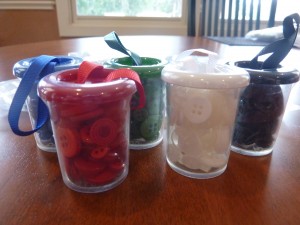
I was at Michael’s the other day and in the $1 section I came across these cute containers of buttons.  Each one held buttons of a certain color and when I looked closely, there were a variety of sizes, they had different styles and had either 2 or 4 holes.  They came in red, black, blue, white and green and I thought they would be perfect for an Obstacle Course sorting station!

Containers of buttons found at Michael's Arts and Crafts store
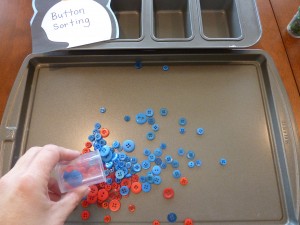
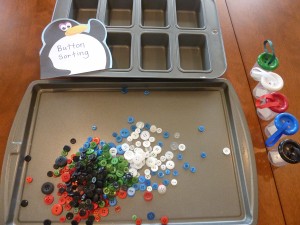
Pouring the buttons onto a rimmed cookie sheet so they can be sorted while also stay contained.
More buttons!
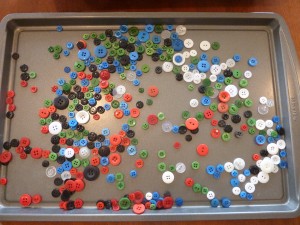
All of the button containers emptied onto the tray.
Mix the buttons well and then they are ready for sorting. Just choose how you want your child to sort them- color, size, number of holes?

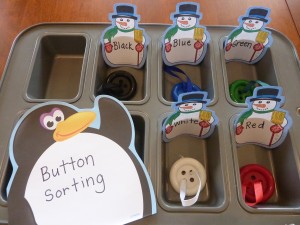
Sorting By Color

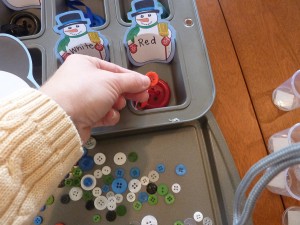
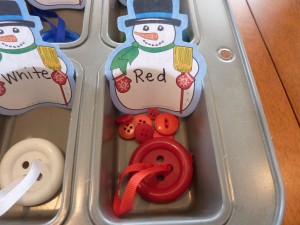
Using a small loaf pan to sort buttons by color. Â Paper cups or styrofoam bowls work just as well if not better because you can write the color directly on them! Â I also used the container lids as a visual cue as to go along with the color word.
A cute, small pad of paper and a pen are all you need to add some literacy to this activity.
Your child can go through the buttons, sorting them one color at a time (like Andrew would) or each button as it is picked up.
Red buttons!

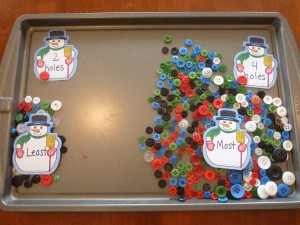
Sorting By the Number of Holes

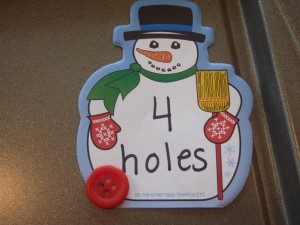
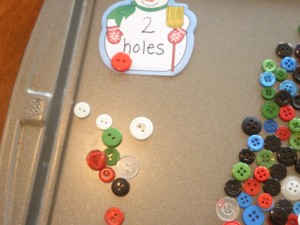
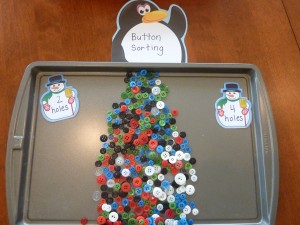
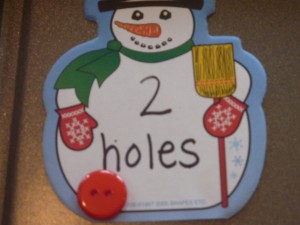
Using the cookie tray to sort buttons by number of holes, 2 or 4. I used the snowman pad of paper to make an easy label for how to sort.
2 hole label and button
4 hole label and button
Buttons sorted with 2 holes
All buttons sorted by number of holes.
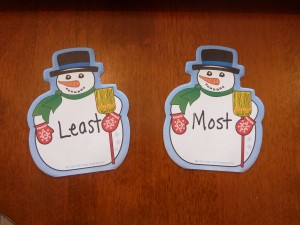
Use the pad of paper to incorporate math vocabulary "most" and "least"
Have your child place the "most" and "least" labels on the correct pile.

Extension:

After the buttons are sorted you could have your child count them, one by one if that is what they are able to do, or by groups of 2, 5 or 10 to work on skip counting.

« Previous Page
Next Page »

Primary Sidebar

Obstacle Course Mom’s Blog

  • When People Stare, Mind Your Own Business
  • ABC’s of Peaceful Parenting Tele-class
  • What’s Perfect About This?
  • Exciting News!
  • Halloween

Categories

  • Blog
  • Cool Tool
  • Fine Motor
  • Getting Started
  • Gross Motor
  • Literacy
  • Math
  • My Obstacle Course Station Ideas
  • Oral Motor
  • Problem Solving
  • Sensory
  • Social Skills
  • Uncategorized

Archives

  • July 2012 (1)
  • May 2012 (1)
  • January 2012 (1)
  • November 2011 (2)
  • October 2011 (12)
  • September 2011 (14)
  • August 2011 (15)
  • July 2011 (19)
  • June 2011 (18)
  • May 2011 (21)
  • April 2011 (20)
  • March 2011 (22)
  • February 2011 (19)
  • January 2011 (21)
  • December 2010 (22)
  • November 2010 (6)

Meta

  • Log in
  • Entries feed
  • Comments feed
  • WordPress.org