• Skip to primary navigation
  • Skip to main content
  • Skip to primary sidebar

My Obstacle Course: Engage, Encourage and Empower

A fun, structured, systematic way to work on your child's strengths and weaknesses at home!

  • Welcome to My Obstacle Course!
  • What is My Obstacle Course?
  • Developmental Timelines
    • What Is My Child Ready For?
  • About Us
  • Blog
  • Contact Information

Fine Motor

Domino Math

If you have been following my posts, you know that one thing I try to do when putting together activities for My Obstacle Courses is use things I already have, whether they are toys, pouches or calendar cutouts.  I love it when I look around the house and find something that can help me make developmental and academic skill building fun by using it in a different way.

One Christmas, years ago, we received one of those game sets with dice, cards, dominos, chess pieces and wooden circles to be used as checkers all stored inside a wooden box.  I was trying to reduce the amount of stuff and clutter that had accumulated and found this game set just sitting in a cupboard.  While we had packed and moved it a few times, we never really used the game set for it’s original purpose. Now that I was thinking with a different mindset, trying to use things around the house to help Andrew, I was glad we still had it because of all the possibilities for the pieces inside.  The box (which was broken) went, the pieces stayed!

Domino Math

Dominos

These dominos were found in the game set and while they may not seem very exciting to you, I was thrilled! You may think that all you can do with them is line them up and watch them fall down…

Lining dominos up requires steady hands and strong fine motor skills.

or match up sides that have the same.

Matching up sides that have the same amount.
Sides with same amounts matched up (4's, 3's, and 6's).

While these are both great activities for fine motor skill building (having to place them so they line up) and the latter is good for number awareness, there are other ways to use them at home, specifically to build and reinforce math skills.

I do My Obstacle Courses with Andrew so I can have fun and really engage with him. Having some unexpected tools like dominos helps to keep things interesting and since there are usually 28 in a box or package, it allows for a good deal of randomness. When I place some in a pouch and he has to reach in and take one out, neither of us know what it’s going to be and that alone turns it into a bit of a game – more fun than flash cards in my opinion! Once you have your dominos, preparing these station activities is a piece of cake!

My Obstacle Course Station Activity:  Matching Dominos With Total Number Of Dots

  • I chose 8 dominos. (The number of dominos you choose is up to you.)
  • I wrote out the total number of dots from each domino on a Post-It Note and arranged them at the station in random order.  You could put them in number order as well, I just wanted him to be really looking at the number on the paper.  Note:  Instead of writing the numbers or facts for them, you could provide a white board or chalk board and have them write the numbers or facts as they pull them out to build writing skills.
  • I placed them in the black pouch (adds some mystery!).
My Obstacle Course station activity: Matching dominos with the total number of dots.
Reach in a get a domino. Count the total number of dots ("How many dots in all?").
The first domino matched with correct number.
More dominos matched with their total number of dots.
All of the dominos from the pouch matched with their numbers.

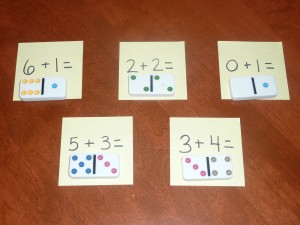
My Obstacle Course Station Activity:  Matching Dominos With Their Addition Equation

My Obstacle Course station activity: Matching dominos with addition equations.
Addition equation and domino matched up.
Dominos matched up with their addition equations.

Same activity using the colored dominos.

My Obstacle Course station activity: Match up dominos with addition equations.
A colored domino matched up with its addition equation.
Colored dominos matched up with their addition equations.

I love how easy (and inexpensive!) these activities are to set up and how by adding a little bit of mystery and randomness, they become a fun way to build math skills.

Engage, Encourage and Empower!

Stamping

My Obstacle Course station activity: Stamping the word "apple" during an apple themed course

This is one of Andrew’s favorite My Obstacle Course station activities and when I think back to when I taught kindergarten, it was one of their favorite “center” activities as well. There is just something about stamping that children seem to enjoy, perhaps it seems like grown-up activity or is something they rarely get to do. I’m not sure why, but stamps have always been a hit with the children I’ve worked with.

Note: “Centers” are stations that teachers set up and the children rotate through in order to strategically work on different skills.

Building Fine Motor Skills

While Andrew is extremely strong, his grasp is weak and so I am always on the lookout for ways to build strength in this area. When using a stamp, you have to grasp the stamp, push the stamp into the ink and then apply pressure when stamping on paper.

Grasping a stamp helps build fine motor skills by squeezing fingers together to hold the stamp evenly.

Combining Strengths And Weaknesses For Building Skills In Multiple Areas

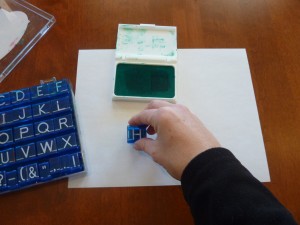
I found these letter stamps at a teacher supply store and knew that with Andrew’s love of letters and words, they would be perfect for motivating him to work on this fine motor weakness while he’s focused on something that is a strength. Note: The reverse of this would also be true so if you have a child who has great fine motor strength but struggles with letters and words.

My Obstacle Course Stamp Stations

When setting up my stamping station as part of My Obstacle Course, I provide the stamps, stamp pads (I made sure to get washable ink so I wouldn’t have to worry about finding permanently stamped letters on the floor or tables.), paper to stamp on and also paper towels to use either to wipe off ink when switching ink colors or as a place to “hold” the stamps until you are ready to place them back in the case.

Supplies for stamping station: paper, stamps and washable ink
My Obstacle Course station activity: Stamping space words
My Obstacle Course station activity: Stamping ocean words to go with the sticker

Stamping suggestions:

  • Stamping names
  • Stamping words to go with your theme
  • Stamping vocabulary words from a story or as part of a unit study
  • Stamping spelling or word study words

If you are looking for a fun way to engage with your child while incorporating fine motor skills and literacy, I encourage you to try setting up a stamping station!

Engage, Encourage, Empower!

Building Scissors Skills

The fine motor skill of cutting is something that is difficult for many young children and Andrew was no exception.  I had gotten some children’s scissors but it was really difficult to get his fingers into the holes in the right position.  In addition to that, there is the whole skill of opening and closing the scissors using the fingers.  These challenges don’t even take into consideration the planning necessary to have the scissors where they need to be to cut where they are supposed to be cutting!

Loop scissors

I found these Loop scissors at the teacher supply store and thought they were fabulous.  They come in different sizes and since there are no holes, he can place his thumb on one side (the top side when cutting) and the rest of his fingers on the other side and squeeze.  This allows him to build the motor skill of squeezing and releasing his hand so the scissors open and close to cut the paper.  (Use hand over hand if your child is at the beginning stages or if they need help with feeling how much pressure is needed.)  These scissors remove one challenge but still allows him to work on planning where to put the scissors to cut where he wants to cut.  There is time for him to work on using traditional scissors but for now we are using any tool we find that helps him build skills at his level.

Making Scissor Skills Interesting To Someone Not Interested In Arts And Crafts

Now that we had a great tool, I needed an interesting way to help him build his cutting skills.  Since he is not the kind of child who is into arts and crafts projects, I have to find ways to sneak it in while capturing his attention with something that does interest him.

My Obstacle Course station activity: Cut out the ceiling fans. Put them in order from your most favorite to your least favorite. (Note: Andrew loves ceiling fans and so this was very motivating for him.)

Drawing brightly colored, thick lines around the area to cut helps to provide some structure.  It helps him to see where he is supposed to cut, gives him something to focus on and helps reduce frustration caused when he accidentally cuts through the picture!

My Obstacle Course station activity: Â Cut out three books you would like to read.
My Obstacle Course station activity: Cut on the line and sort the pictures into people, places or things. (Note: This is from Reading A to Z's website which has materials to reinforce and build literacy skills.)

If you have a child who is not crazy about working on scissors skills, think about what they like or what they are into and have them cut out things that go along with their interests, like Andrew cutting out fans.  Think about using things like toy catalogs, grocery fliers, old magazines, wrapping paper, string, etc. and add some purpose by having them find specific things or amounts of things.

Some ideas for adding purpose:

  • things that they like
  • things that they dislike
  • things that are a certain color
  • pictures of animals
  • things that start with a certain letter or sound (this adds literacy)
  • things that have numbers on them (this adds math)

I encourage you to think about how you can combine things that are challenging for your child with things that are fun and interesting to them.  It doesn’t always have to be fancy or expensive.  You may be surprised what you have in your own home that could be used for a cutting station.  My kindergarten students had a blast cutting out grocery items from the newspaper advertisements, pretending to make grocery lists and I bet you they didn’t even know they were doing it to work on their cutting skills!

Engage, Encourage, Empower

A Bit Of Mystery and Intrigue

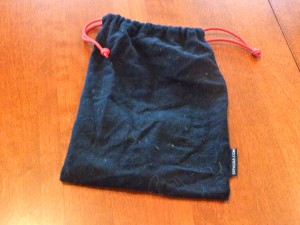
So, I have this black pouch.  It is sitting on the table as part of a My Obstacle Course station.  Are you curious as to what is inside of it?  I’ll give you a hint.  It has a bunch of something inside, something I’m sure every house has.  Think you know?  I’ll let you know if you are right…later!

Mysterious black pouch

I am a huge fan of The Amazing Race and was thinking how part of the intrigue of the show was the clue being hidden inside of the envelope.  The teams don’t know what is going to happen until they open the clue and find out. They race up, open it and can barely read it aloud because they are so out of breath.  Mystery and intrigue seem to be a common characteristic among popular reality shows and it made me think about what people were willing to do in order to get to the next stage or get the next clue.  This was a huge inspiration to me when I created My Obstacle Course for my son.  He needed something a bit different that would motivate him and I wanted a way to build his skills.  He needed structure, I decided to make it fun by adding some mystery and intrigue!

How do I do this for My Obstacle Courses in my home?  It really is quite simple.  I went on a bit of a hunt around my house, mostly in drawers, cupboards and closets.  I was looking for things that could hold and hide station materials or items.

I found an old lunch box,

Lunchbox

an eyeglass case,

An eyeglass case is perfect for holding puffs or other small items.
An eyeglass case not only holds small items but also requires fine motor skills to open it.

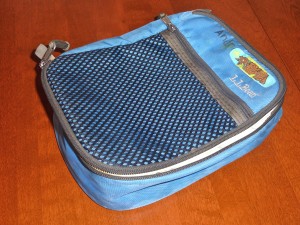
and some make-up bags I had received as “free gifts” with a purchase.

Zip up pouch
Clear plastic zip up pouches

These were perfect for stations with smaller pieces or calendar cutouts.  They not only held the materials but also provided an opportunity to build fine motor skills by unzipping or unsnapping.  The fact that most of the bags were quite sparkly and colorful was an added bonus!

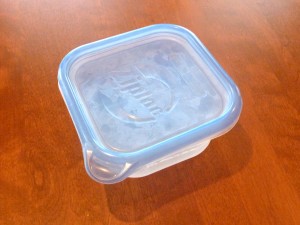
I have used plastic bags, leftover containers

Ziploc container hold items and requires fine motor skills to peel the lid off.

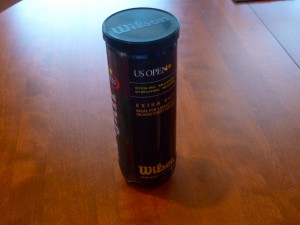
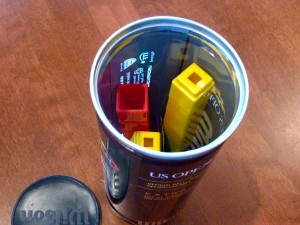
and even tennis ball cans which weren’t as mysterious because he could see through them but he still had to peel off the lid to know exactly what was going to be required of him.

Tennis ball can
Tennis ball can holding materials (counting cubes)

Larger tote bags were perfect for larger items like stuffed animals, small balls, cars and other items I used to work on building social, literacy and receptive language skills.

Tote bag for larger items

It was not only fun for Andrew to get to experience the mystery and intrigue of not always knowing what he was going to find (his face is always priceless as he scans the room to see what I’ve set out) but it was also fun for me to try and find ways to hide things so he wouldn’t know what they were.  It’s the same feeling that I get when we hide Easter Eggs or wrap gifts for him.  A bit of mystery and intrigue can make an otherwise mundane task seem more like an adventure.

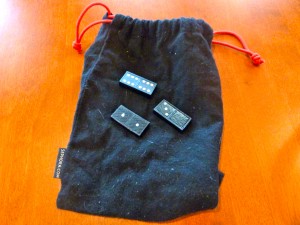
Do you have any idea what I have in the mysterious black pouch?  Check it out!!

Mysterious black pouch holding dominos -this time!

I’ll do a post soon on how I use dominos in My Obstacle Course but for now, I encourage you to add some mystery and intrigue to the time you spend with your children and go on a little hunt of your own to find ways to hide materials.  You might be surprised at what you find right under your bathroom sink!!

Engage, Encourage and Empower

Calendar Cutouts- Flip and Draw

This is a My Obstacle Course station idea that is easy to put together and makes sneaking in some fine motor/drawing skills more like a game than a “sit at the counter and practice something that’s really difficult for you” session.  That hasn’t worked for us and this is much more fun!

A My Obstacle Course Flip And Draw Station

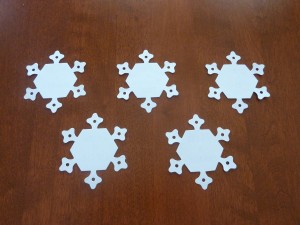
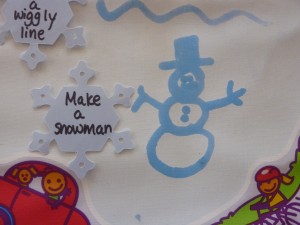
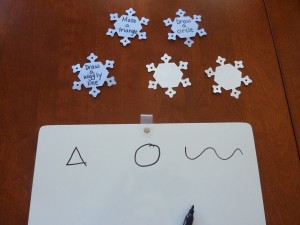
I used some calendar cutouts that I had and wrote a basic drawing skill that I wanted Andrew to work on.  This particular station was done during a winter themed Obstacle Course which explains the snowflakes.  This could also be done using index cards, strips of construction paper, ideally something that you cannot see through.

My Obstacle Course station idea: Â Flip and Draw

Some basic ideas include but are not limited to:

  • Draw a straight line.
  • Draw a wiggly line.
  • Draw a circle.
  • Draw a square.
  • Draw a triangle.
  • Make a snowman.
  • Draw a happy face.

I flip the cutouts over…

Flip and Draw Cards turned over

and when he gets to the station, he will turn over the cutout, we will read the instruction and he will try to do it.

Modifications:

Some children may need to have a model provided for them.  If so, draw the shape (or whatever the cutout says) first so they have one.  While you are drawing (the visual model) add an auditory piece by talking through what you are doing, where you are starting, how you are making sure to keep your lines straight (if you are making a shape), etc.  It may seem silly at first but it could help your child if they are an auditory learner!  From there, they can then draw their own shape next to the model, trace over yours or use hand over hand to help them draw it.  Another option is to try “dotting” out the shape and have them connect the dots.

Why Turn The Cards Over?

By having the cards flipped over, he was not immediately overwhelmed by all that he was going to have to do (Imagine walking into a meeting late and seeing a whole list of things you were assigned to do asap.  I don’t know about you, but I’d be overwhelmed!).  He could process each request as he flipped it over which reduced the stress and frustration that usually occurs before he even begins a drawing or writing task.  This turns it into a bit of a game, gives them some sense of control since they get to choose the one they flip and is done at their pace making it easier to handle.

(Random Note – I’ve thought about doing this for myself when I get overwhelmed with “things to do” or household chores!  One thing at a time would allow my brain to focus on whatever the card says instead of trying to remember all that I’m going to have to do.  So, if you ever come to my house and see flipped over calendar cutouts, you’ll know I’m on a mission!!)

Flip and Draw card turned over
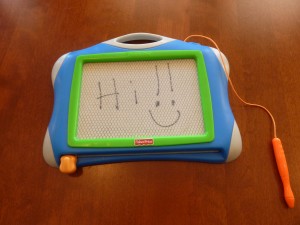
Flip and Draw using Doodle Pro
Flip and Draw using Aqua Doodle
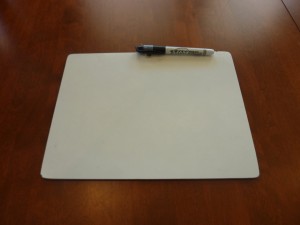
Flip and Draw using white board and dry erase marker

This is something that could be used with any writing tool (marker, pencil, crayon, pen, etc) and writing surface (blank sheet of paper, dry erase board, Magna Doodle, Aqua Doodle, etc).

This activity not only helps build drawing skills, it also builds basic literacy skills because they are seeing (visual) and hearing (auditory) the words while they are making the shapes (kinesthetic).  It allows me to see what he knows how to do and where he needed more assistance.  The best part of all, is that we are having fun together while building his skills.

Engage, Encourage and Empower!
No Paper Or Pencils Required Here!

Fine motor skills, other than spinning small items like a dime, have been a bit of a challenge for Andrew.  I wrote about some handwriting helpers (markers, crayons and pencil grips) I found that help with finger positioning and I would also like to share some fun toys/tools he’s gotten that I’ve incorporated in My Obstacle Courses to help engage him in the writing/drawing process.

See Mom?  I DO Need Help!

It never failed, as soon as I would get out paper and writing tools, he would hold them for a minute and then say in his very weepy voice, “Help me Momma!  I need help.”  I would encourage him to try a little by himself but that would result in him scribbling something really big over the whole paper while looking at me, not the paper :), as if to say “See?  I DO need help!”  I tried hand over hand with him, which was a bit more successful but getting him to try it on his own was quite a challenge.

Toys As A Tools

One day I found his Doodle Pro in his room with some of his drawing on it.  I brought it down and used it the next time we did My Obstacle Course, taking turns to make shapes and different kinds of lines (a post coming soon on how to turn this into more of a game!).

Doodle Pro

I found an Aqua Doodle at the store and tried it in another course.  Same thing!  No whining, no squirming to get away.  (I know that his willingness had little to do with it being part of My Obstacle Course because I had tried pencil and paper before and got whining and squirming.)

My Obstacle Course station idea: Aqua Doodle Word Writing (he's writing the word "spider" during an October Obstacle Course)

White/dry erase boards got thumbs up as well.

White board with dry erase marker (Be careful not to use a permanent marker! Â They look similar but only the dry erase will wipe off.)

What Is It About Paper And Pencil?

When I notice things like this, the teacher in me starts to analyze a bit.  What is it about these toys/tools that make this activity more tolerable to him?  What are his avoidance behaviors telling me when I bring out paper and pencil?  I thought about the difference between them and I think the main reason is that since the Doodle Pro (or Magna Doodle), Aqua Doodle and white boards are not “permanent” like pencil/paper (at least in his eyes) it was not as daunting.  It was no big deal to make some markings on them because they were easy to get rid of.  They were not permanent and if it didn’t turn out the way he wanted, he wouldn’t have to look at them for more than a few seconds.

Building Confidence While Building Skills

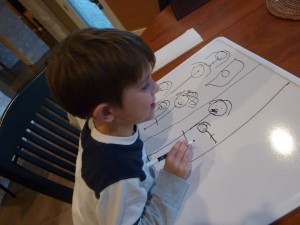
I think that if kids know that what they are putting down on paper is not the way they want it to look, they get frustrated and don’t really want to try anymore (kind of like me and baking!).  For Andrew, using tools that make the writing easy to “wipe away” helped him slowly build up his confidence.  By removing some of the pressure, we could focus on the basics of the skill.  Now he loves his big white board where he can draw people and fans (his two obsessions right now) because he has an opportunity to practice while being able to easily rub unwanted lines or marks away.

Happily drawing people on his white board

If you have a child who is reluctant to write or draw, I encourage you to think beyond pencil and paper.  A lot of what I’ve learned from my son has come from trial and error so don’t give up introducing skills or concepts in different ways because chances are eventually something is going to click!

Engage, Encourage and Empower!

« Previous Page
Next Page »

Primary Sidebar

Obstacle Course Mom’s Blog

  • When People Stare, Mind Your Own Business
  • ABC’s of Peaceful Parenting Tele-class
  • What’s Perfect About This?
  • Exciting News!
  • Halloween

Categories

  • Blog
  • Cool Tool
  • Fine Motor
  • Getting Started
  • Gross Motor
  • Literacy
  • Math
  • My Obstacle Course Station Ideas
  • Oral Motor
  • Problem Solving
  • Sensory
  • Social Skills
  • Uncategorized

Archives

  • July 2012 (1)
  • May 2012 (1)
  • January 2012 (1)
  • November 2011 (2)
  • October 2011 (12)
  • September 2011 (14)
  • August 2011 (15)
  • July 2011 (19)
  • June 2011 (18)
  • May 2011 (21)
  • April 2011 (20)
  • March 2011 (22)
  • February 2011 (19)
  • January 2011 (21)
  • December 2010 (22)
  • November 2010 (6)

Meta

  • Log in
  • Entries feed
  • Comments feed
  • WordPress.org