• Skip to primary navigation
  • Skip to main content
  • Skip to primary sidebar

My Obstacle Course: Engage, Encourage and Empower

A fun, structured, systematic way to work on your child's strengths and weaknesses at home!

  • Welcome to My Obstacle Course!
  • What is My Obstacle Course?
  • Developmental Timelines
    • What Is My Child Ready For?
  • About Us
  • Blog
  • Contact Information

Fine Motor

Jingle Bell Patterning

Last year I was wandering the aisles of Michaels Arts and Crafts store, looking for things to incorporate into My Obstacle Course.  Since it was December, the store was filled with lots of items symbolic of the holiday season, just like it is now.  During the next few weeks I’ll share what I discovered and how I have used it.

Jingle Bell, Jingle Bell, Jingle All the Way!  Oh What Fun It is to…

Pattern Jingle Bells!

One thing I found and was quite excited about using was a package of jingle bells.  Now it might just be me, but these days when I find something like this my mind starts racing excitedly about how I could use it to help my son.

In the package that I found, there were red, green and gold jingle bells (I was just there today and found a package with silver and blue.).  Immediately I thought about patterning.  When I got them home and looked more carefully, I noticed that they each had a loop on the top, obviously for stringing.  My son did not like the usual lacing pieces I had purchased to work on this skill with him, but something sparkly and noisy might just get his attention (and it did!!).

If at first they don’t succeed, try something different!

I knew from previous attempts that stringing with a loose lace was fairly challenging for him so I decided to use pipe cleaner, which has the same result but provides some structure for fingers just learning how to push and pull things through for stringing.

My Obstacle Course Station Idea: Jingle Bell Patterning- AABB and ABC

How to make  Jingle Bell Patterns using a pipe cleaner:

Step 1: Gather one pipe cleaner and jingle bells needed for pattern (this pattern is going to be ABAB which requires two colors of bells)
Step 2: Make a loop or twist at the end of the string or pipe cleaner so the bells do not fall off
Step 3: String the bells onto the pipe cleaner...
and pull down towards the end.
Step 4: Begin the pattern that you want your child to continue.
Step 5: Have your child string the jingle bells onto the pipe cleaner, figuring out what comes next to make the pattern!

Whenever I introduce a new concept like patterning (“What comes next?”), I like to provide a model for him to follow (“Make the same”) so he can associate what the direction means with what the outcome is supposed to be.  I figure he’s no different from me in that when I am trying a new recipe, I like to have an idea of what it should look like when it’s finished!
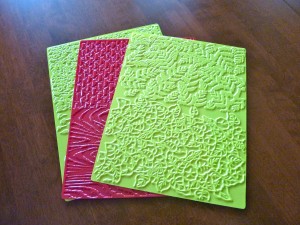
Cool Find- Textured Rubbing Plates

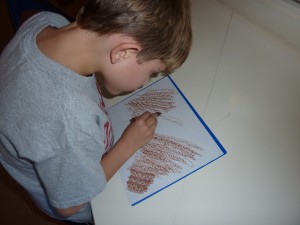
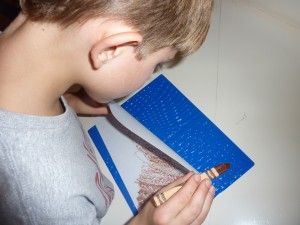
My son HATES to color.  He doesn’t see the purpose in it, knows he’s not great at it (getting better since starting OT for fine motor skills) so he literally looks elsewhere while he is coloring.  That said, it is something that I have tried many different ways to make purposeful for him and haven’t been too successful.  While I was at the teacher store (Teacher Heaven), I came across these textured rubbing plates, which are basically plastic pieces the size of a sheet of paper with raised parts so when colored upon, they reveal different patterns and shapes.  I got one package with these three sheets of nature patterns to see if he would be into them but they also make sheets with animal prints.

Textured Rubbing Plates

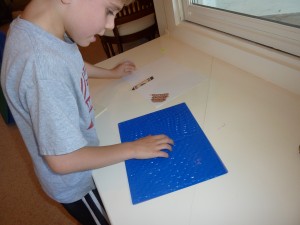
We tried them out and it worked!  He colored for almost a whole minute, which for us is HUGE!!!

Checking it out- he's interested!! Â I showed him how to put the paper on top and how it worked by coloring back and forth.
He's coloring! He's not only looking at what he's doing, I think he's even got the right grasp!
Always curious. He has to see how this is working.

This is also something that you could do with other things such as leaves, place mats, coins, corrugated cardboard, etc. – basically anything that has a good texture to it.  If you are like me and like to have things contained, you could create a texture bin to store different textured items that you come across.  This would not only help you store materials for a station activity like this, it could also be part of a station activity where your child chooses 2 or 3 textured items to experiment with and color upon.

Leftover Foil Pan? Just add…

So Thanksgiving has come and gone, we are all wishing our pants had that wonderful stretchy fabric found on maternity pants and we are dealing with all of the leftovers.  Here is an idea for a leftover you may have that will not add any inches to your waistline, a foil pan you can use with your children either as an Obstacle Course station or as a “keep them occupied” activity.  This is a fun and easy activity that can be made even more fun with a few basic add-ons.

Leftover Foil Pan + Shaving Cream = Fun Space for Drawing, Writing or Just Playing

So easy and so fun along with the added bonus of having the mess, I mean fun, contained!

How to make your own:

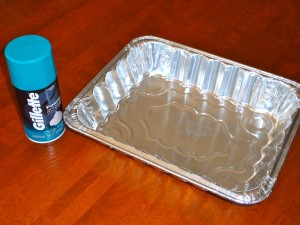
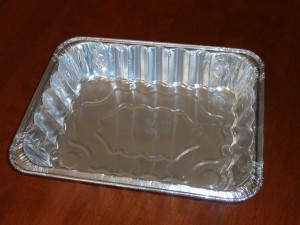
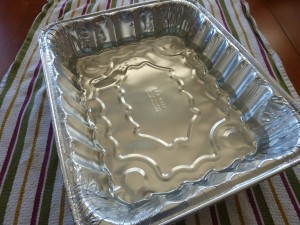
Step 1: Get a clean, empty foil pan and a container of shaving cream.
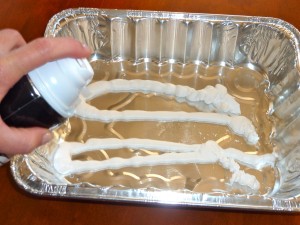
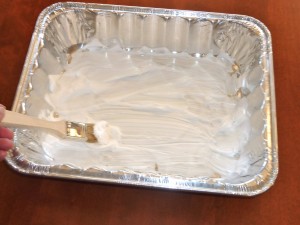
Step 2: Spray shaving cream in the foil pan. Â I just made rows but you could try to spray your child's name or make a happy face!
Step 3: Now it's time for your child to spread or paint the shaving cream so it covers the bottom of the pan.
Step 4: Â Once the bottom is covered, it's ready for drawing or writing. When your child is finished, clean up is easy- just rinse and let dry for the next time!

Easy Add On:  Food Coloring

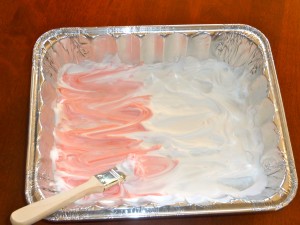
Add some food coloring drops for a colorful variation.
Here, I added some red food coloring drops to the shaving cream.
Use a spoon, brush or spatula to mix the food coloring into the shaving cream.
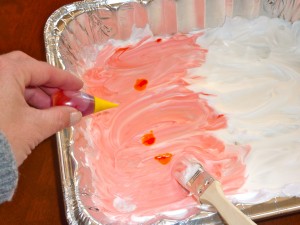
I wanted some autumn colors so I added some yellow food coloring drops to the red to make orange.
Orange shaving cream ready for some drawing, writing or more painting! Rinse and dry when finished so it's ready for the next time.

Some of you out there will have children who cannot wait to get their hands into the shaving cream as soon as it is squirted into the foil pan.  I do not have one of those children, he’s getting better, but he’s more likely to do something like this if he has some tools to protect his hands from getting gooey.  I have used pastry brushes, both silicone and the regular kind, with him so he can “paint” the shaving cream across the bottom of the pan.  A spatula also works well for this activity.  I like to add some drops of food coloring around the shaving cream so he can experiment with mixing in the color as well as combining the colored cream to make different colors.

Foil Pan Salt Writing

Since the foil pan (or roasting pan if you prefer something heavier) has very deep sides, it makes it a great container for things that otherwise would get all over the place.  When doing station activities like this, activities kids can really get into, there are things you can do to make your life a bit easier.  Place a towel, placemat, tablecloth, etc. underneath the pan, bin or tray so you can just dump anything that spills over into the sink, garbage can or out in the grass.

Idea #2:  Salt Writing/Drawing Station

It is so easy and provides some sensory input while promoting the fine motor skills of drawing and handwriting.  If your child does not like touching this, try using the non-spoon end of a wooden spoon.  The salt writing station allows children to play, draw and write in a sand-like material without the icky feeling of having sand sticking to their hands. Knowing my child’s love of salty things, he may end up licking his fingers just to get to taste it!

Here’s how you get your very own salt writing tray!

Step 1: Get an empty foil pan.
Step 2: Get some fine salt and pour it into the pan, creating a layer of salt that covers the bottom of the pan.
Step 3: It is now ready for your child to start writing...
or drawing!

I’m Thankful for…Foil Pans!

When I think of November, I think about cozy, autumn days spent at home.  My mission this month was to find some ways to help you build your child’s skills at home while using things that you most likely have.

The Foil Roasting Pan

The Foil Roasting Pan made it’s appearance at the end of the grocery aisle, symbolizing it’s importance and usefulness at this time of year.  When I see these I think of stuffing, turkey, most importantly, easy clean up!  I know that I am more willing to do something messy with my son if it is contained a bit.  I saw the foil pans and had a number of ways to put them to use as stations, allowing children to have fun while also building skills.

Idea #1:  Just Add Water for Turkey Baster Fun

This is an easy station idea that works to build fine motor skills and play skills.

Step 1: Â Begin with an empty foil pan.
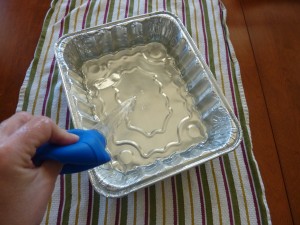
Step 2: Fill the pan with some water (not all of the way to the top, between 1/4 and 1/3 full) and place on top of a towel to catch spills.
Step 3: Add a turkey baster and show how to squeeze the bulb to suck in water.
Step 4: The turkey baster is now completely filled up with water.
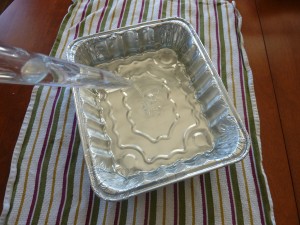
Step 5: Squeeze the baster to squirt the water back into the pan.
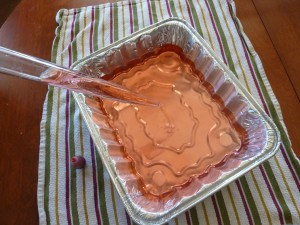
Add some food coloring to the water so they can really see the water inside of the baster!

You can add to this by having another pan or bowl right next to it so they can transfer the water.  Have them predict how many times it would take for them to fill the baster before the pan is empty!

Once they are done with this station, easy clean up by dumping the water down the sink, rinsing and wiping so it’s ready for the next time!

« Previous Page

Primary Sidebar

Obstacle Course Mom’s Blog

  • When People Stare, Mind Your Own Business
  • ABC’s of Peaceful Parenting Tele-class
  • What’s Perfect About This?
  • Exciting News!
  • Halloween

Categories

  • Blog
  • Cool Tool
  • Fine Motor
  • Getting Started
  • Gross Motor
  • Literacy
  • Math
  • My Obstacle Course Station Ideas
  • Oral Motor
  • Problem Solving
  • Sensory
  • Social Skills
  • Uncategorized

Archives

  • July 2012 (1)
  • May 2012 (1)
  • January 2012 (1)
  • November 2011 (2)
  • October 2011 (12)
  • September 2011 (14)
  • August 2011 (15)
  • July 2011 (19)
  • June 2011 (18)
  • May 2011 (21)
  • April 2011 (20)
  • March 2011 (22)
  • February 2011 (19)
  • January 2011 (21)
  • December 2010 (22)
  • November 2010 (6)

Meta

  • Log in
  • Entries feed
  • Comments feed
  • WordPress.org