• Skip to primary navigation
  • Skip to main content
  • Skip to primary sidebar

My Obstacle Course: Engage, Encourage and Empower

A fun, structured, systematic way to work on your child's strengths and weaknesses at home!

  • Welcome to My Obstacle Course!
  • What is My Obstacle Course?
  • Developmental Timelines
    • What Is My Child Ready For?
  • About Us
  • Blog
  • Contact Information

Blog

Gone Fishin!

Andrew was always taken with the fishing game sold in stores, the one where the fish go around in a circle while opening and closing their mouths while you try to get the end of the fishing line in their mouths. He got one and was extremely frustrated. I tried it and got extremely frustrated. The mouths close so quickly and with the fish moving around, I’m not sure how he could be successful with this. I decided to make my own fishing game, adding a bit of a My Obstacle Course twist on it (of course!).

Make Your Own Fishing Rod

I know they sell fishing rods with magnets on the end of the line, but I wanted to see if I could make my own. I went to Michael’s and bought some small dowel rods, red string (red is the easiest color to see), corks, sturdy needles (to go through the cork), circle magnets that would fit on the corks and glue. I glued the magnet to the narrow end of the cork and let it sit overnight to dry. Then I used the needle to attach the cork to the string and wound the other end of the string around the dowel (towards the end of it, without being too close to where it could fall off).

Note: This is one of those things that would be awesome to purchase and make with a group of other people since the materials were all sold in packs.

Homemade "fishing" rod.

What’s Biting?

The rod was complete and now I needed something to fish. I had some fish calendar cutouts and attached some paper clips to them. All I had to do was think about what I wanted to work on with Andrew and write that on the cutout. Below you will see just some of the possibilities for things to put on the fish.

Number Recognition

My Obstacle Course Station Activity: Fishing for numbers (to build number recognition skills)
"Catching" the number 15.

Shape Recognition

My Obstacle Course Station Activity: Fishing for shapes

Word Recognition or Vowel Sound Identification

My Obstacle Course Station Activity: Fishing for words (This particular station is working on the difference between long and short vowels words.)

Addition – Finding the Sum

My Obstacle Course Station Activity: Fishing for sums.

During the station, he would use the fishing rod to “catch” the correct fish. He had a ball with it and was able to work on steadying his hand, lowering the cork down to the correct fish and “catching” it on the paper clip. So fun, much more motivating and no batteries required!!

Engage, Encourage and Empower!
Finding Motivators to Gently Push Beyond Comfort Zones

When I did a post earlier this summer on creating a water wheel pouring station, little did I know that a water wheel was going to be the thing to motivate and encourage Andrew to get closer, even into, the ocean.

My mother in law brought a bunch of sand toys, including some pails and several different water wheels. We began by filling some pails with water so that he could pour the water into the water wheels while we videotaped him on our phone. (It’s no surprise that he loves things that spin and watching the wheels spin at different speeds was very exciting for him. Being able to watch it frame by frame on the phone afterwards was an added perk!)

Video clip of Andrew pouring water into the water wheels.

After a while, we decided to use this to motivate him to get closer to the ocean. We gradually moved him closer to the water by first coming up with a plan for how far he was willing to go in. This was important so that he knew ahead of time what he was going to have to do AND he agreed to it. We would then go with him, go in the water and gently get him to the designated point.

Earning the water in buckets by going up past his ankles.

Once he did this, he was free to go back and we filled the pails with water.

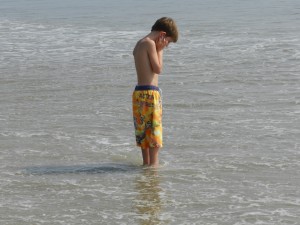
"I did it! Now I'm out of here!"
"Whew! Made it! 🙂 "

He eventually went into the water up past his knees, something I don’t think he would have done in the same amount of time on his own. This was huge for him!! Maybe next time we’ll get him to fill a bucket but for now, it was perfect for him to go in as far as he did.

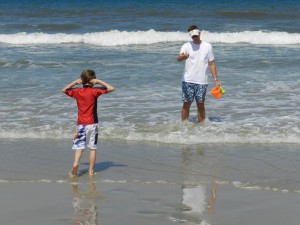
Note: Andrew does not have fear of water. He knows how to swim and is very comfortable in the water. If he did not know how to swim or had water fears, we would have placed focus on something else because going into the ocean would have been too big. This was a sensory processing issue for him, working to deal with the noise of the ocean, the feel of the cold, scratchy water on his legs and the unpredictability of the waves. You can see that he is plugging his ears to lessen the noise and as the week progressed became more comfortable with the patterns of the waves, which we pointed out to him. Not much to do about the scratchy water other than get used to it! 🙂

The day before we left - in on his own.

I share this experience because it was such a clear example of finding what is motivating and exciting for your child and using that to help stretch their experiences and tolerances, even if by the tiniest bit. While your child may not care about wheels spinning (or fans as he was calling them 🙂 ) or videotaping themselves on a phone, there is usually something that they will be willing to work for, you just have to find it.

Start small and slow with things that are doable for them and gradually increase the expectations. Watch them carefully and read them for what they are telling you – (too much? too scary? too big? or Ok, I can do this. I may not be crazy about this, but I really want to do ___. ) and try to stay in the zone of nudging them a little bit out of their comfort zones while still feeling safe. Think about what you experience when you or someone else pushes you a little outside of your comfort zone for your own good. Nervous, doubtful or bothered at first but when you finish or reach your goal, you probably feel really proud of yourself. I saw all of this in Andrew as he made his way closer and closer to the ocean and by the end of the week, he was even inside pretending a pillow was a boogie board, practicing how he would wait for the perfect wave and then ride it in. Who knows, maybe that’s what I’ll be reporting to you next year! Turtle steps all the way :).

Special thanks to my in-laws (G & T) for these awesome photos – Thank You!!!

Engage, Encourage and Empower!

Sand Writing

No beach? No problem! I shared in an earlier post about creating a Sand Bin and how that can be used to hide items to increase sensory tolerance and build hand muscles through sand play. This bin can also be used to build handwriting skills by having your child do some sand writing.

One of the things I learned last year when Andrew attended a handwriting camp was the importance of providing opportunities for children to build handwriting skills in:

  • large ways (ex. writing really big on a white board)
  • medium ways (ex. sand or salt writing)
  • small ways (ex. pencil/paper).

Side note: At Michael’s this morning, I noticed that in addition to regular decorative sand, they had small containers of sand in a variety of colors (in the discount/$1 racks at the front of the store), probably to make those sand in the bottle crafts, but for a few dollars, this sand could be poured onto a rimmed cookie sheet for an easy to assemble writing station. How fun!!

My Obstacle Course Station Activity: Sand Writing

What to include at this station:

  • Play sand in a bin or rimmed tray
  • Towel underneath to catch any stray sand
  • I provide a spray bottle with water so that Andrew can get the sand wet (sand is great to get wet because it makes it easier to write in and dries for future uses!)
  • Pouch with letters for them to choose and write
  • Dice to roll and write
  • Flash cards or cutouts with shapes or words to practice drawing or writing
  • Tools to help: wooden spoon to flip around and use the end like a pencil if your child has sensory issues and doesn’t like the feel of sand on their hands; something with a flat edge to smooth the sand before writing the next letter, number, shape or word

At the station, they practice writing shapes, numbers, letters or words in the sand. This seems and is super simple but it has really allowed me to see if he is forming things like his letters and numbers correctly.

Sand writing utilizes all learning styles (visual, auditory, kinesthetic):

  • the child is seeing what they are drawing or writing (this is done through the letters they choose)
  • hearing what they are drawing or writing (saying it out loud while they are doing it, even adding some dialogue such as, “A square has four sides made of four straight lines. First line – stop. Go down for second line – stop. Go across for the third, bottom line – stop. Go up for the fourth and last line – stop.)
  • actually making the shapes, numbers, letters or words.

Here is a variation of sand writing using salt in a foil pan - Salt Writing. Note: Do not get the salt wet!

Engage, Encourage and Empower!

Beach Themed My Obstacle Course: Station Activities Using Shells

I know that it is now August and people are probably in “back to school” mode but we just returned from a vacation at the beach and I got lots of ideas for a beach themed My Obstacle Course to use with Andrew before school starts again. Don’t worry, I have LOTS of ideas for the fall but since it is still summer I’m going to try to remain in the present and enjoy the rest of the season, even if a chill in the air would be a dream come true!

Shells

This was our third trip to the beach but the first time that Andrew was willing to walk a little bit in the sand. One of the ways we gave these walks some purpose was to gather up some shells. In typical Andrew fashion, he began by wanting to know exactly how many shells he had to get before he could go back. He would then grab that number of shells as quickly as he could get his hands on them and run back to our spot. We learned and then gave the beach walks a certain length of time or a certain distance, such as walking to a specific house before turning back. This helped a bunch, knowing that there was an end to something he wasn’t really crazy about (a familiar theme for us!). He eventually became VERY interested in finding shells because he learned that they could be glued together to make shell ceiling fans (thanks Tina!). He was not only able to gather up shells but was really focused on finding ones that were all a similar size and shape to give the fans similar blades. These shell ceiling fans are now hanging from the pull chains of his bedroom ceiling fan and are a prized possession of his.

Andrew's Shell Ceiling Fan

My Obstacle Course Station Activity: Sorting Shells

Now, my station activity idea is not to create shell ceiling fans, unless your child is crazy about ceiling fans like mine is, and if so, go for it! I was thinking more about using shells to work on skills like:

  • Sequencing the shells by size (smallest to largest)
  • Sorting the shells by shape, size or color
I did not bring any shells back from the beach because my suitcase was packed so I am going to check out Michael’s to see if they have some, which I’m sure they do, perhaps even at a discount because they probably have Christmas items out on display!! I digress – back to My Obstacle Course station ideas.

My Obstacle Course Station Activity: Shell Description

This is a really basic station activity using one shell and working together to see how many words we can come up with to describe that shell. This is aimed at increasing vocabulary and descriptive language regarding a single object. I would do this activity with a dry erase board or sheet of paper and I would probably do the writing since that is not my objective, however, if your child is ready for that and is still able to come up with ideas, go for it! You can always take turns if it ends up being an issue.

Some examples:

  • smooth
  • curved edges
  • has ridges
  • round
  • flat
  • sharp
  • pointy
  • brown
  • speckled
  • striped

My Obstacle Course Station Activity: Shell Creations

Another fun activity is to gather some shells and see what you can create using them. In the bunch of shells I found at the beach, I was able to make a dolphin, turtle and queen, complete with hula skirt :).

Have fun, get a little creative and help your child build skills using something a little out of the ordinary!

Engage, Encourage and Empower!

Favorite My Obstacle Course Station Activities

There are some station activities that I love to use because they have a basic structure that allows me to not have to think about what to do with regards to setting it up so I can place my attention towards what concepts I want to help Andrew build. They also have worked really well to keep him engaged for almost the same reason, so this actually helps us both out! In my experiences with the children I have taught and with Andrew, they tend to like structure and predictability, which these activities provide, while also maintaining interest by using the activities in different ways so they don’t get boring.

I’ve done past posts on them but thought I would include them again since they help me when planning and setting up My Obstacle Courses, in the same way that having a kit of supplies helps. These are three of my favorite go-to station activities and can be used to build literacy skills, math skills, motor skills, motor planning, problem solving, and social skills (specifically working on turn taking while playing Memory Match). Just click on the link to see either the original post on the activity or the website search results showing a variety of posts on that particular activity.

Memory Match

  • Memory Match
My Obstacle Course Station Activity: Memory Match

Make the Same

  • Make the Same Part 1
  • Make the Same Part 2
My Obstacle Course Station Activity: Make the Same

Crawl and Match

  • Crawl and Match
My Obstacle Course Station Activity: Crawl and Match Addition Equations with Sums

These are station activities that build many different levels of skills and concepts while also being really easy to change up through the use of different themes. I especially like how combining two completely different skill sets, such as pairing motor and academic skills, creates a much more engaging learning experience. It doesn’t have to be complicated. Use these basic activity structures, modify the content to help your child with what they are ready to work on and you are set!!

Engage, Encourage and Empower!

Sample My Obstacle Course Using Kit Items

I hope you have found these past posts on what I would include in a basic My Obstacle Course kit helpful. These are just some of my favorites and are examples of items that could easily be assembled to provide activities to help build your child’s skills. I encourage you to go on a little treasure hunt through your own house and see if there’s anything else you can find. (Click here for a past post on Treasure Hunting At Home.)

Academic and Developmental Skill Areas

Just like when I set up My Obstacle Courses for Andrew, I include things to build a variety of academic and developmental skills. The areas I focus on are:

  • Literacy
  • Math
  • Fine Motor
  • Gross Motor
  • Oral Motor
  • Sensory
  • Problem Solving
  • Social Skills

Sample My Obstacle Course

With the kit items I have given you, below is a sample My Obstacle Course. Please remember that the MOST important thing to remember is to provide activities that YOUR child is ready for at the level they are ready for, regardless of their age. These activities can be modified up or down in difficulty so keep that in mind.
  1. Pass the question beach ball back and forth 5 times, asking and answering questions based on the question word in front of you when caught. (Social Skills and Gross Motor)
  2. Crawl through the fabric tunnel. (Gross Motor and Sensory)
  3. Unscramble the scrabble letters to make words that go along with clues. (Literacy and Problem Solving)
  4. Write the words you’ve made with the scrabble letters on the lined write on/wipe off board. (Literacy and Fine Motor)
  5. Crawl through the collapsible tunnel or under three chairs lined up (3 is just an example number!). (Gross Motor)
  6. Roll one die and use the tweezers to move that many puffs. Repeat with the other die and then count how many puffs in all. (Click here for a post on Easy Math Organizers with a description of this activity minus the tweezers and click here for a post on Tweezers with puffs.) (Math and Fine Motor)
  7. See how many different shades of blue you can make using the droppers and colored water. (Different Shades of Blue) (Fine Motor and Problem Solving)
  8. Clothesline clipping- matching up addition equations with their sums. Look at the equation clipped on the clothesline and find the sum. Clip them together and move onto the next equation. (This could be done easily using equations and sums written on index cards or pre-made flash cards with sums written on cards.) (Math and Fine Motor)
  9. Puff Blowing- Blowing puffs (with mouth or straw) off of a counter into a cup or bowl. (Puff Blowing) (Oral Motor)
This is just an example to show how easy it is to set up a basic My Obstacle Course using these kit items.
My next post will be on my favorite go-to station activities that are easy to make and adapt to different skills and levels.
Engage, Encourage and Empower!
« Previous Page
Next Page »

Primary Sidebar

Obstacle Course Mom’s Blog

  • When People Stare, Mind Your Own Business
  • ABC’s of Peaceful Parenting Tele-class
  • What’s Perfect About This?
  • Exciting News!
  • Halloween

Categories

  • Blog
  • Cool Tool
  • Fine Motor
  • Getting Started
  • Gross Motor
  • Literacy
  • Math
  • My Obstacle Course Station Ideas
  • Oral Motor
  • Problem Solving
  • Sensory
  • Social Skills
  • Uncategorized

Archives

  • July 2012 (1)
  • May 2012 (1)
  • January 2012 (1)
  • November 2011 (2)
  • October 2011 (12)
  • September 2011 (14)
  • August 2011 (15)
  • July 2011 (19)
  • June 2011 (18)
  • May 2011 (21)
  • April 2011 (20)
  • March 2011 (22)
  • February 2011 (19)
  • January 2011 (21)
  • December 2010 (22)
  • November 2010 (6)

Meta

  • Log in
  • Entries feed
  • Comments feed
  • WordPress.org