• Skip to primary navigation
  • Skip to main content
  • Skip to primary sidebar

My Obstacle Course: Engage, Encourage and Empower

A fun, structured, systematic way to work on your child's strengths and weaknesses at home!

  • Welcome to My Obstacle Course!
  • What is My Obstacle Course?
  • Developmental Timelines
    • What Is My Child Ready For?
  • About Us
  • Blog
  • Contact Information

Obstacle Course Mom

Word and Object Matching – Real Life Flashcards

I have been sharing what I learned by doing My Obstacle Courses with other parents and since Andrew is now 7 years old, I frequently get questions about working with children who are much younger.  I began doing this at home with him routinely when he was 4 years old but used some of the activities with him as early as 2 years old (I just hadn’t put it together that that’s how he wanted to play with me – ah, hindsight!).  My advice to these parents is to use toys that they have (perhaps in a different way from their intended purpose), use real objects as much as possible and most importantly make it fun.  Here is one station activity I have used to build literacy and vocabulary skills.

What’s In The Bag?

I shared in a post last week (A Bit of Mystery and Intrigue) how I love to use tote bags to hold items and this is an activity modeling how to find out what your child knows using the tote to add some mystery.

I gathered some items found around the house and placed them inside of the tote bag.  I wrote out the word name for these items (any paper, index card or post-it note works) and set them out.  That’s it as far as set up goes and here is a how it looks! (Note:  If this seems like it would be too easy for your child keep reading for ways to make it more challenging for your child.)
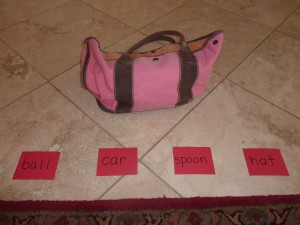
My Obstacle Course station activity: Word/Object Matching
A peek inside the bag.
A hat matched up with the word "hat."
I guess the ball is next!
Ball matched with "ball."

This station idea is like creating a real life flash card for your child with the written word name and actual object.

All of the objects matched up with their words.

How To Play:

  1. Choose a card.
  2. Say the word name.
  3. Ask them to find it in the tote bag.
  4. Match up the object with the word.

By being able to get the object, this removes the need for them to speak in order to show they know what it is.  We still work on speech skills but that is not the primary purpose for this activity.  They are also getting the benefit of receiving information through all modes of learning – visual, auditory, and kinesthetic.  If there is something that your child does not know or understand, take note of it so you can be sure to incorporate this more often.

This My Obstacle Course station activity empowered him because he could demonstrate his knowledge without speaking intelligibly and it empowered me by learning specific information about the sorts of things he knew and didn’t know.

Making It More Challenging

This activity could be made more challenging by:

  • using word clues instead of the actual word (ex.  Find something that bounces.)
  • using different objects from a category and matching according to their specific uses or descriptions (ex.  category – things to eat/drink with:  fork, spoon, child friendly knife, straw or things to write/draw with:  pencil, crayon, marker, dry erase marker, chalk, paint)
  • matching up an item with a word it rhymes with (ex.  Find an object that rhymes with cat.)
  • matching up the object with it’s function (ex.  Find something that can drive you to school.)
  • finding items that go together (ex. Find an object that goes with a bowl.)

I encourage you to think about what literacy skills your child is working on and see if there is a way to add some fun by incorporating real objects.

Personal Note:

There are many frustrations that parents of late talkers or non-verbal children experience but I think one of the things that was most difficult for us was that we did not know exactly what he knew or didn’t know.  He would point to things for us when it involved books or catalogs that he enjoyed or if it meant he would get tickles as a reward but outside of those times, we could only guess.  After his neuropsychological evaluation (which I got to sit in on and watch while he ignored the evaluator – talk about a fun morning!) showed nothing we didn’t already know, I knew it would be up to me to find out.  It was a long process, with a lot of trial and error but in the end, I realized that with a little bit of planning and creativity, I could provide ways to find out.

Engage, Encourage and Empower

Winter Themed Graph

Math was one of my favorite subjects to teach and is something that I find easy to incorporate into My Obstacle Courses with Andrew.  One of my favorite station activities is graphing.  This one activity builds many different skills – sorting (visual discrimination), arranging (fine motor skill), counting (math), and answering questions using the graph (problem solving).

My Obstacle Course station idea: Winter Themed Graph

We have made graphs with all sorts of different things and when I found these mini-cutouts I knew they would not only make this easy for me but there were so many in the package that we could do lots of different graphs showing different results.

These were my favorite and I used to be able to get them at my teacher supply store but haven't been able to find them lately. They worked well because they were small, bright and blank.
I did find these at the teacher supply store. The package has three different kinds of snowflakes and the backs are blank.
These were some that I got for our Christmas themed My Obstacle Courses, but I can still use two of the three patterns for my winter themed graph.
I would combine the cutouts and use these if I was working with someone who had trouble with visual discrimination.
These cutouts are a bit more difficult because they have similar coloring. Â I would use these with children who are working on this sort of visual discrimination.

Creating A Graph Doesn’t Have To Be Anything Fancy!

Once you have something to graph, you are almost ready.  Here’s how I set up my graphing stations for My Obstacle Courses:

Here are the materials I used to make these activity stations: Â paper, cutouts, markers (a gold photo marker for the black paper). and glue.
Start with blank sheet of paper (white or colored, printer sized or larger)
Draw a line down the left hand side (y-axis) and along the bottom (x-axis). Â The paper could be turned to make the graph the other way as well.Â
Write and underline the title.
My graph is ready! Â The numbers are on the side and the cutouts are glued on the bottom. Â Note: Â Make sure your numbers are about the same size as the cutouts or it may cause confusion if the number doesn't line up with the item amount.
The other graph numbered and labeled.

I choose how many of each specific cutout I want to have in the graph and place them in a container (small plates, cups or cupcake foils work great for this!).

That’s all the preparation necessary for this station!

Graphing Station How To:

  1. When the child gets to this station, they will sort the cutouts into the correct row.
  2. Gluing is not necessary but if you want to work on that skill, the pieces can then be glued in the row.
  3. The child counts how many in each row.
  4. Incorporate math vocabulary and answering questions either by asking your own questions or by using question cards.
Calendar cutouts used as question cards.

Sample questions:

How many ___?

How many in all?

Which one has the most/greatest?

Which one has the smallest amount/least?

Do any of the rows/cutouts have the same amount?

Completed graph with question card pile
The child flips over the card, reads (with assistance if necessary) and answers the question.

The level of difficulty can be adjusted and if you have a child who is ready for more representational thinking, you could have each cutout represent a given amount (ex. one snowflake cutout=10 snowflakes falling), even cutting snowflakes in half to make it more challenging!

I encourage you to have fun doing math with your child.  It doesn’t always have to be scary and boring.  This is such an easy thing to do and the finished graph looks cool hanging on the refrigerator or pantry door!

Engage, Encourage and Empower!

Winter Themed Memory Match

I am in the process of gathering and creating materials for Andrew’s Obstacle Courses this month and am going to share one of his favorite station activities, memory match.  This was one of my first posts but feel it’s worth revisiting because I have had many new visitors since then.  (Click here to view the original detailed Memory Match post.)

Creating Your Own Thematic Memory Match Game

This game is really easy to make and as I was shopping for the holidays, I noticed all sorts of character themed memory match games for sale out there.  I love creating my own because it allows me to incorporate vocabulary for whatever themes or concepts I can find stickers for.  Right now, he is learning about the winter season in school so I will use winter themed stickers and talk about them when they get flipped over.

These are some examples of what I might ask or comment on for the card with the snowman on it:

  • What would it feel like outside if you were building a snowman?
  • What kinds of things would you bring out to put on your snowman?
  • Do you notice how the bottom snowball is larger than the top snowball?
  • What would happen if the bottom snowball was the smallest?
  • Is a snowman a real man?
  • Was the movie Frosty the Snowman fact or fiction?

(Keep in mind I wouldn’t ask all of these at one sitting, but would choose questions that were appropriate for him during that time.)

In addition to language building, this game allowed us to work on play and social skills.  Since it is a game with few rules, it was perfect for teaching him about turn taking, something he definitely needs to work on.  I discovered that we needed to do more things like this because he did not like it all when someone else found the card he was looking for!  Once again, an activity that combines what he likes to do with building skills he needs.

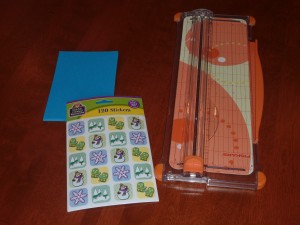
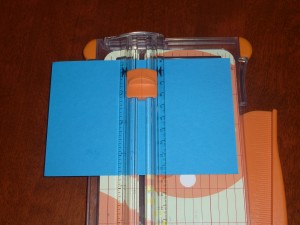
Materials needed: Â Index cards, seasonal stickers and my paper-cutter or scissors
Cut the index card in half
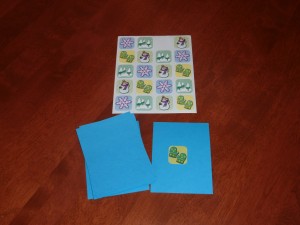
Place one sticker in the middle of one of the cards.
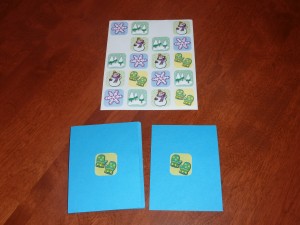
Place the matching sticker on another card.
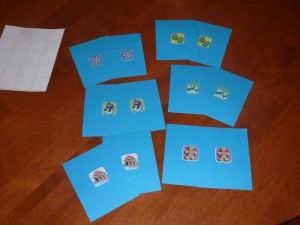
Sets of winter matching cards
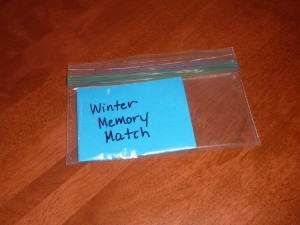
Labeled and stored in a small bag to keep them organized.

I have made a new thematic memory match game each month for two years and am now working to create some different kinds that move beyond seasonal themes.  I will share soon!

Engage, Encourage and Empower!

A Bit Of Mystery and Intrigue

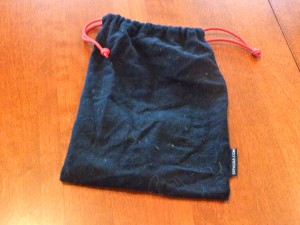
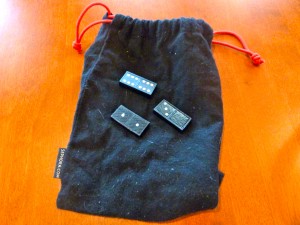
So, I have this black pouch.  It is sitting on the table as part of a My Obstacle Course station.  Are you curious as to what is inside of it?  I’ll give you a hint.  It has a bunch of something inside, something I’m sure every house has.  Think you know?  I’ll let you know if you are right…later!

Mysterious black pouch

I am a huge fan of The Amazing Race and was thinking how part of the intrigue of the show was the clue being hidden inside of the envelope.  The teams don’t know what is going to happen until they open the clue and find out. They race up, open it and can barely read it aloud because they are so out of breath.  Mystery and intrigue seem to be a common characteristic among popular reality shows and it made me think about what people were willing to do in order to get to the next stage or get the next clue.  This was a huge inspiration to me when I created My Obstacle Course for my son.  He needed something a bit different that would motivate him and I wanted a way to build his skills.  He needed structure, I decided to make it fun by adding some mystery and intrigue!

How do I do this for My Obstacle Courses in my home?  It really is quite simple.  I went on a bit of a hunt around my house, mostly in drawers, cupboards and closets.  I was looking for things that could hold and hide station materials or items.

I found an old lunch box,

Lunchbox

an eyeglass case,

An eyeglass case is perfect for holding puffs or other small items.
An eyeglass case not only holds small items but also requires fine motor skills to open it.

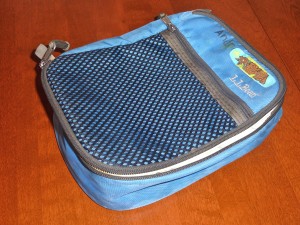
and some make-up bags I had received as “free gifts” with a purchase.

Zip up pouch
Clear plastic zip up pouches

These were perfect for stations with smaller pieces or calendar cutouts.  They not only held the materials but also provided an opportunity to build fine motor skills by unzipping or unsnapping.  The fact that most of the bags were quite sparkly and colorful was an added bonus!

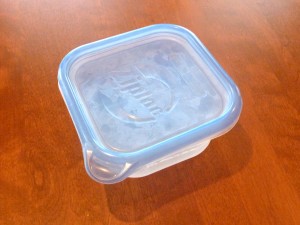
I have used plastic bags, leftover containers

Ziploc container hold items and requires fine motor skills to peel the lid off.

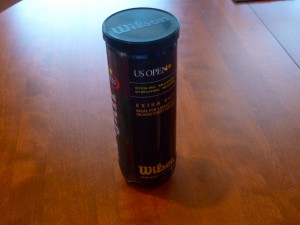
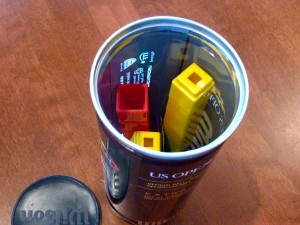
and even tennis ball cans which weren’t as mysterious because he could see through them but he still had to peel off the lid to know exactly what was going to be required of him.

Tennis ball can
Tennis ball can holding materials (counting cubes)

Larger tote bags were perfect for larger items like stuffed animals, small balls, cars and other items I used to work on building social, literacy and receptive language skills.

Tote bag for larger items

It was not only fun for Andrew to get to experience the mystery and intrigue of not always knowing what he was going to find (his face is always priceless as he scans the room to see what I’ve set out) but it was also fun for me to try and find ways to hide things so he wouldn’t know what they were.  It’s the same feeling that I get when we hide Easter Eggs or wrap gifts for him.  A bit of mystery and intrigue can make an otherwise mundane task seem more like an adventure.

Do you have any idea what I have in the mysterious black pouch?  Check it out!!

Mysterious black pouch holding dominos -this time!

I’ll do a post soon on how I use dominos in My Obstacle Course but for now, I encourage you to add some mystery and intrigue to the time you spend with your children and go on a little hunt of your own to find ways to hide materials.  You might be surprised at what you find right under your bathroom sink!!

Engage, Encourage and Empower

Inspiring Blog Award


Yesterday morning I received a surprise while checking out my friend Tracie’s blog at Cleverly Inspired.  She has always been creative and on the lookout for what she could transform next.  Even back in high school we would venture to a local stencil store, buy wooden things and then paint and stencil them- we were real trouble makers!!
Tracie can walk into a thrift store and take someone’s unwanted items and turn them into beautiful and useful things for her house.  I am inspired by her to look at things with a different eye and see what other uses they may have in store for me.
I am a complete novice at this blogging thing but she granted me this award after only one month of blogging (I even had to ask her how to respond to this award!!) and so I am entitled to pass on this award to other bloggers who inspire me!
Here is how this works:

Thank and link back to the person who gave it to you

Award 3 deserving Bloggers and share how they inspire you

Contact these bloggers and tell them about the award

Here are my top three:
1.  Nourish Life Coaching Alexis Robin is one of the most positive people I have the pleasure of knowing.  She is so down to earth and can relate to what others are going through but has a natural way of helping them move beyond the frustration to discover the joy and bliss of every day life.  She sees the power and greatness in people that they may not see in themselves.  I am honored and blessed to call her a friend!
2.  After Autism Diane Hunter’s calm, peaceful energy comes through her written and spoken words.  She inspires me to keep my energy calm for my son and to stay in my own business, even with tantrums around me.  She has been there, is there and will continue to persist in her effort to heal her own son.  It means the world to know that there is a mother out there who is able to stay positive, help others get through their own challenging situations while never forgetting the importance of caring for and loving oneself.  She inspires me to want to help other parents just as she has helped me.
3.  The Worst Mother She inspires me to embrace all of the different aspects of who I am.  She wears so many hats in her life and her blog conveys a fabulous personality with the important ability to laugh at oneself.  Lin, I wear all of my hats with pride and with a giggle in my heart because of you!!

Calendar Cutouts- Flip and Draw

This is a My Obstacle Course station idea that is easy to put together and makes sneaking in some fine motor/drawing skills more like a game than a “sit at the counter and practice something that’s really difficult for you” session.  That hasn’t worked for us and this is much more fun!

A My Obstacle Course Flip And Draw Station

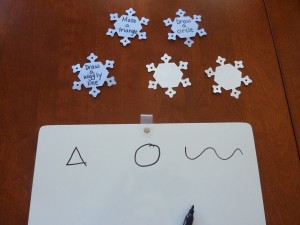
I used some calendar cutouts that I had and wrote a basic drawing skill that I wanted Andrew to work on.  This particular station was done during a winter themed Obstacle Course which explains the snowflakes.  This could also be done using index cards, strips of construction paper, ideally something that you cannot see through.

My Obstacle Course station idea: Â Flip and Draw

Some basic ideas include but are not limited to:

  • Draw a straight line.
  • Draw a wiggly line.
  • Draw a circle.
  • Draw a square.
  • Draw a triangle.
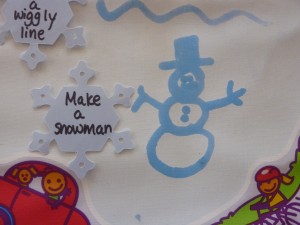
  • Make a snowman.
  • Draw a happy face.

I flip the cutouts over…

Flip and Draw Cards turned over

and when he gets to the station, he will turn over the cutout, we will read the instruction and he will try to do it.

Modifications:

Some children may need to have a model provided for them.  If so, draw the shape (or whatever the cutout says) first so they have one.  While you are drawing (the visual model) add an auditory piece by talking through what you are doing, where you are starting, how you are making sure to keep your lines straight (if you are making a shape), etc.  It may seem silly at first but it could help your child if they are an auditory learner!  From there, they can then draw their own shape next to the model, trace over yours or use hand over hand to help them draw it.  Another option is to try “dotting” out the shape and have them connect the dots.

Why Turn The Cards Over?

By having the cards flipped over, he was not immediately overwhelmed by all that he was going to have to do (Imagine walking into a meeting late and seeing a whole list of things you were assigned to do asap.  I don’t know about you, but I’d be overwhelmed!).  He could process each request as he flipped it over which reduced the stress and frustration that usually occurs before he even begins a drawing or writing task.  This turns it into a bit of a game, gives them some sense of control since they get to choose the one they flip and is done at their pace making it easier to handle.

(Random Note – I’ve thought about doing this for myself when I get overwhelmed with “things to do” or household chores!  One thing at a time would allow my brain to focus on whatever the card says instead of trying to remember all that I’m going to have to do.  So, if you ever come to my house and see flipped over calendar cutouts, you’ll know I’m on a mission!!)

Flip and Draw card turned over
Flip and Draw using Doodle Pro
Flip and Draw using Aqua Doodle
Flip and Draw using white board and dry erase marker

This is something that could be used with any writing tool (marker, pencil, crayon, pen, etc) and writing surface (blank sheet of paper, dry erase board, Magna Doodle, Aqua Doodle, etc).

This activity not only helps build drawing skills, it also builds basic literacy skills because they are seeing (visual) and hearing (auditory) the words while they are making the shapes (kinesthetic).  It allows me to see what he knows how to do and where he needed more assistance.  The best part of all, is that we are having fun together while building his skills.

Engage, Encourage and Empower!

« Previous Page
Next Page »

Primary Sidebar

Obstacle Course Mom’s Blog

  • When People Stare, Mind Your Own Business
  • ABC’s of Peaceful Parenting Tele-class
  • What’s Perfect About This?
  • Exciting News!
  • Halloween

Categories

  • Blog
  • Cool Tool
  • Fine Motor
  • Getting Started
  • Gross Motor
  • Literacy
  • Math
  • My Obstacle Course Station Ideas
  • Oral Motor
  • Problem Solving
  • Sensory
  • Social Skills
  • Uncategorized

Archives

  • July 2012 (1)
  • May 2012 (1)
  • January 2012 (1)
  • November 2011 (2)
  • October 2011 (12)
  • September 2011 (14)
  • August 2011 (15)
  • July 2011 (19)
  • June 2011 (18)
  • May 2011 (21)
  • April 2011 (20)
  • March 2011 (22)
  • February 2011 (19)
  • January 2011 (21)
  • December 2010 (22)
  • November 2010 (6)

Meta

  • Log in
  • Entries feed
  • Comments feed
  • WordPress.org