• Skip to primary navigation
  • Skip to main content
  • Skip to primary sidebar

My Obstacle Course: Engage, Encourage and Empower

A fun, structured, systematic way to work on your child's strengths and weaknesses at home!

  • Welcome to My Obstacle Course!
  • What is My Obstacle Course?
  • Developmental Timelines
    • What Is My Child Ready For?
  • About Us
  • Blog
  • Contact Information

Obstacle Course Mom

Word Family Sorting

Word Family Sorting-

I have been asked a number of times by parents about what they should work on with their children after they have mastered ABC recognition and letter sounds. The next step is putting together the sounds to form small words and this is easily done by building word family recognition.  Here is a link to a word family list at a favorite website of mine, www.enchantedlearning.com. Word families are basically common word endings that become new words by switching out the beginning letter/s.

An example word family for the word ending “-at”: bat, cat, fat, hat, Kat, mat, pat, rat, sat

Concepts and skills like this are easily turned into My Obstacle Course station activities. I introduced this with Andrew by using Scrabble or Bananagram letters, letter blocks and letter magnets to build this knowledge, allowing him to see how the word changes easily by replacing the first letter. As he got older, I used some calendar cutouts and created a word family sort.

Word Family Sorting - 2 endings

I chose the word families he was working on in school at wrote the endings on a cutout.  (The photo above shows -it and -id word families and the photo below shows short “i” words so I chose -it, -id, -in and an oddball of -an endings.) I wrote the words that go with the endings each on their own cutout.  I mixed up the words, put them in a pile and set out the endings. (This also works great as a “Crawl and Sort” station activity.)

When he got to the station, he sorted the words, put them with their correct endings. He read the words out loud while sorting. If your child is ready for this skill but is not speaking yet, you can read the words out loud for them while they sort them. This helps give an auditory component to this activity so all learning modalities are used (visual, auditory and kinesthetic).

Another Self-Checking Activity:  I wrote the endings on the back of the cutout in order to make it a self-checking activity. Once the sort is complete, turn the cutouts over to make sure they match the ending on top.

More word families sorted - 4 endings

Since spelling or word patterns are usually how students are taught in school, this is a great way to reinforce something they are already working on.  You can adjust this activity to fit with whatever skill level your child is ready for. Turning it into more of a game doesn’t take long and doesn’t have to be fancy but it sure helps to make practicing this skill more fun and engaging.

Heart Shaped Calendar Cutouts

Calendar cutouts are always on my list of things to get for My Obstacle Courses.  They are so helpful when working on different academic and developmental skills at home. Instant theme and so versatile! My favorite cutouts are from Creative Teaching Press. They are about the thickness of an index card and have a different color on each side. Click here for the direct link to the calendar cutouts on their site. I also get them at my local teacher supply store.

Engage, Encourage and Empower!
February Puff Sorting

Puff Sorting

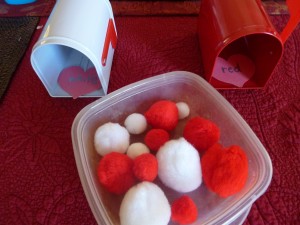
This is a basic activity to work on visual discrimination of color and size using colored puffs. I purchased a large bag of colored puffs, in different sizes, from Michael’s a few years ago and am still finding ways to use them in My Obstacle Courses to build different skills. Since it is February (almost Valentine’s Day!), I chose the white and red ones to use in these station activities to go with our theme.

My Obstacle Course Station Activity: Sorting By Color

I placed a handful of puffs, between 10-15, in a container to keep them organized (they could also be placed in a zippered bag to work on opening and removing items while holding the bag – for some children that is a challenge). I used heart-shaped calendar cutouts labeled according to how the puffs were to be sorted – in this particular activity they are labeled “white” and “red.” I also provided a place for him to put the puffs (see below for more on thematic sorting containers). It’s all set and ready for sorting!

My Obstacle Course station activity: Sort puffs by color

My Obstacle Course Station Activity: Sorting By Size

I strategically picked puffs in each size and placed them into the container. I labeled the mailbox sorters so he would know which size puffs to place inside. You could also provide a sample puff for each size so that your child can compare and check their choice. It’s all set and ready for sorting!

My Obstacle Course station activity: Sort the puffs by size
Valentine Mailboxes with red puffs sorted by sizeÂ

Helping to build basic skills like this does not have to be complicated! Activities like this are quick and easy to set up but allow you to see firsthand how your child does with these concepts. Too easy? Now you know they can do it and the next time you can use an activity that will challenge them. Too hard? Scale it back and include more activities like it to build their skills.

I have attached a developmental skills timeline/survey I received a few years ago (it is also on my website). I really like this timeline and use it to determine what we need to work on with Andrew and what we need to do next once he has mastered a skill. This timeline is unique because it lists out skills in order according to developmental areas, and does not list them by what a child “should” be able to do according to chronological age.

Thematic Sorting Containers

I’m always on the lookout for fun, thematic items to include in My Obstacle Courses and found these cute red and white mailboxes at Target last year. The dollar section in the front of the store usually has fun containers or buckets that go with the season we are in or about to be in. I get them to use for thematic looking sorting stations. This year I went and while my particular store did not have the mailboxes, they did have boxes that resembled Chinese food take out boxes. You could make your own “mailboxes” from shoe boxes or use plastic containers. In working with Andrew, I find that it helps to have a specific place to put things that we are sorting.

If you’d like ideas specific to what your child needs to work on, please email me at obstaclecoursemom@yahoo.com or leave me a post on My Obstacle Course’s Facebook page. I love hearing from you!

Engage, Encourage and Empower!

Valentine Themed Math Part 2

Valentine M&M Graphing

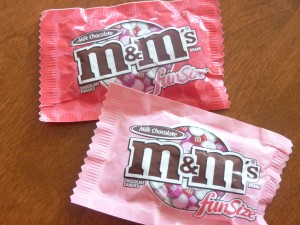
Here is another opportunity to build math skills while having a bit of yummy fun with the small package of Valentine themed M&M’s.

Valentine Themed M&M's In Fun Size Packs

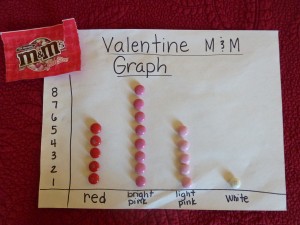
I use the package of candy with Andrew to make graphs.  As I’ve said before, I like to use things that are random because it helps to keep things from getting boring. These small packages are perfect because neither of us know how many of each color will be inside. (There are lots of ways to do this sort of thing without candy (for those of you who don’t want their children eating candy), it just takes a little bit of planning. I will do another post on some fun non-food ways to sort and graph.)

This is such an easy activity to set up (click here to see a detailed post from Winter Graphing which shows step by step how to set up the paper). I begin by taking a sheet of paper and write the title, Valentine M&M Graph in this case.  I underline it and then make my x-axis and y-axis along the bottom and side.  I write the numbers (about the same size as an M&M so they line up) and color words along the side and bottom. Now all we have to do is open the package and complete the graph!

My Obstacle Course station activity: Valentine M&M Graphing

I can use the same questions from the M&M sorting activity with this. I like to print them on index cards so I can reuse them or I type them on the computer, print them and cut them out into question cards. I place them question facing down to make it a bit more fun. I’ve found that he gets really excited about flipping them over to see what they are going to ask, like it’s a big mystery. He is definitely more focused on what the question is asking than if I just verbally asked him. It may seem like a minor thing or an unnecessary step but it has made a huge difference for us because he is actually showing me what he knows instead of squirming away to avoid answering questions “mom” is asking. The power of the written (or printed) word!

Once our graph is done, we take turns flipping over the question cards and answering them.

Questions:

  • Which color has the most?
  • Which color has the least?
  • Do any colors have the same?
  • How many ___? (specific color or item)
  • Which color is your favorite?
  • Do you like the way they taste?

Engage, Encourage and Empower!

My Obstacle Course: February Theme

Here is a video clip from a February themed My Obstacle Course that we did last year. The station activities are all specific to the skills and concepts that Andrew was working on in therapy and school but I want you to see how it looks when I combine the station activities I post on to build developmental and academic skills. If you’d like me to post on specific skills or skill levels that you are working on with your child or want help figuring out how to know what to do or where to start, please email me at obstaclecoursemom@yahoo.com.  You can also leave me a post on my Facebook page at My Obstacle Course.

February Themed My Obstacle Course:

This course includes the following station activities I’ve already posted on:

  • Race To 100
  • Tunnels
  • Thematic Memory Match
  • M&M Math – Sorting By Color
  • Puff Blowing

Engage, Encourage and Empower!

Race To 100!

The other day was the “Hundredth Day of School” for Andrew and for those of you who don’t know about this, it is a big deal for young children. At the beginning of the school year they begin keeping track of how many days they have been in school. This allows for a very natural introduction and instruction about numbers. They usually use straws and add one per day until they have 10 to bundle into one group of 10.  This continues each day allowing them to count by tens and adding on the ones. They celebrate when they’ve reached the 100th day of school because they get to bundle up 10 groups of 10 to make one group of 100. Very exciting for them!! Children are usually encouraged to find 100 things and bring them to share with their class. This is also a great opportunity to work on grouping 100 items by 2’s, 5’s, and 10’s in particular.

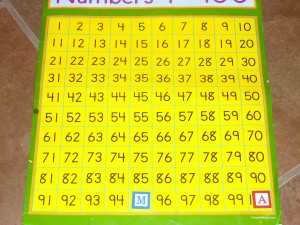
Last year Andrew brought in 100 colored puffs (He loves colored puffs almost as much as I do!) and this year he decided to bring in a 100’s chart poster.  He found it in my supplies and squirreled it away to his room. I purchased this chart in order to work on numbers with him by playing a game that is so simple it’s almost funny. I did this game with my kindergarteners and it was a great way to work on number recognition, number order and adding on from a certain number. This could also be played in reverse to work on subtraction. I thought it would be a great extension activity to reinforce at home what he is doing at school.

My Obstacle Course Station Activity:  Race To 100

What you need:

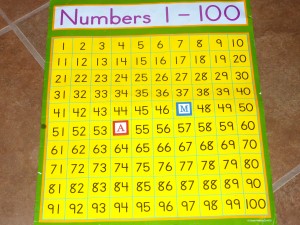
  • Hundreds Chart (poster or printout – I’ve attached a link for one at the bottom of this post)
Hundreds Chart
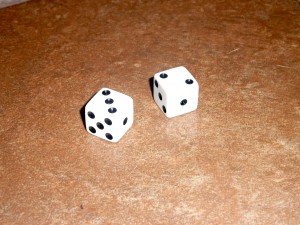
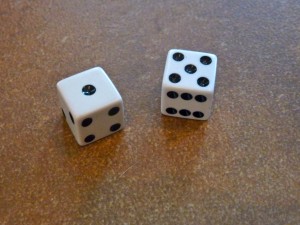
  • Dice (one or two depending on your child’s counting skills and/or how fast you want to get to 100)
Dice
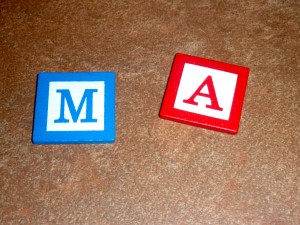
  • Game pieces (These could be game pieces from another game, different coins, anything that fits in the chart’s squares and are different so you can tell whose marker it is.  We’ve even used wine corks with faces drawn on them!)
Our game pieces - these were letter tiles I found at Michael's.

How to play:

1.  Start both game pieces before the number 1.

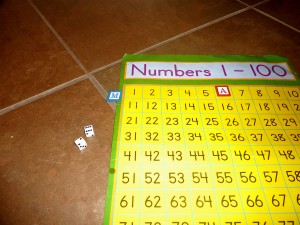
Ready to play!

2.  Take turns rolling the dice, counting and moving that many spaces.

Andrew went first and rolled a 6.
Andrew's game piece on 6. I rolled an 8.
Game pieces after our first rolls.

Say the number you land on to reinforce number and number name.

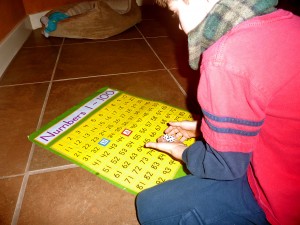
Andrew taking his turn rolling the dice.
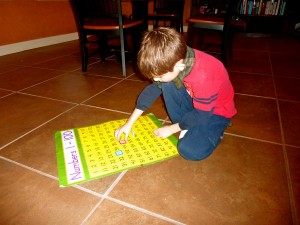
Andrew moving his game piece.
Keep rolling, counting...
and moving until you get to 100!

First one to 100 wins or if you play with Andrew, there are no winners because he gets just as excited to see everyone reach 100 as he is when he gets there.

This is a fun way to work on turn taking while playing with numbers and learning if there are any numbers that stump your child. The more they are exposed to numbers through all modes of learning, visual (chart), auditory (hearing the numbers counted as they move through the chart) and kinesthetic (moving their place marker in order through the chart), the better their understanding will be of how numbers relate to one another. I have used this 100’s chart for other My Obstacle Course stations that I will share in future posts, but until then, Happy Belated 100th Day of School!

(Click here for a link to A to Z Teacher Stuff website which has several PDF hundreds charts, ranging from blank ones for the child to write the numbers in to a complete 100’s chart.)

Engage, Encourage and Empower!

Valentine Themed Ball

Sparkly Valentine Ball (that also happens to light up when bounced!!)

This particular ball holds a special place in my heart and while I know that sounds corny, it actually does. I found this ball last year and purchased it because it was sparkly and went along with the February theme since it had a heart inside.  At the time, we were really working with Andrew on his bouncing skills. We tried all sorts of things but he just really didn’t care about bouncing a ball. He used to barely look at the ball when tossing or catching with me. (*See note below) Of course, I didn’t give up on this and knew that eventually I would find something that would let me know either that he was not able developmentally to bounce and catch a ball yet or he could do it and just didn’t see the purpose in doing so.

While setting up one of My Obstacle Courses, I took the ball and bounced it to see how it worked because it was a bit heavier than the other plastic balls we’d used so I wanted to experience what he would experience with it. I bounced it and the heart flashed! I was beyond happy because Andrew is a huge fan of lights, always has been and probably always will be.

Finding The Right Motivation

I kept this light up heart a secret and when he showed very little enthusiasm for bouncing the ball I told him that if he did it he would be surprised, but that he had to bounce it.  I showed him how he needed to do this because I had to bounce it pretty hard to get the heart to light up.  He saw this and his eyes opened wide and right then and there he bounced the ball AND caught it multiple times in order to get the heart to flash.

His bounces and catches were not perfect but I was not going for perfection.  I wanted to see if he was able to push down for the bounce, use his hands together to catch all while tracking the ball down and up with his eyes – so much to do for something that comes easily to so many! Even if he hadn’t been able to do it, I had found something that would have motivated him to at least try.  He wanted to see the light flashing and would do whatever it took to get it to happen, even if mom had to help out!!

Note: I attended a brain conference which gave me some insight into why children don’t look or focus on things like this and it has to do with convergence of vision, which can produce the appearance of multiple or blurred objects. I think this was part of his issue since I don’t think he would have chosen to have balls thrown into him. I realize how frustrating it must be to not be able to really focus on something and we worked to provide ways to help him.  This got better as he did more cross patterning activities like crawling, running, swimming and monkey bars, all of which helped his brain develop. When choosing this as a station activity, I knew that he was close to being able to bounce and catch and having knowledge about this, had he not been there, I would have chosen to do something like rolling it back and forth.

Engage, Encourage and Empower!
« Previous Page
Next Page »

Primary Sidebar

Obstacle Course Mom’s Blog

  • When People Stare, Mind Your Own Business
  • ABC’s of Peaceful Parenting Tele-class
  • What’s Perfect About This?
  • Exciting News!
  • Halloween

Categories

  • Blog
  • Cool Tool
  • Fine Motor
  • Getting Started
  • Gross Motor
  • Literacy
  • Math
  • My Obstacle Course Station Ideas
  • Oral Motor
  • Problem Solving
  • Sensory
  • Social Skills
  • Uncategorized

Archives

  • July 2012 (1)
  • May 2012 (1)
  • January 2012 (1)
  • November 2011 (2)
  • October 2011 (12)
  • September 2011 (14)
  • August 2011 (15)
  • July 2011 (19)
  • June 2011 (18)
  • May 2011 (21)
  • April 2011 (20)
  • March 2011 (22)
  • February 2011 (19)
  • January 2011 (21)
  • December 2010 (22)
  • November 2010 (6)

Meta

  • Log in
  • Entries feed
  • Comments feed
  • WordPress.org