• Skip to primary navigation
  • Skip to main content
  • Skip to primary sidebar

My Obstacle Course: Engage, Encourage and Empower

A fun, structured, systematic way to work on your child's strengths and weaknesses at home!

  • Welcome to My Obstacle Course!
  • What is My Obstacle Course?
  • Developmental Timelines
    • What Is My Child Ready For?
  • About Us
  • Blog
  • Contact Information

Obstacle Course Mom

The Bulb Syringe- Not Just For Baby’s Nose!

I know I say this all of the time but I really do love that there are so many wonderful and unexpected items sitting right in my cupboards that allow me to help Andrew build skills! I found this bulb syringe, aka the booger bulb, while cleaning out our medicine cabinet and figured since it hadn’t been used in years, it was time to get rid of it.

Bulb Syringe

That is, until I squeezed it…

Squeezing the bulb syringe.

and realized that it would be perfect for him to build his pincer grasp and hand muscles while being able to feel and see that the liquid was disappearing into the bulb…

Releasing bulb to let liquid or air in.

and then squeezing it again to squirt it back out.  How fun! This also involved a bit of experimentation because if he squeezed a little, only a little water went in, but if he squeezed a lot, then a lot of water goes in. It took a few tries and some hand over hand at first but eventually he got the hang of it!

My Obstacle Course Station Activity: Using bulb syringe to transfer water from one row of hearts to another.

As an auditory component, I found it helpful to tell him the syringe was sucking the water in, holding it’s breath and then spitting the water back out. You could even draw a face on it and pretend like it was an elephant sucking and spitting out water with its trunk!

Andrew squeezing the bulb to suck the water in.

He had a ball with it and even asked to take it in the tub to play with it.  Hmmm… more motor skill building? I guess so! 🙂 Love, love, love sneaking in skills while he just thinks it’s fun and games!

Engage, Encourage and Empower!

Cutting Out Grocery Store Ads

I love to find things that can be combined with another thing or tool to make an interesting station activity for My Obstacle Courses. When they are delivered to my mailbox and are free, I am beyond excited! Grocery advertisements are a perfect example of this. I used them all of the time when teaching Kindergarten to help with reading, math and fine motor skills and have used them with Andrew at home while doing My Obstacle Course. They are always changing so it keeps things interesting!

My Obstacle Course Station Activity: Cut Out 5 Things You Love

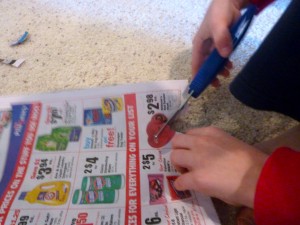
For a February themed My Obstacle Course that we did last week, I combined the grocery advertisements with our loop scissors for Andrew to cut out 5 things he loved.

My Obstacle Course Station Activity: Cut out 5 things you love

The advertisements are perfect because there are lots of colorful pictures of a wide variety of things. Adding the scissors allows me to help him build his cutting skills and since it is a station within the Obstacle Course, there are specific directions and he knows just what to do. I am also there to help out if needed. (Example: I did have to help him figure out how to get his scissors to a picture in the middle of the page.)

Check out how engaged he is!
Cutting out a heart. Two previous choices are in the left hand corner.
Turning his hand to cut and using the other hand to hold the paper. Progress!
He's totally cracking himself up with his choice!
See, practicing cutting skills with grocery advertisements can be fun!!

This is such an easy way to help your child build cutting skills, and it’s free! While the things that he cut were not cut out perfectly, you can see from the expression on his face that it didn’t matter. He was having fun and was practicing how to maneuver his hands to get the scissors to the picture he wanted to cut without the stress of doing it perfectly. (Note: The advertisements can be torn or cut into smaller sections if the whole thing is too much for your child to handle.)

Engage, Encourage and Empower!

No “Ick” Finger Painting

Finger Painting! A wonderful, soothing activity to express creativity with cold, wet paint on a blank canvas of white paper – for some that is. For others, it is definitely a non-preferred, “avoid if possible” activity. Why is this? Some people, especially those with sensory sensitivities, do not like getting things on their skin. There is something about the feeling of something that doesn’t belong there that they cannot stand. When I imagine a child like that finger painting, I see them literally paying no to attention to what they are doing and spending the entire time trying to find a way to keep from touching the paint and if they do, how to get it off of their fingers and hands. How can I imagine this? Because Andrew is one of those children. He does not like having things on his skin and if something gets on it, he needs to have it wiped off right away. If he had to do an activity like this, he would be done in 2 seconds after making a few swipes with his fingers and then yelling about needing help getting the paint off.

My Obstacle Course Station Activity: No “Ick” Finger Painting

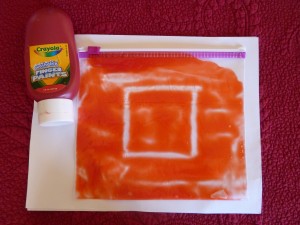
I was cleaning out my art supply box one day and found some containers of finger paint. Poor finger paint, never getting a chance to be used! I almost threw them out and then I thought about what it was that made it so unappealing to him. What would happen if I took away the “ick” factor? Would that encourage him to experiment with it? Since I am always trying new things to see if they work for him, I have found that it never hurts to try! So, I did a little experiment of my own and squeezed some finger paint into a sealable plastic bag. I closed it tight and began playing around. Turns out that it works great! Plus there is no mess to clean up or worries about getting it onto one’s skin.

I tried it as a My Obstacle Course station activity and he loved it! He got to experience something other children do in a way that made it not only tolerable but also enjoyable for him. It also gave us another fun, easy way to practice his fine motor skills.

Finger Painted Square

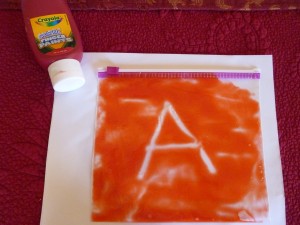
It is great because once he is done with one shape, letter or whatever he draws, he can “erase” it by smoothing the paint to create something else.

Finger Painted Letter A

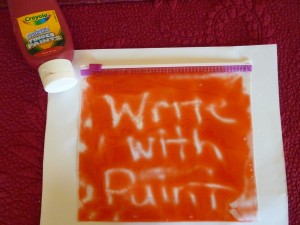
It also lasts for a long time when left sealed.

Finger Paint Writing

Now, I do realize that he will need to build up a bit of a tolerance for things getting onto his skin but if the purpose of playing with finger paint is to have another way to practice drawing or writing skills than this works great. Plus, this is still a sensory activity for him because he gets to feel the squishiness of the paint (which feels “gel”-like) without the anxiety of it getting on him.

Engage, Encourage and Empower!

How Do They Feel?

My Obstacle Course Activity Idea: How Do They Feel? Sorting Station

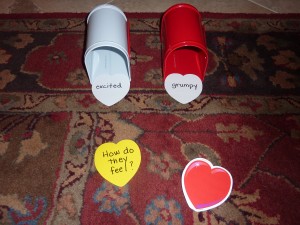
This is a station activity I used with Andrew to work on recognizing how other people might be feeling during certain situations. This is a very easy station to make and only takes a short amount of time to write the situations, especially if you think about things and people who are relevant to your child. I used calendar cutouts to write the scenarios on and the mailboxes for sorting but you can use whatever you have available to you (Post-It Notes, index cards, cut up strips of paper, etc.).

My Obstacle Course Station Activity: How Do They Feel? Sorting

I chose 2 feelings (some examples could be happy, excited, sad, disappointed, etc.) and then wrote short situations that go with those feelings on the cutouts (Jack was going to see his Grandma.  Sally’s DVD player broke.). When he got to this station, we read the feeling cards in front of each mailbox and showed what our faces would look like when feeling that way. You could also add basic smiley face type expressions on the cutouts to help. We received some “Feelings” stamps for Christmas this year that would be perfect for something like this. I’ll share a post on those soon!

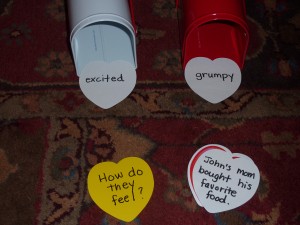
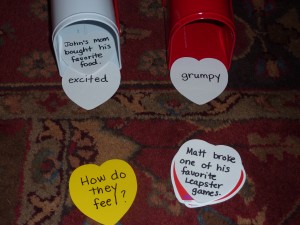
The "feelings" for this station were "Excited" and "Grumpy." The first card we flipped showed "John's mom bought his favorite food. I asked, "How do you think he feels?"

He then chose a cutout, we read the scenario, he decided how that person might feel and placed it into the corresponding mailbox.

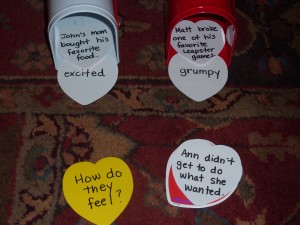
The first card was placed into the "Excited" mailbox because he decided that John would be excited to have his favorite food. We continued with the next card which showed "Matt broke one of his favorite Leapster games." How do you think he feels about this?

Continue going through the situation cards and talk through how that person might feel and how we would feel if it were us.

The second card was placed in the Grumpy mailbox.

Helping To Make A Connection Between Him and Other People

By doing this, I am trying to have him think about things that are important to him and situations that may have led to him feeling a certain way and showing him that other people feel the same way. For the “Grumpy” cards we discussed what each person could do improve the situation in order to feel better and when talking about the “Excited” cards, I asked him things like, “What would  your favorite food be?” and “What trips do you get excited to go on?”

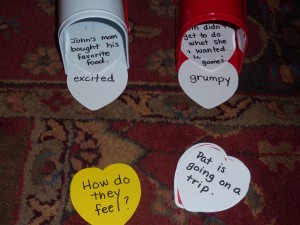
Another situation card: Pat is going on a trip. Is he excited or grumpy? That depends!!

This was a great way for me to see if he was understanding how feelings are connected to situations. It allowed me to work with him on expanding his ability to “read” situations that don’t directly involve him but also recognize that other people have feelings just like him.

Engage, Encourage and Empower!

Lite Brite Heart

We have a lot of toys that Andrew does not play with (click here for a previous post about new toys) and so I began including these toys as station activities in My Obstacle Course. I do this so I can teach him how to play with them (in case that is why he doesn’t play with them) in small steps, with a good deal of structure and guidance.

My Obstacle Course Station Activity: Make A Heart On A Lite Brite

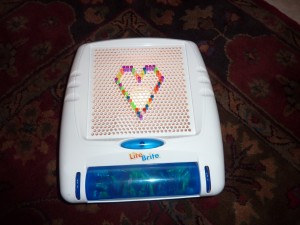
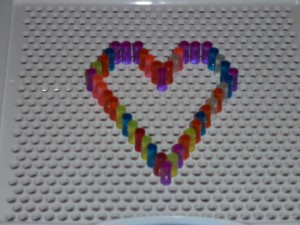
Lite Brite Heart

I think that a lot of times it is intimidating for children with planning issues or delays in pretend or imaginative play to sit down with a blank canvas, like a Lite Brite screen or a toy that comes as a bunch of small pieces needing to be put together to make something, like Legos or Lincoln Logs. Instead of considering those toys to be too difficult or too advanced for him, I removed the “I don’t even know where to start!” factor. I decided to see if starting things out for him would help. It was near Valentine’s day and he had received a new Lite Brite toy for Christmas that hadn’t been played with yet, so I started a heart so that we could build on from there together.

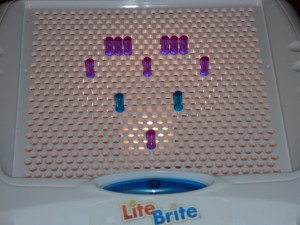
Heart shape started

This was so much less intimidating for him because he knew we were making a heart, he could see the general outline, and he could help me fill in the lines.

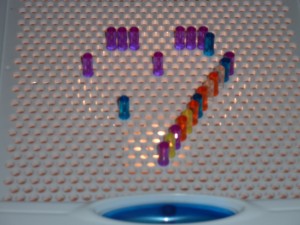
Pegs added to fill in heart outline

He didn’t have to worry about coming up with the idea or plan and making sure it would be right. I was helping him see that in order to play with this toy, all he had to do was put the little pegs go into the holes to make a picture, shape or just something random.

All of the pegs in to make a completed heart shape!

When we finished the heart, he pushed the button, saw all of the colors light up and had the greatest smile on his face!

Something so basic as introducing a toy (or reintroducing if they had no interest the first time) by removing steps that could be too frustrating is a great way to encourage your child to play. After doing this activity (we did this last year), I “caught” him playing with his Lite Brite many times, using the pegs (or markers as he calls them) to make patterns and also placing them randomly. It doesn’t matter to me if he makes random things, shapes or pictures. What matters is that he learned the basics and realized that he could do it!

Engage, Encourage and Empower!
Candy Heart Math

Candy hearts are another way to sneak in some math while using something that is really easy to find this time of year.

My Obstacle Course Station Activity: Match Up Numbers With The Same Number Of Items (Clothesline Clipping An Optional Add-On)

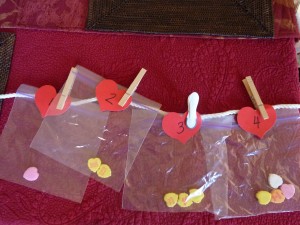
Candy Heart Number Match-Up

This activity helps to build one to one correspondence, which involves being able to match an object or group of objects with the number that represents it.

Setting Up This Station:

  1. I placed a certain number of candy hearts inside of a small plastic bag. (In this case, I used #1-5, but you could do whatever numbers your child is ready for, and they don’t have to be in order especially if you are working on larger numbers.) You could also place them in containers, muffin papers/tins or paper/plastic cups.
  2. I printed the numbers that went with the bags on a calendar cutout.
  3. I attached the bags to my clothesline (to sneak in some fine motor skill building 🙂 ) and set out the numbers.

How To Play:

  1. Choose a number.
  2. Find the bag that has the same number of candy hearts inside.
  3. Clip the number with the bag.

Candy Hearts To Practice Math Facts –

Click here for a previous post on using math organizers and dice to practice math facts. The materials shown went with a December theme but can be switched out for candy hearts to go with a February theme. See how easy it is to use basic materials to build math skills while keeping it fun and thematic!!

My Obstacle Course Station Activity:  Making Equal Groups

This is an activity inspired by my years teaching 3rd grade. When working on multiplication concepts with my students, it was really important to make sure that they understood that multiplication actually stands for “equal groups of.” Example: 4×3 actually means 4 groups of 3. This also works for division – starting with this number, when divided into groups of ___, we have ___ sets.  Example: If we started with 12 hearts and divided them into groups of 3, we would have 4 equal groups so 12 / 3=4.

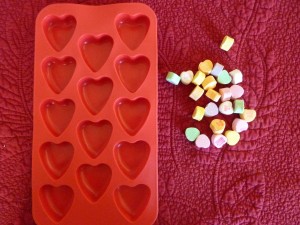
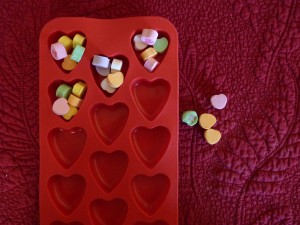
For this activity, I chose a certain number of candy hearts and used a cute ice-cube tray as a counting tray.

Candy hearts and ice cube tray

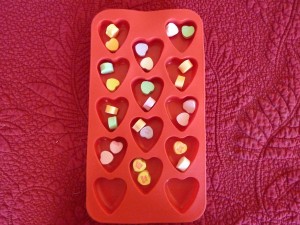
Once at the station, we would first count and see how many hearts we had. Next, we would see if we could make equal groups of 2.

24 hearts divided into equal groups of 2

If so, we knew it was an even number and if not it was odd. If it was even, than we counted how many equal groups we had in order to make our equation: ___ groups of 2= ___. Depending on the number of hearts I had provided, we would usually go up to about 5 so we could count by fives.

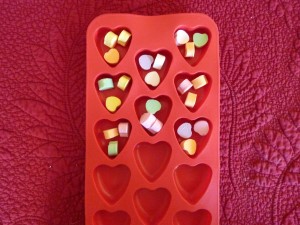
Equal groups of 3 (8x3=24)
Equal groups of 4 works as well!
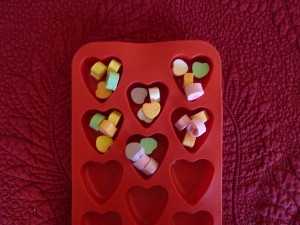
24 does not divide equally into groups of 5 - there are 4 equal groups with 4 left over (remainder)

Building math concepts and skills can be fun and doesn’t always have to involve paper/pencil activities or flash cards. If your child struggles with numbers or math facts, I encourage you to look no further than your pantry to find “manipulatives” (candy, Cheerios, goldfish crackers, dried beans, etc.). It is so important for them to get a good understanding of what the numbers and symbols represent and what they are really doing before being expected to do it all in their head or on paper.

Engage, Encourage and Empower!
« Previous Page
Next Page »

Primary Sidebar

Obstacle Course Mom’s Blog

  • When People Stare, Mind Your Own Business
  • ABC’s of Peaceful Parenting Tele-class
  • What’s Perfect About This?
  • Exciting News!
  • Halloween

Categories

  • Blog
  • Cool Tool
  • Fine Motor
  • Getting Started
  • Gross Motor
  • Literacy
  • Math
  • My Obstacle Course Station Ideas
  • Oral Motor
  • Problem Solving
  • Sensory
  • Social Skills
  • Uncategorized

Archives

  • July 2012 (1)
  • May 2012 (1)
  • January 2012 (1)
  • November 2011 (2)
  • October 2011 (12)
  • September 2011 (14)
  • August 2011 (15)
  • July 2011 (19)
  • June 2011 (18)
  • May 2011 (21)
  • April 2011 (20)
  • March 2011 (22)
  • February 2011 (19)
  • January 2011 (21)
  • December 2010 (22)
  • November 2010 (6)

Meta

  • Log in
  • Entries feed
  • Comments feed
  • WordPress.org