• Skip to primary navigation
  • Skip to main content
  • Skip to primary sidebar

My Obstacle Course: Engage, Encourage and Empower

A fun, structured, systematic way to work on your child's strengths and weaknesses at home!

  • Welcome to My Obstacle Course!
  • What is My Obstacle Course?
  • Developmental Timelines
    • What Is My Child Ready For?
  • About Us
  • Blog
  • Contact Information

Obstacle Course Mom

April Memory Match Games

This month I have two different memory match games to share, one using butterfly stickers and the other with Easter themed stickers.

My Obstacle Course Station Activity: Memory Match Game or Find the Same

Spring Butterfly Themed Memory Match Game:

I like to use calendar cutouts or colored index cards cut in half…

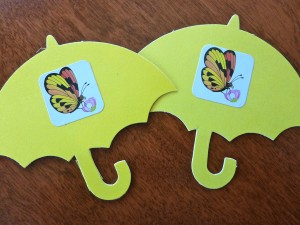
Umbrella Shaped Calendar Cutouts (April Showers)

and thematic stickers. Place matching stickers on two separate cutouts or cards.
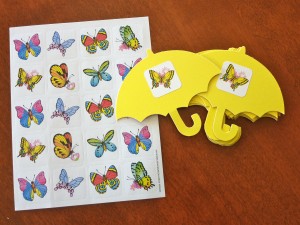
Sheet of butterfly stickers that I used.

(The butterfly memory match is one of the more difficult ones we have done because he really has to pay attention to the details of the butterflies to distinguish between them.)

Set them out face down and that’s it!

Note: When we first began doing this game, I placed the cards face up and we played “Find the Same” to work on finding matching pairs. This helped him with visual discrimination and also gave him an introduction to what we were going to be doing once the cards were turned over.
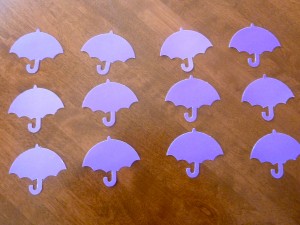
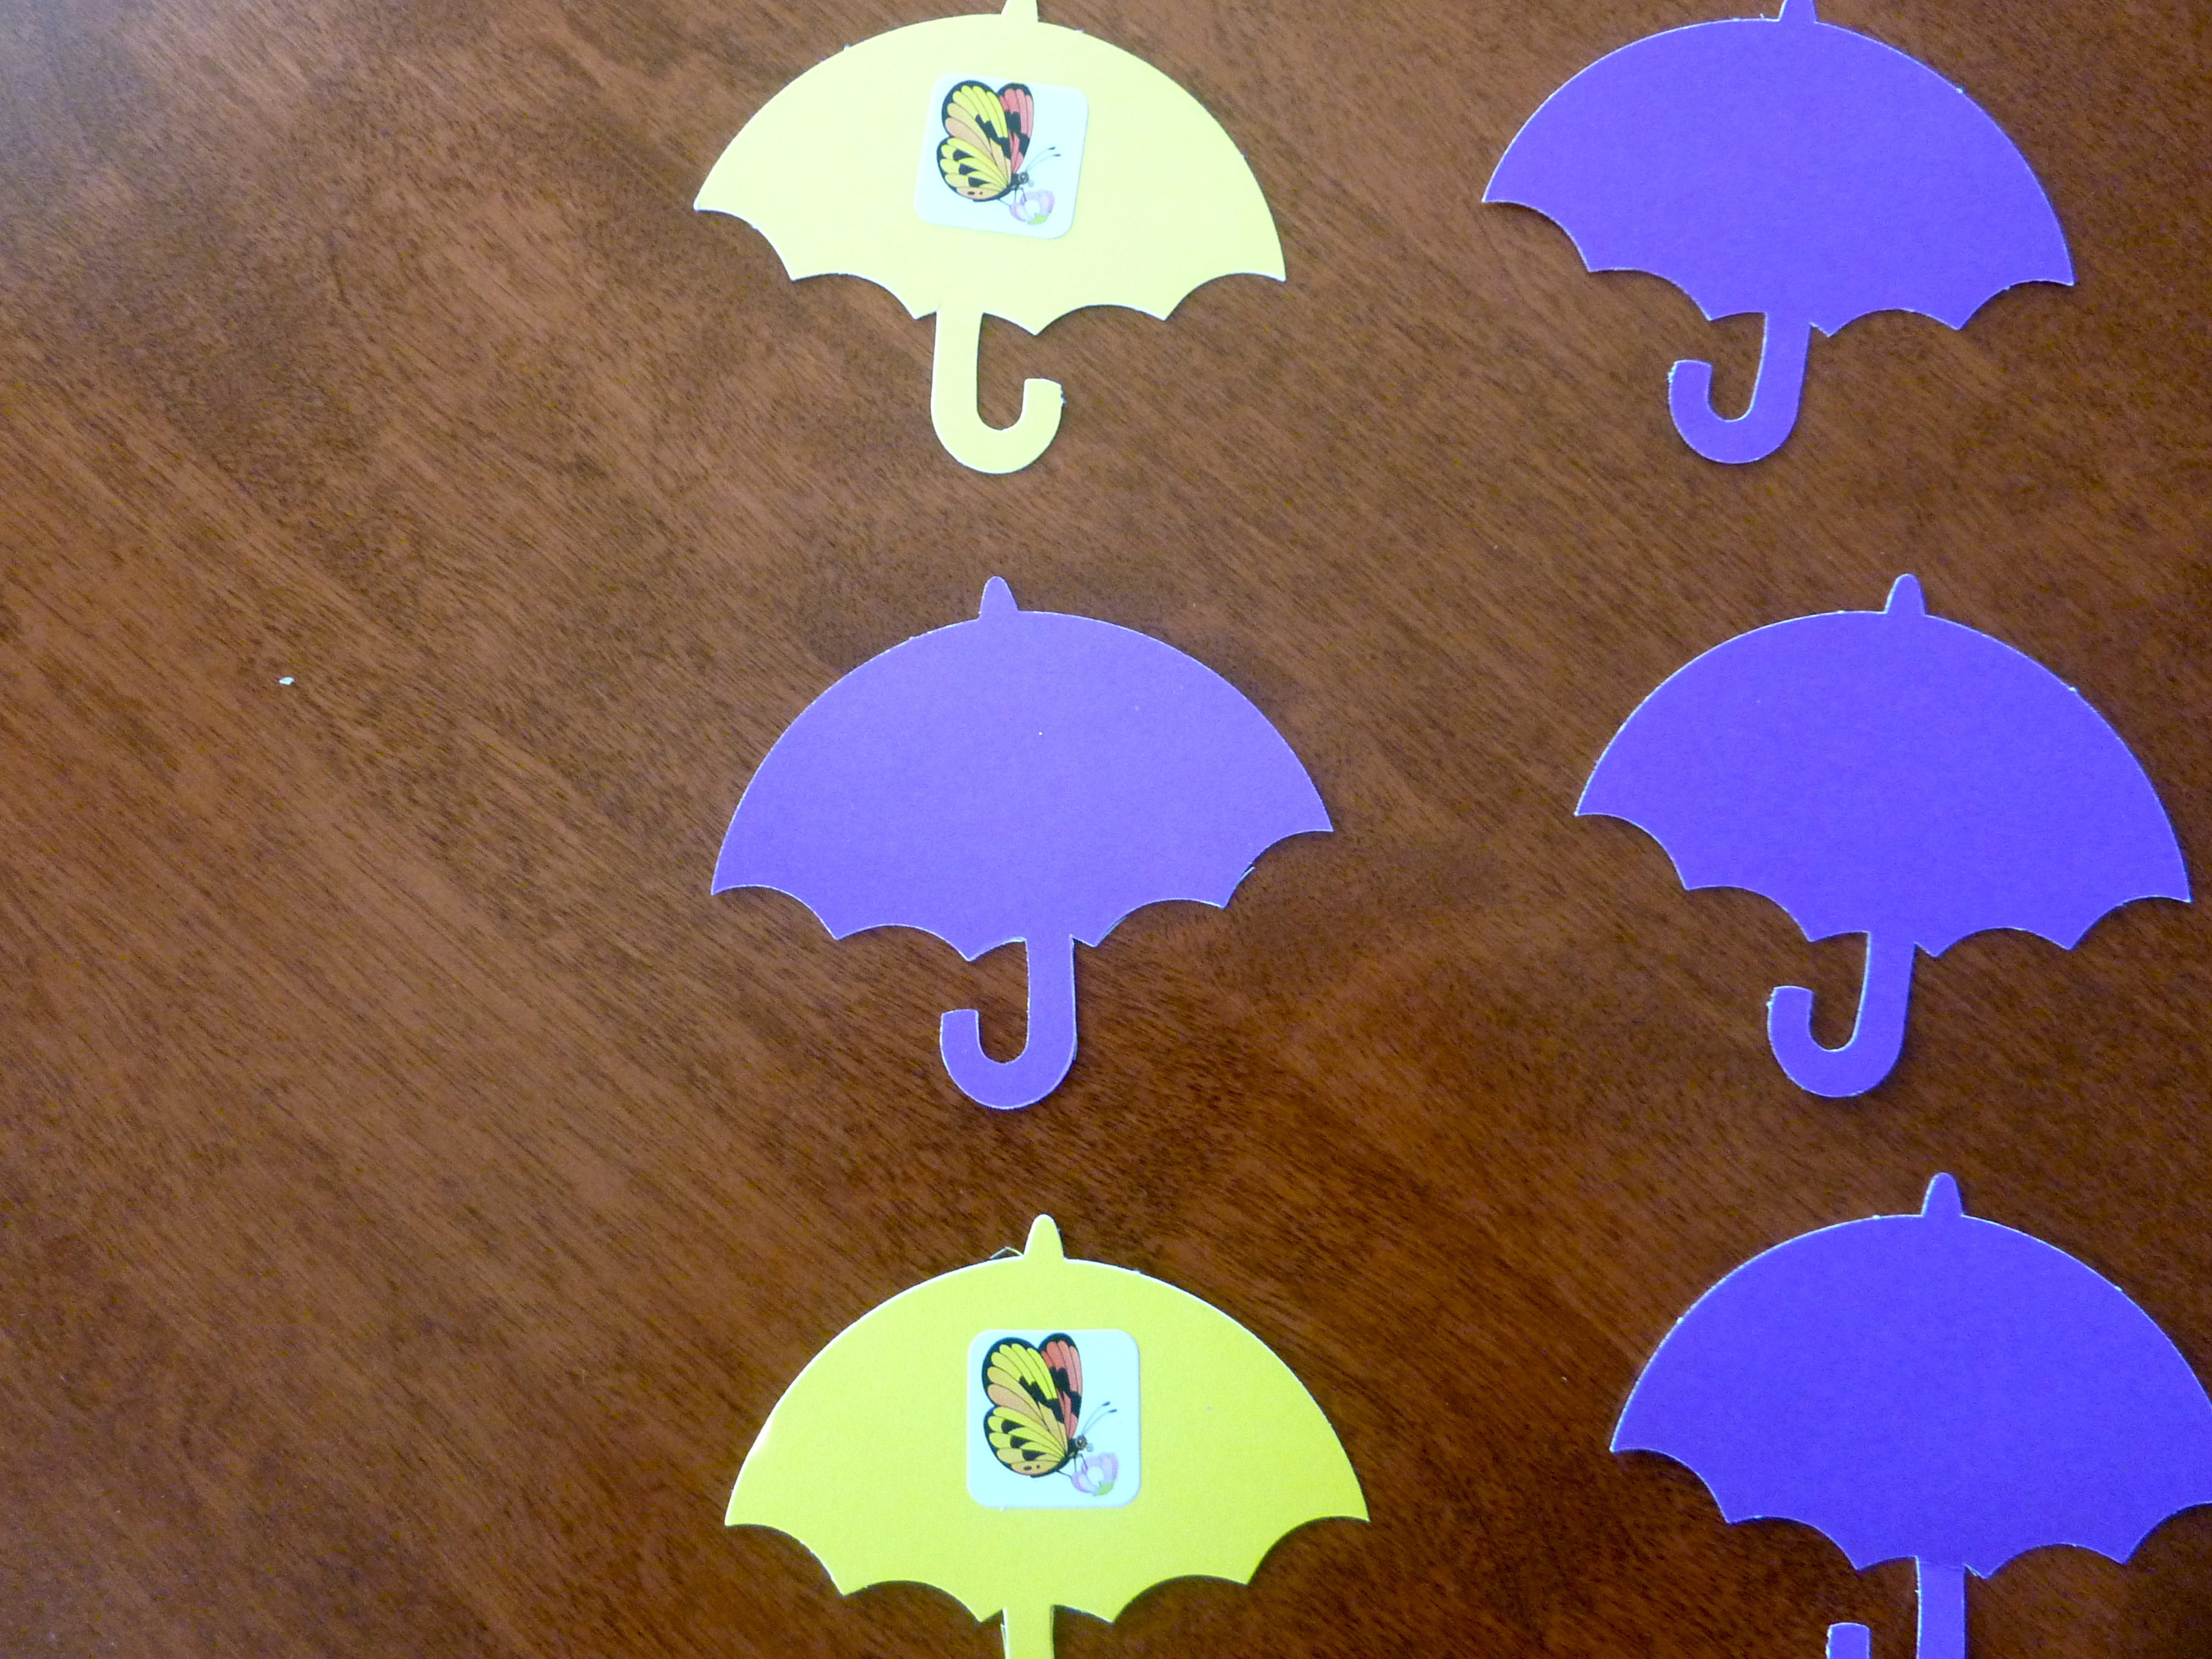
Memory Match Game Set Up
Matching pair found!
Matching pair up close.

Easter Themed Memory Match Game:

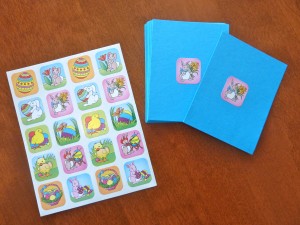
Memory Match Game with Easter Stickers
Matching pair!

Note: There are tons of different kinds of stickers out there so if you don’t celebrate the holidays I am sharing about or if you have a child who is really into something, like vehicles or sports, you can substitute those kinds of stickers and make a game that will be appropriate for your family and motivating for your child.

Engage, Encourage and Empower!
 

Find Baby Butterfly

This is an adaptation of a game that I used with my students when I taught kindergarten. It was called “Where’s Uncle Ugboo?” and it was basically a hide and seek game using construction paper umbrellas with letters of the alphabet on them and a small picture of Uncle Ugboo that I would “hide” under an umbrella. We would go around and the students had to identify the letter before they could lift it to see if he was under the umbrella. If they found him, they got to hide him the next time. They loved it and it was a fun way to practice letter identification.

I decided to try it with Andrew and was so excited because I realized how simple this was to make with cutouts or index cards and also the whole idea that I was not limited to just doing letters. I could make the game so it was building on whatever concepts he was ready for, including (but not limited to) numbers, words, colors, shapes, emotions, thematic vocabulary words (think science and social studies vocabulary!), etc.

I used some large butterfly cutouts, wrote or drew what I wanted him to identify and then set them out at one of My Obstacle Course stations. (Note: When making this game, I recommend using something thicker than paper like calendar cutouts or index cards so that they cannot see the baby butterfly underneath.)

My Obstacle Course Station Activity: Find Baby Butterfly

Letter Identification:

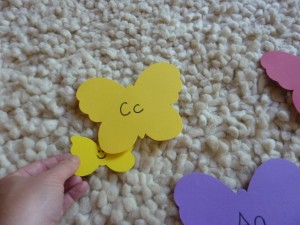
Letter Identification Game Set Up
Baby Butterfly

I placed a small butterfly cutout (the baby butterfly) underneath one of the larger ones. That is it for set up!

Hiding Baby Butterfly

When playing this game, he has to identify whatever is on the butterfly or card before he can lift it up to see if the baby butterfly is underneath.

Lifting the cutout to see if it's there!

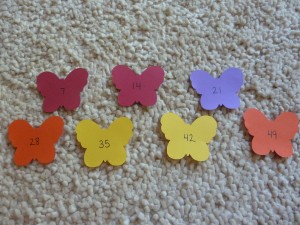
Numbers:

Multiples Of 7 Game Set Up

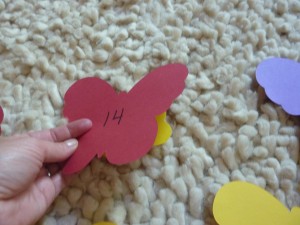
Baby butterfly is hiding under the number 14

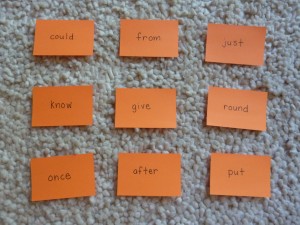
Sight Words or Vocabulary Words:

Sight Word Game Set Up
Hiding under the word "know"

You can also modify it so that there are a few baby butterflies hidden or you could play it a few times if they find it right away. Super simple, fun and helps build skills. I love activities that incorporate all of those things!!

Engage, Encourage and Empower!

Math Fact Sorting

This is a station activity that I made last year to help Andrew work on his math facts. It was a huge hit with him and it is another example of how easy it is to tweak something so that a child can demonstrate their knowledge.

Intelligibility and legibility DO NOT indicate intelligence!

He was not able to write numbers at the time we did this so it gave him the opportunity to show what he knew without something like fine motor weakness or intelligible language standing in the way. If he was only allowed to show what he knew by filling out worksheets or using flashcards in the traditional way, it would have appeared as though he didn’t know the answer. I would have been expecting him to be able to show or tell me the answer in ways he was not able to. By making small modifications to something very basic, he was able to demonstrate to me that he understood what the equation was asking as well as showing he knew how to figure out the answer. It was not something he had memorized at the time and it was fascinating to watch him figure out the answer and place the butterfly into the pail.

(Note: When doing something like this, I like to have manipulatives available for him to use as counters if he needs them (I’ve used buttons, beans, pennies, Cheerios, Goldfish Crackers and anything else that he can use to count.). It is really important for me that he understands what the equation means rather than force him to memorize something without that understanding.)


My Obstacle Course Station Activity: Sort the equations by their sum.

I started with a package of multi-colored butterfly cutouts (I used these because it is spring but you can use whatever you have – Post-It Notes, index cards, note paper, etc.)…

Butterfly Cutouts

and wrote some math facts that were appropriate for what he was ready for and working on in school. I chose to focus on four different sums (4, 5, 6 and 7) and picked 3 equations per sum to write on the cutouts.


Butterfly Cutouts with Math Facts

That’s all it takes and the station is ready!

When he got to the station, he flipped over the cutout, read the equation…

First cutout flipped over

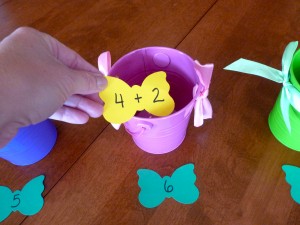
and placed it into the correct pail.

"4+2" gets placed into the "6" pail

Repeat with the next cutout.

Next cutout flipped over
"3+4" gets placed into the "7" pail.

Continue until all of the cutouts have been placed into the correct pails.

All equations sorted

Crawl and Sort

This is the actual station that he did last year and is the same as shown above with the addition of the carpet runner to incorporate crawling and movement. He started at one end, picked up one equation, crawled down to the other end of the runner and placed it into the correct pail. He crawled back and repeated this until all of the equations were sorted. It’s a total win-win because he thinks it is fun to be moving around while I know that he is working on things that are important for his brain development.

Equations placed at one end of carpet runner for "Crawl and Sort."
Sums and pails at the other end of the carpet runner

(Here is a link to a previous post that includes what the carpet runner looks like in action and why I use it. The carpet runner part of the post is towards the end.)

Engage, Encourage and Empower!


My Obstacle Course Recipe

I am a big recipe follower.  I am not someone who tosses or mixes things in hoping for the best.  I find comfort in knowing that someone has tried and tested something AND feels it is good enough to pass on to others.  That is how I feel about My Obstacle Course.  This is something I have actually done with my son (for 3 years now!).  I share this idea with you because I have been there (and still am!) with my child, not always knowing what to do or how to help him.  While I take him to all of the therapists he needs, try to provide activities outside of the home to help him build social and play skills, I really wanted something to do with him at home and this is what I came up with, something different from anything I could find in books or on the internet.  It is my desire to help other parents like me, those who are in need of something a little different in order to “Engage, Encourage and Empower” their child!

I AM a big fan of metaphors so here is one I think that fits quite well for My Obstacle Course.

It is like a recipe, a very basic one that can be adapted in many different ways.  Think of the obstacle course structure as the base of the meal, say chicken.  It is the thing that holds the meal together yet can take on many different flavors depending on what you add.  I have found that most people enjoy doing obstacle course-like activities (think Survivor, the Amazing Race, scavenger hunts, occupational therapy gyms, etc.).  There is something motivating about an event made up of smaller activities, tasks that have specific directions or clues so you have an idea of what is expected, things you feel you can actually accomplish without being too overwhelmed.  There is comfort in knowing that once the activity is completed, you get to move on to something else.  The individual station activities set out on their own appear random but when placed within the structure of an obstacle course, they make sense because they are part of the whole.

The individual station activities of the obstacle course are like the side dishes, the things that help to make it well-rounded and well-balanced.  By providing activities that allow your child to build skills in all areas of development (fine motor, gross motor, oral motor, literacy, math, and problem solving) at the level they ready for, you are helping them grow not only in areas where they are weakest, but also encouraging growth in their strengths.

(Note:  This was a huge concept for us because we discovered that even though he wasn’t talking, he was reading.  We were so focused on getting him to talk that had we not started doing Obstacle Courses with him, we would have totally missed out on building something that he was ready for.  So scary!!  It also made him engage with us more because we were providing activities that were interesting and challenging instead of insulting him by providing activities that were way too easy.   Just because he has delays in certain areas doesn’t mean he is delayed in all areas.)

Lastly, the monthly or holiday themes keep things fun and interesting, in the same way that spices keep the chicken from being bland and boring.  Putting out the same activities each and every time gets boring.  Using different themes to go along with the months, holidays or school studies helps on several different levels.  I have found that it helped my son make connections based on the symbols that go with the themes.  It allowed us to introduce vocabulary that may have seemed less important than getting him to speak intelligibly.  I saw that even without being able to speak, he was able to show he understood just by matching pictures with words.  It also made me really think about what HE needed to work on and what HE was ready for each time I set it up.

The Obstacle Courses that you make for your child will be unique to the tastes and interests that motivate them.  They will need more of certain kinds of activities, less of others depending on where they are with each developmental area or skill.  I encourage you to look at the activity ideas I post with an open, flexible mind knowing that each activity can be adapted up or down to meet a wide variety of needs.  I will do my best to show examples of how to do this but find that once you get going, it will become much more natural to look at something and think, “hmm… I like that but could tweak it a bit to target what my child needs.”  That is what I hope to teach you.  It is my desire to help you engage with your child.  I want to encourage you to try some new things so you can learn more about your child.  I want to empower you to be the knowledgeable team leader for your child because WE are the constant in their lives!

Engage, Encourage and Empower!!

Design and Drill

"Design and Drill" toy

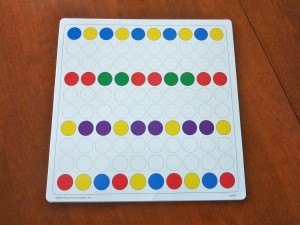
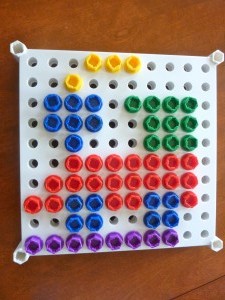
When I first saw this toy I thought it would be a huge hit with Andrew and when he seemed reluctant to play with it I immediately made plans to turn it into a station activity in My Obstacle Course. It is a square with holes to be used with colored screws to create designs or patterns. It comes with an electric drill as well as one the child can use manually. This is a great toy for combining fine motor skills, problem solving and planning along with math skills (patterning).

The colorful screws and drill

The cards that come with the toy range from basic to complex and can take a bit of time to complete. I found that having Andrew make the pattern or picture that was on the card from start to finish was too much and he lost interest when he realized it was going to take a while. I began shortening the activity by either starting a picture or pattern for him to finish or only giving him a certain number of screws to drill in. This helped a ton and was far more motivating to him.

My Obstacle Course Station Activity: Finish the Pattern

Choose colors or a pattern. Begin the row or the pattern and have your child finish the pattern by screwing in the pieces that come next. I like to provide the exact number of pieces that he will need to complete it. Once I saw that he had a good idea of the pattern, I would include an oddball screw to see if he could recognize that it did not belong.

Card with basic rows of different colors
Card with a basic pattern
Rows of patterned screws

My Obstacle Course Station Activity: Make the Same (finishing what is shown on the paper card)

This is the most challenging activity and is something that I found worked best when I began the pattern or picture and provided him with the screws to finish it.

Train card
Andrew's board almost finished (missing two purple screws in the bottom row)!

This is another toy that was purchased for Christmas and was not really played with until I taught him how to do it in a small, structured way. Breaking down the steps into small, manageable pieces makes such a difference! It is now a toy that he understands, enjoys and is more comfortable playing with. Click here for a previous post on new toys not played with.

Engage, Encourage and Empower!


Pastry Brush as Paint Brush

Pastry (or Basting) Brush

I found these bright brushes at Target. I thought that they would be great for painting with while also being super easy to clean. Andrew is not a huge fan of painting and past attempts involving sheets of blank white paper have lasted about 15 seconds. I took that knowledge and decided to make this painting station look very different. I set out these brushes…

Spring Colored Brushes

added a pie tin…

Brushes and Pie Tin

and a plate or cookie sheet underneath (since my tin has holes).

Pastry Brushes, Pie Tin and Paper Plate (to catch spills)

My Obstacle Course Station Activity: Paint Planet Earth

I placed some washable finger paint on the cookie sheet (or on another paper plate if that’s what you are using underneath). I used blue and green paint because he had been learning about the planets in school and the station direction was to paint the planet Earth.

Check out the focus!
Using both hands...interesting 🙂 .
Checking it out closely.
Finished product!

This station activity is really easy to set up and clean up. It was the first time (at home with me) where he was actually willing to paint and I think it really helped him to have a defined space and to know he was expected to cover the whole bottom. A blank white paper can be very intimidating and this was structured enough to make him feel comfortable to be willing to try. He had a ball with this and I enjoyed watching and listening to him as he painted!

Engage, Encourage and Empower!


« Previous Page
Next Page »

Primary Sidebar

Obstacle Course Mom’s Blog

  • When People Stare, Mind Your Own Business
  • ABC’s of Peaceful Parenting Tele-class
  • What’s Perfect About This?
  • Exciting News!
  • Halloween

Categories

  • Blog
  • Cool Tool
  • Fine Motor
  • Getting Started
  • Gross Motor
  • Literacy
  • Math
  • My Obstacle Course Station Ideas
  • Oral Motor
  • Problem Solving
  • Sensory
  • Social Skills
  • Uncategorized

Archives

  • July 2012 (1)
  • May 2012 (1)
  • January 2012 (1)
  • November 2011 (2)
  • October 2011 (12)
  • September 2011 (14)
  • August 2011 (15)
  • July 2011 (19)
  • June 2011 (18)
  • May 2011 (21)
  • April 2011 (20)
  • March 2011 (22)
  • February 2011 (19)
  • January 2011 (21)
  • December 2010 (22)
  • November 2010 (6)

Meta

  • Log in
  • Entries feed
  • Comments feed
  • WordPress.org