• Skip to primary navigation
  • Skip to main content
  • Skip to primary sidebar

My Obstacle Course: Engage, Encourage and Empower

A fun, structured, systematic way to work on your child's strengths and weaknesses at home!

  • Welcome to My Obstacle Course!
  • What is My Obstacle Course?
  • Developmental Timelines
    • What Is My Child Ready For?
  • About Us
  • Blog
  • Contact Information

Obstacle Course Mom

Egg Tray As Math Organizer

Egg Tray For Adding/Subtracting/Multiplying/Dividing

Ok, so Easter is done but I have one more idea for how to use something you may have…an egg tray (you could also use an egg carton or ice-cube tray).
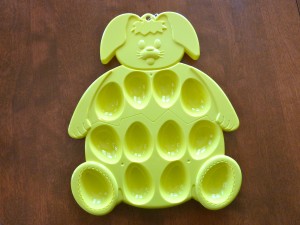
Egg Tray Math Organizer

I got this bunny shaped Egg Tray at Target last year and thought it would be perfect not only for drying the eggs after they have been colored but they would be a great math organizer for adding and subtracting up to 12. For these, I would use dice, playing cards or flash cards to come up with the numbers to add or subtract. (Previous Post on Easy Math Organizers)

Recently though, my mind has been thinking about introducing multiplication and division to Andrew. He found a “Brain Age” game on his DS and was asking what some of the multiplication and division equations meant. It’s time for me to introduce these concepts to him and as with any new concept, I want to begin by making it very concrete, using items that he can manipulate to help connect the abstract numbers and symbols with what they actually mean.

My Obstacle Course Station Activity: Making Groups Of Marshmallows (Introducing Multiplication)

Introducing multiplication using egg tray, colored marshmallows and 8-sided dice.
Counting out 8 x 5 = 40. We counted by 5's at first and then he double checked by counting them all.

I introduced this to him using dice that went up to 8 and while he did okay with it, the next time I will tweak it and make some flash cards to build understanding of one common factor instead of having it be so random. The flash cards I will make will start with common factor of 1 – 1×1, 2×1, 3×1, 4×1, etc., so that he begins understanding the “groups of” concept. We will build from there perhaps throwing in some previously mastered facts to reinforce his knowledge.

Building Understanding For Multiplication And Division

“Mom, we’re finally learning multiplication so I have to memorize all of these facts by tomorrow!” Ahhh…at first they are so excited, as though they’ve reached an important rite of passage. True, there are some children who are able to do this right away and “get” what the numbers represent without needing it broken down. Others are able to memorize the equations but lack the understanding of what they actually represent. This becomes obvious when story problems become difficult because they don’t quite understand what the question is needing them to do – add, subtract, multiply or divide. Then there are those who cannot seem to memorize them and have no tools to help them figure out what they are supposed to be doing.

I prefer to approach abstract concepts by encouraging everyone to begin with a firm understanding of what the concept means, what it looks like and how to “act it out” with manipulatives. This includes those who get it right away because it’s interesting to see how they approach it through actions. Many times they will bristle at this notion – Why do I have to do this? I already know it!”  This is good practice for working on explaining their methods and showing others about how they see things.

My last few years of teaching, we really emphasized to our students the importance of being able to show what they are doing through numbers, words and pictures (those of you who are familiar with the “Investigations” math series will recognize this.). Using a math organizer along with manipulatives replaces the “picture” making because your child is actually representing the equation with items. Their work IS the picture. This will give you immediate information on where your child is with regards to understanding what the symbols mean.

Building Multiplication Skills:

A multiplication sentence may read 4 x 3 = 12 to you, but when teaching my students, I emphasized that it really means 4 “groups of” 3 equals 12. It also represents 3+3+3+3=12 since multiplication is repeated addition.

Building Division Skills:

The same is true for division. 12/4=3 means 12 divided into 4 groups which gives you 3 in each group. When working on division, an organizer can really help your child grasp this concept. Being able to actually divide a given number into groups that must have the same amount.

Make It Relevant

To do this, I always found it helpful to connect it with food or money. Ex. For 12 divided by 4, I would tell them that they have 12 jelly beans that they have to pass out evenly to their 4 friends. How many jelly beans does each person get? They can do the “one for me, one for you, one for you” method until they have all been passed out, giving each person 3 jelly beans.

Using manipulatives, or items to count, when children are first learning math concepts can help them fully understand what they are doing, allows them to see what it looks like and connect that with the numeral representation of it.

Engage, Encourage and Empower!


Reusing Egg Coloring Cups

It’s Earth Day and I thought it would be nice to combine the practice of reusing with something you may have purchased in the past weeks – the colored cups that come with egg dying kits. Once you’re done coloring Easter eggs, the containers are perfect for using in My Obstacle Courses! They stack well for storing purposes and are bright and colorful. I especially like them because they keep things we are using at a station contained until we get there or they can be set out with labels as part of a sorting station. Here are some photos showing how I have used them over the past 4 years…

My Obstacle Course Station Activity: Sort the puffs into the same colored cup using a tweezers.

Colorful containers match colored puffs for station activity of sorting by color.

My Obstacle Course Station Activity: Sort the items

Containers used to hold materials and also provide a place to sort into.

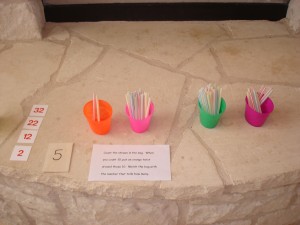
My Obstacle Course Station Activity: How many straws?

Containers hold straws for number/place value station.

My Obstacle Course Station Activity: Blow the puffs off of the counter into the cup.

Container perfect for holding puffs for "puff blowing" station.

If I haven’t done a post on the station activity, I will do so at a later date. Andrew is off today so I’m going to keep this short and sweet because we are off to do our own Easter themed My Obstacle Course! Have a great weekend!! 🙂

Engage, Encourage and Empower!

Jelly Beans Tweezing

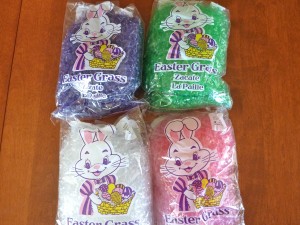
I was at our grocery store and found these different colors of Easter grass.

Easter Grass in fun colors!

I purchased them not for our Easter baskets but rather to use in My Obstacle Course along with tweezers or tongs for fine motor skill building. While Andrew’s handwriting is really improving, we still need to build his pencil grasping muscles and tweezers are a great tool to use for this. Since Easter is just around the corner and I like to use things that are thematic and seasonal, I bought some jelly beans to put in the grass for him to get out.

I always try things out before putting them into the Obstacle Course so I know what he is going to be experiencing. This activity requires more pinching pressure to grab the jelly bean, which is going to help him build those finger and hand muscles. If this is too difficult for your child, use something that is larger, like ice-cube tongs or switch the jelly beans with colored marshmallows.

My Obstacle Course Station Activity: Jelly Bean Tweezing

Set Up:

I used an old baking tray…

Easter grass and an old baking tin

and placed some grass in, spreading it out so it wasn’t just one big clump.

Easter grass in the tin.

I put some jelly beans in…

Jelly beans scattered in the grass.

set out the tweezers and it is set!

Tweezers grabbing the jelly bean

At The Station:

Your child will use the tweezers to grab the jelly beans out of the grass. You could work on color recognition by having your child hunt for a certain color or choose a certain number you’d like them to find, especially if this is challenging for them.

Going into the grass to get a jelly bean.
Got it!

You could provide a container for them to place the jelly beans in after they find them. I may even use a different color grass in another bowl to make a nest for the pretend play add-on I describe below.

Pretend Play:

Activities like this one also lend themselves to a bit of pretend play. We have pretended that these were bird eggs that fell out of the nest onto the ground and we have to get them back to the nest before the mother bird returns. Get creative and have some fun!

Combining thematic or seasonal items with household items to create a fun station activity.

Engage, Encourage and Empower!


Jelly Bean Sorting

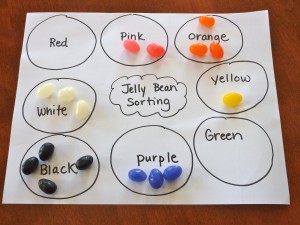
My Obstacle Course Station Activity: Jelly Bean Sorting

This is the jelly bean variation of a My Obstacle Course Sorting Station Activity that I have posted on before. Here is the link for the one using Colored Marshmallows.

Set Up:

The set up is super simple, requiring only white printer paper, a marker, some jelly beans and a container. (See below about the container I am using.) This is a great way to link color words with colored items and basic skills of sorting according to a certain characteristic, counting and analyzing data.

Questions:

You can use the same question cards used with Jelly Bean Graphing. Click on this link for a PDF file: Jelly Bean Questions.

Add On:

You can also add some cards with the color words on them (or even use something like Candy Land cards or make your own color cards using sticker dots – Just thought of this idea as I was writing so look for a post on this soon!) and they could flip them over two at a time and add those colors together (ex. pink + orange= __. The equation for this based on the completed sort below would be 2+3=5.).

My Obstacle Course Station Activity: Jelly Bean Sorting
Jelly Bean Sorting Completed

Fun Container:

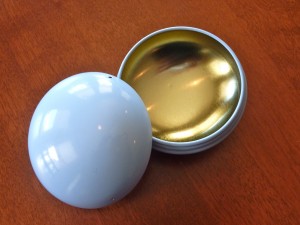
The seasonal aisle of the grocery store is a great place to find fun, thematic items that can also help build basic academic skills such as this cute M&M container. It is a tin that pulls apart and holds two small packages of M&M candy. Once opened, the candy can be sorted by color, used to make a graph, used to make basic addition equations based on color (ex. green + red = ___ ), or paired with some dice for addition or subtraction practice.

M&M container with two fun size packages

Don’t throw away these little containers just yet! They are perfect for use in future My Obstacle Courses to hold small items for counting, sorting or graphing like coins, jelly beans (like I did in the photo above), buttons, beans, etc.

Inside of the container - perfect for holding small items!

Engage, Encourage and Empower!

Jelly Bean Graphing

I may as well call this “Jelly Bean Math Week” because there are so many ways to use this seasonal item to build a wide variety of math skills. (I’m sure they are around all year, I just associate them with this time of year.) Grab some jelly beans (and a toothbrush) because here I go!

Jelly Bean Graphing

My Obstacle Course station activity: Jelly Bean Graphing

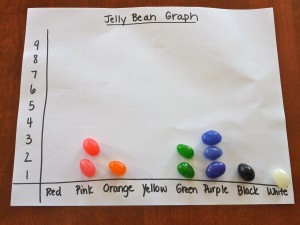
A simple sheet of white printer paper, a marker, a package of jelly beans and a plastic egg are all you need to make a jelly bean graphing station for your child’s My Obstacle Course.

Jelly beans contained in plastic egg until it's time for the activity.

For this station activity, make your graph sheet and place some jelly beans inside the plastic egg. You can choose specific amounts or just pour some in to see what you get. I frequently choose some colors to have the same amounts to work on the concept of “equal” as well as having certain colors be empty for the concept of “Zero.” It is up to you but after doing this sort of thing for a while, you may find yourself becoming more strategic with things like this to use as teaching opportunities.

At the station, your child will open the plastic egg, pour out the jelly beans and sort them into the correct columns by color. When all of the jelly beans have been sorted, talk about what they notice. Click here for a PDF file containing question cards for the jelly beans. As in the other graphing posts I’ve done, I like to cut apart the questions so he can select the question. (Here is a link to print out questions: jellybeanquestions) That said, he is working on writing answers to questions in school so I may modify them a bit so there is room for him to write his answer.

Jelly Bean Graph Completed

This simple activity paired with some question cards allows you to work on analyzing data. The bag of jelly beans provides enough jelly beans for more of the same or can be used with other activities. Stay tuned because there are more to come!

Engage, Encourage and Empower!

Sample My Obstacle Course From Start To Finish

This is an outline of what I do when I set up My Obstacle Course for Andrew. This particular course is one we did a few years ago when he was 5 years old. I like to do 20 stations, which usually takes us about 45 minutes to an hour. Don’t panic at the number! This is what works for us but you can do whatever number works for you. Most of the stations are crawling through tunnels or if I know that a certain activity is more challenging for him, I break it into parts so he has a chance to move in between. The station activities are only meant to take a few minutes each but they let me know right away where he is with that skill or concept.

Personal Note: I consider this time with him sacred. I do not take phone calls, look at email, or fold laundry. I am there with him and he has my full attention. I have learned that he mirrors the attention and energy that I am giving him so if I am distracted or busy with something else, he will reflect that.  I want him to engage and work with me so I can help him and this time disconnected from everything but him is well worth it!

Sample My Obstacle Course From Start to Finish:

1. Choose theme (based on what they were doing in school) and review skills he is working on:

Theme: Land Transportation

Skills:

  • speech- practice /f/ and /s/ sounds
  • fine motor- scissors, gluing, clipping, printing, peeling and placing stickers, stringing beads, track building
  • cognitive/problem solving- creating models using blocks, concept sorting (air, land, water), choosing based on question (what does it do?), pretend play
  • social- listening and answering questions, greeting

2. Look through materials to see what I have:

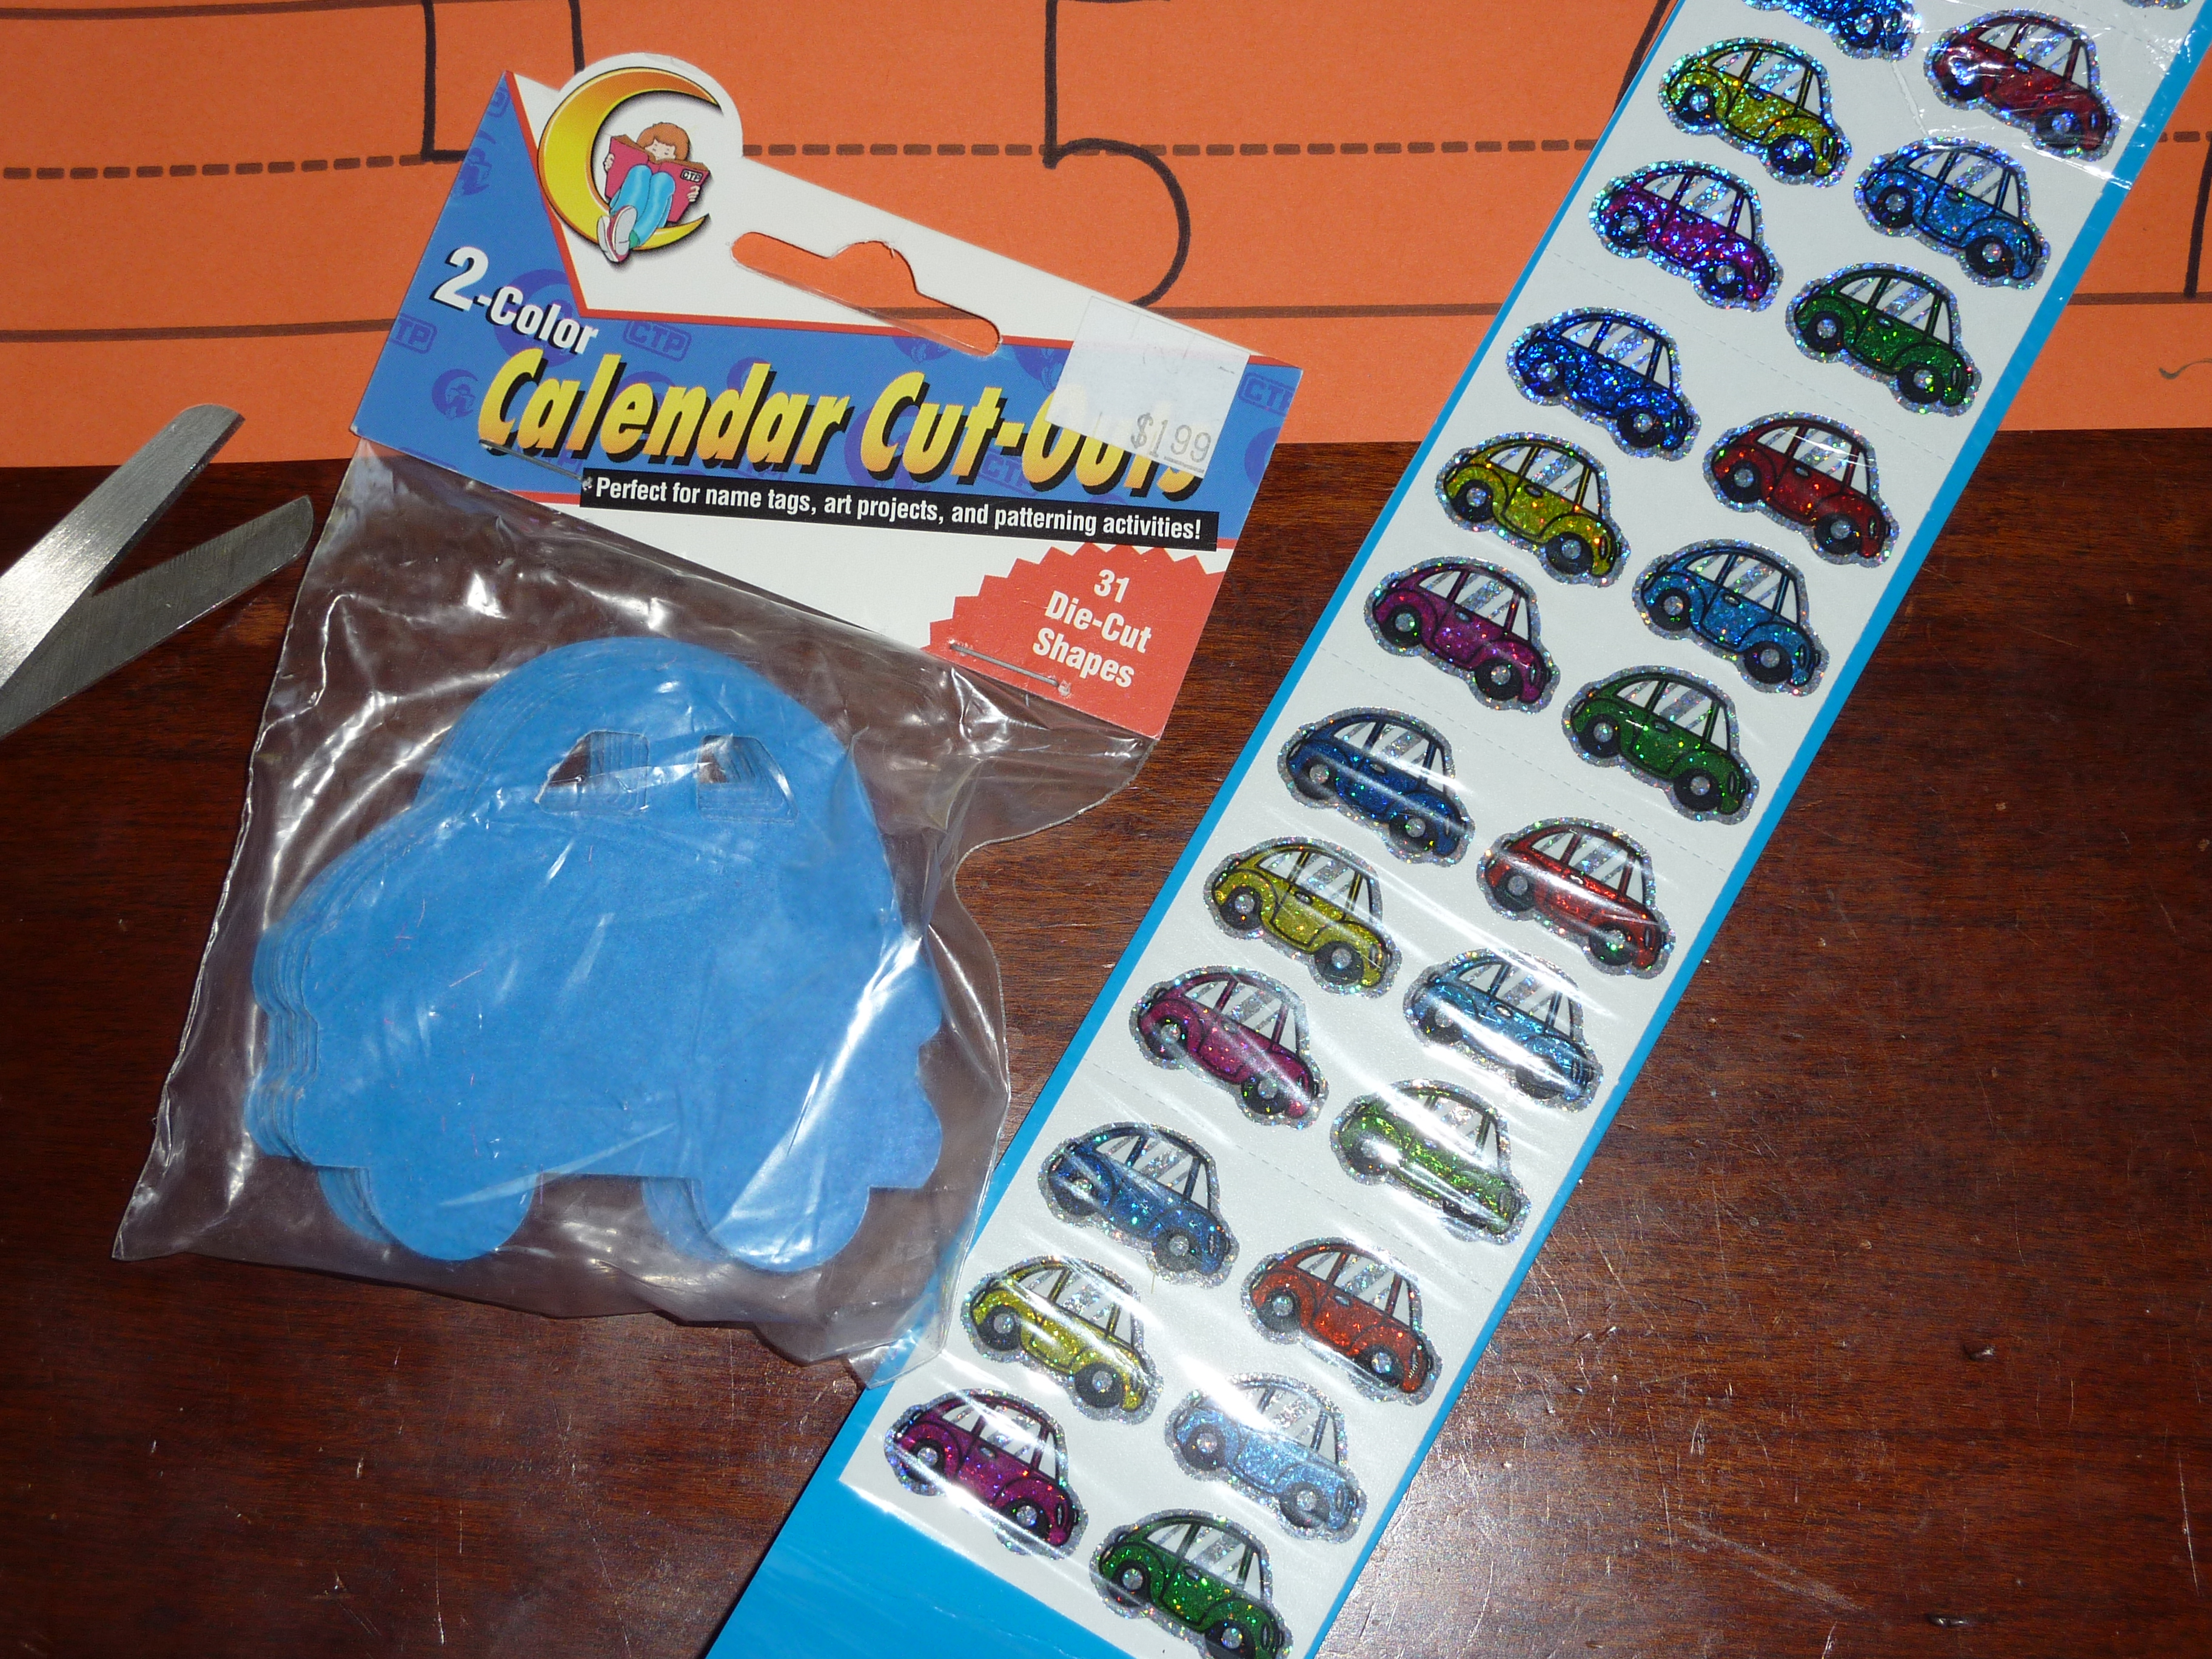
  • Car calendar cut outs
  • Car stickers
  • Vehicle manipulatives
  • Pattern blocks (tangrams)
  • Letter stamps
  • Letter beads for stringing
  • Scrabble letters
  • Construction paper, scissors and glue
Car calendar cutouts from Creative Teaching Press and car stickers
Vehicle manipulatives I got through the Scholastic book order, Scrabble letters and AquaDoodle.

3. Went on Enchanted Learning website (www.enchantedlearning.com ) to see what they had that I could incorporate:

  • Circle vehicles page- I could cut it up and turn it into a vehicle/non-vehicle sort
  • Beginning letter page
  • Vehicle picture/word matching page- I could cut that up and use it as clipping activity on clothesline or crawl and match on carpet runner
  • Vehicle book to practice printing vehicle words
Transportation vocabulary sheet from Enchanted Learning
More transportation pages from Enchanted Learning's website.

4. Went through toy closets to see what we had:

  • train and tracks
  • cars and trucks- could use for putting in order by size or have him get the vehicles that do a certain job (ex.  which vehicle tows?  which one hauls dirt? which one goes fast around a track?) or using a group of vehicles, match up the vehicles that do the same job (ex.  two tow trucks, two dump trucks, two fire engines, two race cars)
  • pretend play garage- could use with script to work on turn taking
Cars and trucks found during my "treasure hunt"
Train tracks and pattern pieces (Melissa and Doug) also found during "treasure hunt"

5. Made my list of 1-20 to scatter skills and activities throughout course:

  1. Social- hello!  how are you doing?
  2. Gross motor- crawl through tunnel
  3. Gross motor- ball rolling back and forth for visual tracking 10 times
  4. Cognitive/problem solving- unscramble scrabble letters to make vehicle words
  5. Math- vehicle manipulatives sorting (land, water, air) – which has most? which has least? how many in all?
  6. Fine Motor- write name on beginning sound paper (from Enchanted Learning)
  7. Literacy- beginning sound paper- circle beginning sound of each word
  8. Gross Motor- crawl through tunnel
  9. Fine Motor- string letter beads to write “train”
  10. Literacy- read “Go, Dog, Go!”
  11. Cognitive- pink bag with 8 vehicles to match up according to job (tow truck, dump truck, race car, fire engine)
  12. Pretend play- train track set up for Thomas
  13. Literacy/fine motor- clothesline clipping words (written on calendar cutouts) that rhyme with vehicle words, trying to include sounds he is working on in speech /f/ (ex. car/far, boat/float, train/plane, truck/luck, tow/low, race/face)
  14. Cognitive/Problem solving- “Make the Same” using pattern pieces to make car or train
  15. Cognitive/Problem solving- “What comes next?”  Patterning using car stickers on paper
  16. Fine Motor- cut out 3 pictures of vehicles from toy catalog
  17. Fine Motor and Literacy- writing one word- vehicle book from Enchanted Learning
  18. Fine Motor and Literacy- writing one word- vehicle book from Enchanted Learning
  19. Gross Motor- crawl through tunnel
  20. Literacy and Gross Motor- “Crawl and Match” vehicle pictures with words

6. Set up

Now is time for set up, which is easy because materials are gathered, plan is made.  Just a matter of arranging materials and doing some basic things like cutting, pasting and writing out some words.

Important Reminder – These are all skills and concepts that were at the level he was ready for. Every My Obstacle Course looks different because every child is different and every house has different materials, tools and toys. That is why I have the “My” in My Obstacle Course, because each Obstacle Course is customized for what an individual child needs. Talk about Individualized Education Plan!! 🙂

Engage, Encourage and Empower


« Previous Page
Next Page »

Primary Sidebar

Obstacle Course Mom’s Blog

  • When People Stare, Mind Your Own Business
  • ABC’s of Peaceful Parenting Tele-class
  • What’s Perfect About This?
  • Exciting News!
  • Halloween

Categories

  • Blog
  • Cool Tool
  • Fine Motor
  • Getting Started
  • Gross Motor
  • Literacy
  • Math
  • My Obstacle Course Station Ideas
  • Oral Motor
  • Problem Solving
  • Sensory
  • Social Skills
  • Uncategorized

Archives

  • July 2012 (1)
  • May 2012 (1)
  • January 2012 (1)
  • November 2011 (2)
  • October 2011 (12)
  • September 2011 (14)
  • August 2011 (15)
  • July 2011 (19)
  • June 2011 (18)
  • May 2011 (21)
  • April 2011 (20)
  • March 2011 (22)
  • February 2011 (19)
  • January 2011 (21)
  • December 2010 (22)
  • November 2010 (6)

Meta

  • Log in
  • Entries feed
  • Comments feed
  • WordPress.org