• Skip to primary navigation
  • Skip to main content
  • Skip to primary sidebar

My Obstacle Course: Engage, Encourage and Empower

A fun, structured, systematic way to work on your child's strengths and weaknesses at home!

  • Welcome to My Obstacle Course!
  • What is My Obstacle Course?
  • Developmental Timelines
    • What Is My Child Ready For?
  • About Us
  • Blog
  • Contact Information

Archives for July 2011

More Nature, Less Electronics

Just as I like to share practical ideas for ways to work on building academic and developmental skills with your children, I’d also like to share something that has made a huge difference in my life (and now Andrew’s) over the past two years – reconnection to nature.

My "love notes" from nature.

Two weeks ago I participated in a tele-class with Michael Trotta, special educator, naturalist and Martha Beck life coach, called, “7 Ways To Help Your Child Become the Natural Genius He/She Was Meant To Be.” While listening to him describe the 7 ways, one of the things that really struck me was how allowing boredom can really help to inspire creativity and imagination. I thought back to growing up, being bored and going off to create forts armed with clothesline, clothespins and old sheets. I can still remember all of the pretending I did sitting in a tree or inside of my fort. It was so much fun to create spaces that were my own, figuring out what worked best through trial and error, really feeling like I was on my own living in this place until it was time to eat. Ah…the good old days!

I’ve been working on getting Andrew to have a balance between time spent with electronics and time spent outside (or even inside playing with things that do not require a plug or battery). Left to do what he wants, he would spend all day watching ceiling fan videos on YouTube (his version of cartoons). With him having more time at home this summer, we began setting limits on the amount of time he can spend doing this. He works well with structure and timers so we give him set amounts of time and use a timer so he can see. We also have passwords for every electronic gadget we have because he’ll sneak things upstairs. While we are the ones who are setting the limits for this, it helps to have them reinforced by something that is not us – a useful way for us to use electronics in our favor!

At first, he would grumble, complain and weep dramatically (And the Oscar goes to…Andrew for the best emotional performance of a child not getting to use electronics!) while we ignored his pleas and locked all of the electronics away until the timer went off. This is also something that I wanted to model for him so it meant that I was not going to use electronics during this break time. Let’s just say I had to be really focused to get posts done when it was “electronics time!” We started slowly with 20 minute breaks and are now up to having 1 1/2 hour breaks at a time which for us is huge! An unexpected benefit of this is that he has learned to tell time! He can even look at my watch (which is not digital) and tell me how many more minutes is left in his break.

I have really been enjoying seeing the little “games” he has made for himself when he knows he is going to be outside for a certain period of time with no electronics. Suddenly, an empty water bottle becomes fascinating to watch as it fills and sinks, rolls down a pool float or pours water on mom’s head :). He has created an OT-like obstacle course in the yard, talking to himself as he reminds himself to “get ready to jump.” He gives himself little challenges like jumping over hoses, swimming with his eyes closed and squirting water into the water wheel to make the wheels spin like they are on high-speed (sneaking in a ceiling fan reference!). The child I thought would never pretend play outside is now doing so and when he doesn’t feel like doing anything, he comes and just sits with me while I soak in the beauty of the nature around me.

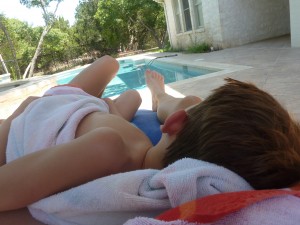
Nature boy allowing me to get a picture of him as takes a break from climbing the walls around our yard.
I'm now getting some rare snuggling - love it!!

If you are interested in learning more about increasing your child’s time in nature or building/re-building your own connection with nature, I highly recommend checking out Michael’s website, www.sagefireinstitute.com. He is offering a free tele-course to groups of 10 or more so if you are part of a parent group you may wish to contact him about this.

Soon I will be sharing some exciting news about something that has changed my life and have become quite passionate about – life coaching, and how it is going to be another way for me to help people engage, encourage and empower themselves (and their families through the process)! Stay tuned!!

P.S. -As I am finishing this, Andrew came in with his computer and said, “It’s 5:00. Time for our electronics break! No electronics until 6:00.” Love this! I gave him his 2 minute break warning and he just did what I asked without me having to go in and get it. He also gave himself a time limit greater than his usual declaration of wanting only a 4 minute break! Now it’s time for me to start my electronics break :).

Engage, Encourage and Empower!


Alphabet Stars

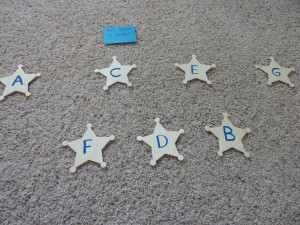
These wooden alphabet stars were one of the first My Obstacle Course station materials that I came up. I purchased some blank, wooden star-shaped pieces from Michael’s and wrote the letters A-Z with permanent marker on each piece. That’s it! I still have them and they are in great shape!

Alphabet Stars!

When I made these, Andrew was 4 and was not saying any consonants and so we didn’t know if he knew his letters. He must have been so frustrated with us because he would say the letter but since we didn’t understand him, it was hard to know if he was understanding the difference between them. Turned out he was and I will one day thank him for his patience with me!! He wasn’t crazy about sitting and pointing to things (so many other more interesting things to do!) so I decided to work on letter recognition in a ways that would get him moving.

1. Hopping Through the ABC’s!

I set out the stars in alphabetical order but had them winding around on the floor. The purpose of the station was for him to hop from letter in order from A to Z. I said the letters out loud as he jumped to them.

2. Stand On the __!

I set out the stars in a random way. When he got to the station, I would call out a letter and he would have to go and stand on it. I would do this about 10 times before moving on to the next station. He really liked things like this and so I wanted to keep it something that he’d want to do again, perhaps in different ways, but still keep it fun and not beat it into the ground, if you know what I mean!

3. Fill in the Missing Letters

My Obstacle Course Station Activity: Fill in the missing letters
Letters in order!

This is a great activity to work on letter sequencing and abc order. It can be done with any letter sequences and can even be accompanied with a sheet showing the letters in order as a reference. Remember, if they need it, let them use it! Learning to refer to something and check one’s work is also an important skill to learn. I refer to lots of things even as I write these posts to try my best to spell things correctly.

4. Word Building

Provide letters needed to make a word, like their name or something that goes with a theme. Show them the word, tell it to them or give them a clue, whatever they are ready for, and have them put the letters in the correct order to make that word. This could be combined with crawling from one end of a room to the other to add some physical movement (kind of like the Crawl and Match activities I have posted on before).

Something so basic yet allowed me to engage with him in a fun way, showed me what he knew and helped me to provide ways to build the literacy skills he was ready for.

Engage, Encourage and Empower!

A Tribute To “Welcome To Holland”

This morning I woke, checked my email and went on to Facebook. I do this every morning as part of my routine but this morning someone in the Apraxia-Kids group referenced a poem called “Welcome To Holland.” How have I never heard or seen this beautifully stated poem before? I love this – thank you Emily Perl Kingsley for putting into words what I feel.

You may have already seen this but I figured it was worth it to share on the off-chance that you hadn’t seen it either. If you have, read it again and give yourself some props for all of the awesome things that you do for your child. If you are a caregiver, teacher, therapist, know that this is what we are feeling and going through and that you help to make a huge difference for us and our children. We know they are not always easy (who is 24/7?) but they are our babies (no matter what age they are) and we love them more than anything.

WELCOME TO HOLLAND

by
Emily Perl Kingsley.

c1987 by Emily Perl Kingsley. All rights reserved

I am often asked to describe the experience of raising a child with a disability – to try to help people who have not shared that unique experience to understand it, to imagine how it would feel. It’s like this……

When you’re going to have a baby, it’s like planning a fabulous vacation trip – to Italy. You buy a bunch of guide books and make your wonderful plans. The Coliseum. The Michelangelo David. The gondolas in Venice. You may learn some handy phrases in Italian. It’s all very exciting.

After months of eager anticipation, the day finally arrives. You pack your bags and off you go. Several hours later, the plane lands. The stewardess comes in and says, “Welcome to Holland.”

“Holland?!?” you say. “What do you mean Holland?? I signed up for Italy! I’m supposed to be in Italy. All my life I’ve dreamed of going to Italy.”

But there’s been a change in the flight plan. They’ve landed in Holland and there you must stay.

The important thing is that they haven’t taken you to a horrible, disgusting, filthy place, full of pestilence, famine and disease. It’s just a different place.

So you must go out and buy new guide books. And you must learn a whole new language. And you will meet a whole new group of people you would never have met.

It’s just a different place. It’s slower-paced than Italy, less flashy than Italy. But after you’ve been there for a while and you catch your breath, you look around…. and you begin to notice that Holland has windmills….and Holland has tulips. Holland even has Rembrandts.

But everyone you know is busy coming and going from Italy… and they’re all bragging about what a wonderful time they had there. And for the rest of your life, you will say “Yes, that’s where I was supposed to go. That’s what I had planned.”

And the pain of that will never, ever, ever, ever go away… because the loss of that dream is a very very significant loss.

But… if you spend your life mourning the fact that you didn’t get to Italy, you may never be free to enjoy the very special, the very lovely things … about Holland.

I love this!! There are times when I read about all of the things that typically developing children in Italy are doing and sometimes I feel a twinge of “Oh, I wonder what that’s like?” but then I remember that everyone’s normal is different and while things may appear perfect on the surface, everyone has their own struggles.

My life with an autistic child and anxious, toothless dog pretty much means lots of deep breaths, soothing music and laughing at the ridiculous-ness of what goes on in my Holland sometimes (My dear sister frequently tells me that she thinks I am being “punked” because of the things that crop up- kind of like a never ending game of “Whack-A-Mole”- can you relate? 🙂 ). My life is full of twists and turns that help to keep me growing and also makes things quite interesting. My Holland is never boring and I wouldn’t want to be anywhere else! It is from the most challenging experiences and times that I have learned the most about who I am and who I was meant to be in this world. 

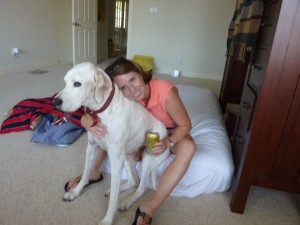
Andrew took this of me hanging with Harvey, the anxious, toothless dog. I'm sure if I lived in Italy, the bed would be made! 🙂

I am grateful because I see and appreciate the pure, innocent joy in my 8-year old son’s face when he sees a really awesome ceiling fan or the smirk of his smile when he finally “gets” something like the tooth fairy and know that he is the child I was always meant to have. He is the most fabulous Andrew that I know and I love him more than anything.  

Engage, Encourage and Empower!
Different Shades of Blue

In keeping with the summer, beach themed My Obstacle Courses, I’m including a station to use the primary colors to make different shades of blue, like water. This is something that only takes a few minutes to set up but is so fun for children to get to play around with. An activity like this also goes along nicely with building some pretend skills, like pretending to be a scientist experimenting or a magician who is making “magic potions.”

My Obstacle Course Station Activity: Different Shades of Blue

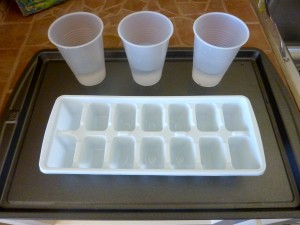
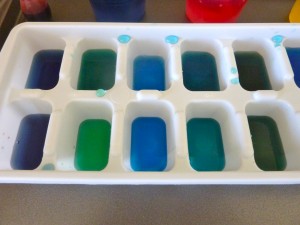
I usually set up a station activity like this near a sink to make it easier to access water for set up and clean up. A rimmed cookie sheet is a perfect “tray” to place below the tools to help catch any stray water or color. I’m all about ease and containing messes :).  I used some clear plastic cups in this particular station but have used ceramic ramekins in past stations and find that those are really helpful if you have children who tend to knock things over, not because they want to, but because they don’t have the hand control. The ramekins are low and heavier than plastic so they don’t tip as easily). I am also using a white ice-cube tray to help the colors stand out even more.

Rimmed cookie sheet, clear plastic cups with water and an ice cube tray.
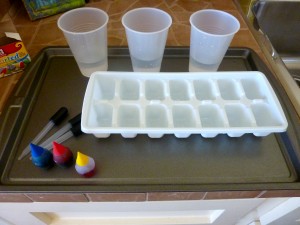
Additional tools of food coloring (red, yellow and blue - the primary colors) and droppers.

I love including droppers with something like this because it also helps to build fine motor skills! (Click here for a past post on droppers.)

Each cup has a different color and it's own dropper.

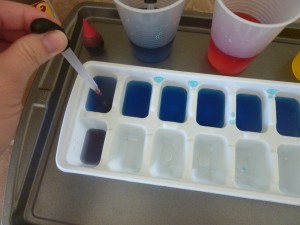
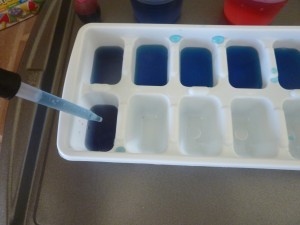
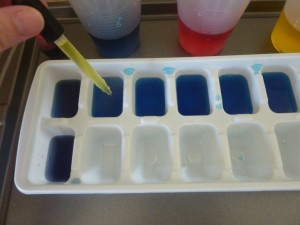
This is where you get to benefit from my experience. I began thinking that I would simply have him use the droppers to fill each section (like shown in the picture below where I had started in the far left corner of the tray) but when I tried it (which I always do before I pass them on to you or try them with him!) it was taking a really long time. I shifted my plan and decided to fill a cup with blue water (also shown below) and fill half of the ice-cube tray with the blue water.

Change in plans!

Ahhhhh….much better! Now, I add the colored water to each blue section to make different shades of blue.

Adding red...
...makes purple-ish water.
Adding yellow...
...makes greenish water.
My different shades of blue!
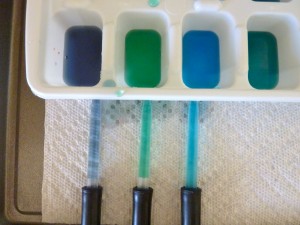
The colored water in the droppers to show the difference.

This was fun for me and is always a huge hit with Andrew! Have fun!!

Engage, Encourage and Empower!
Easy Object Graphing

As I reviewed Andrew’s end of year progress report, I noticed that he still needed some reinforcement with graphing. I looked through my stuff to see what I could have him graph. There were all sorts of things – stickers, buttons, a variety of Goldfish crackers, fruity Cheerios, pattern cards, etc. (Here is a past post I did on graphing using a small bag of M&M’s.) I decided to choose these colorful foam pieces that I found in the dollar section of Target. They came in cylinders, cubes and triangular prisms.

Funny Story – I was teaching a parent session a few months after I had picked these up. I pulled them out of my basket of stuff and one of the moms yelled out, “I have those! I knew you would get them and show us some ways to put them to use so I got them as well.” Ah, I’m beginning to rub off on people and I love it!!

Cylinder foam pieces
Foam cubes
Triangular prism foam pieces

My Obstacle Course Station Activity: Easy Graph

While I usually use a sheet of white printer paper to make graphs with him, this time I decided to use my Melissa and Doug pattern piece background and a pipe cleaner bent around the sides as my border.

I am demonstrating here two different graphs using these foam pieces. One is graphing cylinders by color and the other is sorting by shape.

I also like to include question cards to help build math vocabulary while analyzing the data. You could also begin this activity with making a prediction or hypothesis about which color or shape your child thinks will have the greatest/least/same amounts. Anytime I can sneak in vocabulary in the context of play I do! Click here for a great resource listing math vocabulary in alphabetical order with illustrations to help build understanding – A Maths Dictionary for Kids 2011.

Some question cards to go along with the graph.

Graphing by color station all set up and ready to go!

My Obstacle Course Station Activity: Basic Object Sorting
In the process of making the graph.
Graph completed. Now for some question cards!

Graphing by shape station set up and ready to go!

Graphing shapes.
Shapes graph finished.

I encourage you to get creative by looking around in toy bins and pantry cupboards to see what easy items you have to help your child build graphing skills. These are just examples of basic graphs that can be easily put together as a station activity.

Engage, Encourage and Empower!
 

Patriotic Pails and Word Sorting

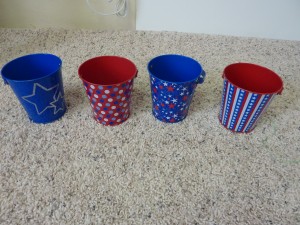
If you’ve been reading my posts for a while, you know that I love finding things to go with the theme we are doing. These little July themed pails were in the dollar section of our Target and I know that they are the perfect addition to a July themed My Obstacle Course sorting station. It really is easy to blend a sorting activity, which provides a quick opportunity to build or reinforce an academic skill like spelling patterns, with these thematic pails to create a fun and appealing My Obstacle Course station.

Patriotic pails!

My Obstacle Course Station Activity: Sort By Vowel Pattern

At this particular station, we are working on sorting by vowel pattern, specifically /i/ words, but please realize that this activity can be modified to build the literacy skills that your child is ready for (Ex. Sorting by beginning sound with pictures.). (Click here for an index of vowel patterns.)

I used some small red index cards and wrote the sorting labels (short i words, words with “igh”, words that follow the i_e (“i consonant e”) pattern, and words that have long /i/ sound made with “y”.). For the sorting activity, I wrote three words that fit each pattern on cards, mixed them up and placed them in a pile.

My Obstacle Course Station Activity: Sort by vowel pattern
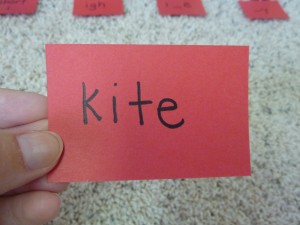
The word "kite" to be sorted into the pail with "i consonant e".
Placing the word into the correct pail.
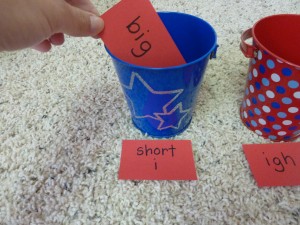
Short i word.
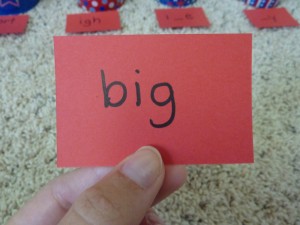
"Big" placed in the short i pail.
Words sorted into the pails are easy to check when the child is finished.

This is something that can be done throughout the year with spelling words but can still look fun by using different colored cards and different sorting containers. The word cards and labels can also be stored and used for future word sorts, review stations or a game like “Guess the Sort”.

Engage, Encourage and Empower!

« Previous Page
Next Page »

Primary Sidebar

Obstacle Course Mom’s Blog

  • When People Stare, Mind Your Own Business
  • ABC’s of Peaceful Parenting Tele-class
  • What’s Perfect About This?
  • Exciting News!
  • Halloween

Categories

  • Blog
  • Cool Tool
  • Fine Motor
  • Getting Started
  • Gross Motor
  • Literacy
  • Math
  • My Obstacle Course Station Ideas
  • Oral Motor
  • Problem Solving
  • Sensory
  • Social Skills
  • Uncategorized

Archives

  • July 2012 (1)
  • May 2012 (1)
  • January 2012 (1)
  • November 2011 (2)
  • October 2011 (12)
  • September 2011 (14)
  • August 2011 (15)
  • July 2011 (19)
  • June 2011 (18)
  • May 2011 (21)
  • April 2011 (20)
  • March 2011 (22)
  • February 2011 (19)
  • January 2011 (21)
  • December 2010 (22)
  • November 2010 (6)

Meta

  • Log in
  • Entries feed
  • Comments feed
  • WordPress.org