• Skip to primary navigation
  • Skip to main content
  • Skip to primary sidebar

My Obstacle Course: Engage, Encourage and Empower

A fun, structured, systematic way to work on your child's strengths and weaknesses at home!

  • Welcome to My Obstacle Course!
  • What is My Obstacle Course?
  • Developmental Timelines
    • What Is My Child Ready For?
  • About Us
  • Blog
  • Contact Information

Archives for January 2011

Sticker Cards

Two of my favorite items to use when making My Obstacle Course stations are colored index cards and stickers.  I love how they make things colorful and bright while also allowing me to change up the theme easily with stickers.

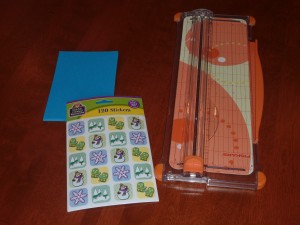
Snowflake stickers and colored index cards

Building Math Skills

Before setting up My Obstacle Courses, I always think about what skills Andrew needs to build and how I can incorporate them in a fun way.  Early on, I was thinking of the math skills he needed and was trying to find out more about what he knew.  At that point in time we were working with him on numbers (the actual number and what that number represents) and number order.  I had used some regular playing cards found in a drawer and one day had the idea of creating my own “playing cards” using index cards and stickers.  This would be a perfect way for me to combine concept and theme.

Sticker Cards:

What you need:

  • 10 4×6 index cards
  • 3 sheets of stickers from 1 package of 120 stickers (Ideally they should match but can vary a bit like these snowflakes.  I just try to not make them too busy with lots of details.)

How to:

This is really easy and quick to make.  Take a card and place the same number of stickers on it as you want it to represent (ex. one sticker on the 1 card, two stickers on the 2 card, etc.).  The photo below shows my completed sticker cards in order from 1-10.  I do not put the numbers on the cards because I want to be able to see how he is counting.

Sticker cards 1-10

My Obstacle Course Station Activity Ideas:

Put sticker cards in order:

My Obstacle Course station activity: Put these cards in order from 1-10.

Matching sticker cards with numbers:

  • Choose some sticker cards and set out in a random order.  Note:  They do not have to be in order like the photo shows, you can choose whatever numbers you think will challenge your child appropriately.  (Ex.  Using 6 and 9 in the same set would let you know if they are confusing them because they look similar.  Using two consecutive number cards would show you if they are counting properly (1:1 correspondence) or if they are miscounting by counting randomly, skipping over stickers or double counting them.)
  • Make number cards that match up with the sticker cards you’ve chosen.  The numbers shown below are made with same index cards cut in half.
  • Set out the numbers for the child to match up with the sticker cards.
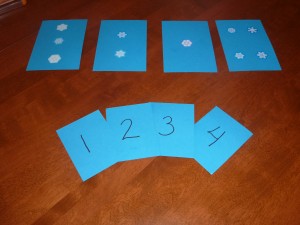
My Obstacle Course station activity: Match the number with the card that has the same number of stickers.
Matching up numbers with correct card.
Numbers matched up with correct sticker cards.

Make This Number:

  • I choose a number and write it down.
  • I then select sets of cards that when put together, they make that number.
  • When putting the station together, I separate the cards so that one card from each set is put out underneath the number and I mix up the other cards.   This activity is giving them the sum and one addend and they have to figure out what the other addend is!
My Obstacle Course station activity: Make This Number

How To Play:

  • When he gets there he will look at the number to make  (10 in this photo).
  • He will count the number of stickers on the first card under the number.
  • Then he will choose a second card from below that he thinks will help to make the given number.
  • He’ll count the stickers on the two cards to see if they make the number.  If he doesn’t get it, he’ll choose another one from below and see if it works.  If he gets it, he moves on to the next set, continuing until all sets are matched up.

Note:  When we first began doing this, Andrew went about this in a fairly random way but I have seen him grow and begin to strategize a bit.  I can see him really thinking about the number he is starting with and choosing his next card based on what makes the most sense.

Two cards matched up to make 10 in "Make This Number" (In this photo, 3+7 are matched together to make 10)
Cards matched up for Make This Number. Â This photo shows 9+1, 3+7, 8+2 and 4+6 which all make 10.
Andrew making 9 while doing My Obstacle course station "Make This Number."

Storage and organization:

Winter sticker cards stored and labeled

These cards are quick and easy to make yet provide many different ways to build math skills at many different levels.  I have shown you just some of the ways I have used them in my home.  I encourage you to think about the skills your child needs to build and see if there is a way to use these fun, colorful sticker cards to help!

Engage, Encourage and Empower!

Annie the Bear

Social Skill Building:  Thinking Beyond One’s Own Needs

One of the things that we are continually working on with Andrew is his social skills.  He is gifted at being able to get everyone around him to meet his wants and needs, even when his speech was limited to “uh uh uhs.”  He is an only child and because we didn’t know what he could or couldn’t do due to his delays, we initially did a lot for him.  Then we hit a point where we realized he could do a lot more but quite enjoyed having others doing things for him while he got to do what he wanted.  Smart child!  (I secretly think he’ll make an excellent business executive someday – he knows what he wants, he’s great at delegating, he checks up to make sure things are getting done the way he wants, and he reaps the rewards of everyone’s hard work.)

You Have To Know What To Do Before You Know What To Do

We learned our lesson but also realized that there were things that he needed to be taught so he would know how to do them. I am a firm believer that you cannot expect someone to know how to do something when they don’t know how to do it.  I found that this is also true when it comes to empathizing with and helping others with their wants and needs.  While this might come easily and naturally to some children, it didn’t for him.  Don’t get me wrong, he is a sweet, happy, loving boy, it just didn’t really occur to him that he should help us or others out.  We all seemed quite capable of doing it ourselves :).  I needed a way to teach him this in a very deliberate and direct way without having or needing another person here.

Using What I Already Have

One day, while straightening his room, I put a stuffed animal back on a shelf for the millionth time, and then it hit me!  I had been focused on building other developmental and academic skills using things I already have and I could do the same to help build the social skills he needs!!  It was then that I decided to introduce Annie, a teddy bear I had gotten as a baby shower gift.  I would use her in a My Obstacle Course station activity to help teach him about how to help others.

Annie the Bear

There were many benefits of working on social skills using an inanimate object.  I didn’t have to worry about the social skills between two children, him getting overwhelmed by another child’s social expectations or pre-coaching the other child about why we were doing this when it may seem obvious to them. I could model language and actions in a strategic way while within a familiar and safe environment for him.  This is particularly important for him because he pays attention to and notices everything around him to an amazing degree.  He picks up on the energy and perceptions that other children have and is quite aware when someone is insulting or making fun of him.  This was something I wanted to be able to work on without having to add those issues to his plate.

Another benefit was that he would also be able to do things like put on a band-aid or help her brush her teeth without someone squirming (not that friends brush each others teeth but we struggle with getting him to brush his teeth so I wanted him to work on that skill from a different perspective.).  Annie would be perfect for this!

I grabbed Annie and went hunting for some common items that could be useful when helping someone.

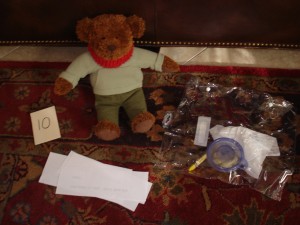
My Obstacle Course station activity: Annie the Bear needs your help!

Just some of the items I have used:

  • tissue
  • toothbrush
  • straw
  • spoon
  • band-aid
  • crayon
  • crackers

I wrote and printed out some basic scenarios that Annie could have happen to her.

Some of Annie the Bear's scenario cards

Here are some sample scenarios:

  • Annie fell down on the playground.  Her knee is bleeding.  What does she need?
  • Annie finished her breakfast and now she needs to brush her teeth.  What does she need?
  • Annie has applesauce in her lunch.  What does she need to help her eat it?
  • Annie just sneezed!  She needs something to wipe her nose with.  What can she use?
  • Annie wants to drink her juice but she doesn’t like to drink from the cup.  What tool can she use?

When he got to the station, he would have to read or listen to the scenario and find the item in the bag that could help her.  Here are some questions that I would ask him:

  • What happened to Annie?
  • What does she need?
  • Can you help her?

When doing this station with him, I was modeling pretend play by treating Annie as though she were a real child sitting there with us.  I talked to Annie, modeling for him how to ask her things like, “Are you okay?” or “How can I help you?”

Turtle Steps

At first it may seem kind of funny (although if you’re in a situation like I was with a non-verbal child, I had already spent years talking out loud to myself so it didn’t really faze me!) and he did look at me like “You do know it’s not real?” but pretty soon he was doing it as well.  Building these basic social skills did not come over one session but in the 3 years we’ve been doing this, I have really seen them evolve in him.  Through the use of Annie the Bear, as well as other inanimate friends, and creating different scenarios that were occurring in his life, I think this has made a huge difference.  It gives him the language to use during a situation that is familiar and he gets to practice without pressure to get it right the first time.

Some friends to help build social skills involving turn taking.
Here is an alternative to stuffed bears. Â It doesn't matter what kind of toy you use, see what you have and work with that!

Where at one point in time I could not have imagined him pretend playing with his toys, I have gone looking for him only to find him in his room reenacting scenes from school and home, caring for and nurturing his toys as “real life” people.

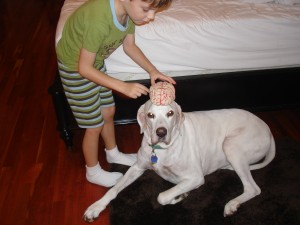
Perhaps taking it a bit far implying that Harvey needs a brain. 🙂

This has also moved beyond toys to him commenting on other people’s feelings and needs.  Just the other day, I hit my shin and said, “Ouch!”  He ran over and said, “Mommy needs a band-aid.”  He ran off and yelled for me to come help him because the band-aids were on the top shelf.  It’s the thought that counts here and he was thinking it!

Engage, Encourage and Empower

Building Scissors Skills

The fine motor skill of cutting is something that is difficult for many young children and Andrew was no exception.  I had gotten some children’s scissors but it was really difficult to get his fingers into the holes in the right position.  In addition to that, there is the whole skill of opening and closing the scissors using the fingers.  These challenges don’t even take into consideration the planning necessary to have the scissors where they need to be to cut where they are supposed to be cutting!

Loop scissors

I found these Loop scissors at the teacher supply store and thought they were fabulous.  They come in different sizes and since there are no holes, he can place his thumb on one side (the top side when cutting) and the rest of his fingers on the other side and squeeze.  This allows him to build the motor skill of squeezing and releasing his hand so the scissors open and close to cut the paper.  (Use hand over hand if your child is at the beginning stages or if they need help with feeling how much pressure is needed.)  These scissors remove one challenge but still allows him to work on planning where to put the scissors to cut where he wants to cut.  There is time for him to work on using traditional scissors but for now we are using any tool we find that helps him build skills at his level.

Making Scissor Skills Interesting To Someone Not Interested In Arts And Crafts

Now that we had a great tool, I needed an interesting way to help him build his cutting skills.  Since he is not the kind of child who is into arts and crafts projects, I have to find ways to sneak it in while capturing his attention with something that does interest him.

My Obstacle Course station activity: Cut out the ceiling fans. Put them in order from your most favorite to your least favorite. (Note: Andrew loves ceiling fans and so this was very motivating for him.)

Drawing brightly colored, thick lines around the area to cut helps to provide some structure.  It helps him to see where he is supposed to cut, gives him something to focus on and helps reduce frustration caused when he accidentally cuts through the picture!

My Obstacle Course station activity: Â Cut out three books you would like to read.
My Obstacle Course station activity: Cut on the line and sort the pictures into people, places or things. (Note: This is from Reading A to Z's website which has materials to reinforce and build literacy skills.)

If you have a child who is not crazy about working on scissors skills, think about what they like or what they are into and have them cut out things that go along with their interests, like Andrew cutting out fans.  Think about using things like toy catalogs, grocery fliers, old magazines, wrapping paper, string, etc. and add some purpose by having them find specific things or amounts of things.

Some ideas for adding purpose:

  • things that they like
  • things that they dislike
  • things that are a certain color
  • pictures of animals
  • things that start with a certain letter or sound (this adds literacy)
  • things that have numbers on them (this adds math)

I encourage you to think about how you can combine things that are challenging for your child with things that are fun and interesting to them.  It doesn’t always have to be fancy or expensive.  You may be surprised what you have in your own home that could be used for a cutting station.  My kindergarten students had a blast cutting out grocery items from the newspaper advertisements, pretending to make grocery lists and I bet you they didn’t even know they were doing it to work on their cutting skills!

Engage, Encourage, Empower

Word and Object Matching – Real Life Flashcards

I have been sharing what I learned by doing My Obstacle Courses with other parents and since Andrew is now 7 years old, I frequently get questions about working with children who are much younger.  I began doing this at home with him routinely when he was 4 years old but used some of the activities with him as early as 2 years old (I just hadn’t put it together that that’s how he wanted to play with me – ah, hindsight!).  My advice to these parents is to use toys that they have (perhaps in a different way from their intended purpose), use real objects as much as possible and most importantly make it fun.  Here is one station activity I have used to build literacy and vocabulary skills.

What’s In The Bag?

I shared in a post last week (A Bit of Mystery and Intrigue) how I love to use tote bags to hold items and this is an activity modeling how to find out what your child knows using the tote to add some mystery.

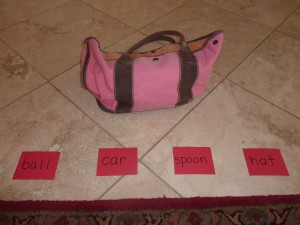
I gathered some items found around the house and placed them inside of the tote bag.  I wrote out the word name for these items (any paper, index card or post-it note works) and set them out.  That’s it as far as set up goes and here is a how it looks! (Note:  If this seems like it would be too easy for your child keep reading for ways to make it more challenging for your child.)

My Obstacle Course station activity: Word/Object Matching
A peek inside the bag.
A hat matched up with the word "hat."
I guess the ball is next!
Ball matched with "ball."

This station idea is like creating a real life flash card for your child with the written word name and actual object.

All of the objects matched up with their words.

How To Play:

  1. Choose a card.
  2. Say the word name.
  3. Ask them to find it in the tote bag.
  4. Match up the object with the word.

By being able to get the object, this removes the need for them to speak in order to show they know what it is.  We still work on speech skills but that is not the primary purpose for this activity.  They are also getting the benefit of receiving information through all modes of learning – visual, auditory, and kinesthetic.  If there is something that your child does not know or understand, take note of it so you can be sure to incorporate this more often.

This My Obstacle Course station activity empowered him because he could demonstrate his knowledge without speaking intelligibly and it empowered me by learning specific information about the sorts of things he knew and didn’t know.

Making It More Challenging

This activity could be made more challenging by:

  • using word clues instead of the actual word (ex.  Find something that bounces.)
  • using different objects from a category and matching according to their specific uses or descriptions (ex.  category – things to eat/drink with:  fork, spoon, child friendly knife, straw or things to write/draw with:  pencil, crayon, marker, dry erase marker, chalk, paint)
  • matching up an item with a word it rhymes with (ex.  Find an object that rhymes with cat.)
  • matching up the object with it’s function (ex.  Find something that can drive you to school.)
  • finding items that go together (ex. Find an object that goes with a bowl.)

I encourage you to think about what literacy skills your child is working on and see if there is a way to add some fun by incorporating real objects.

Personal Note:

There are many frustrations that parents of late talkers or non-verbal children experience but I think one of the things that was most difficult for us was that we did not know exactly what he knew or didn’t know.  He would point to things for us when it involved books or catalogs that he enjoyed or if it meant he would get tickles as a reward but outside of those times, we could only guess.  After his neuropsychological evaluation (which I got to sit in on and watch while he ignored the evaluator – talk about a fun morning!) showed nothing we didn’t already know, I knew it would be up to me to find out.  It was a long process, with a lot of trial and error but in the end, I realized that with a little bit of planning and creativity, I could provide ways to find out.

Engage, Encourage and Empower

Winter Themed Graph

Math was one of my favorite subjects to teach and is something that I find easy to incorporate into My Obstacle Courses with Andrew.  One of my favorite station activities is graphing.  This one activity builds many different skills – sorting (visual discrimination), arranging (fine motor skill), counting (math), and answering questions using the graph (problem solving).

My Obstacle Course station idea: Winter Themed Graph

We have made graphs with all sorts of different things and when I found these mini-cutouts I knew they would not only make this easy for me but there were so many in the package that we could do lots of different graphs showing different results.

These were my favorite and I used to be able to get them at my teacher supply store but haven't been able to find them lately. They worked well because they were small, bright and blank.
I did find these at the teacher supply store. The package has three different kinds of snowflakes and the backs are blank.
These were some that I got for our Christmas themed My Obstacle Courses, but I can still use two of the three patterns for my winter themed graph.
I would combine the cutouts and use these if I was working with someone who had trouble with visual discrimination.
These cutouts are a bit more difficult because they have similar coloring. Â I would use these with children who are working on this sort of visual discrimination.

Creating A Graph Doesn’t Have To Be Anything Fancy!

Once you have something to graph, you are almost ready.  Here’s how I set up my graphing stations for My Obstacle Courses:

Here are the materials I used to make these activity stations: Â paper, cutouts, markers (a gold photo marker for the black paper). and glue.
Start with blank sheet of paper (white or colored, printer sized or larger)
Draw a line down the left hand side (y-axis) and along the bottom (x-axis). Â The paper could be turned to make the graph the other way as well.Â
Write and underline the title.
My graph is ready! Â The numbers are on the side and the cutouts are glued on the bottom. Â Note: Â Make sure your numbers are about the same size as the cutouts or it may cause confusion if the number doesn't line up with the item amount.
The other graph numbered and labeled.

I choose how many of each specific cutout I want to have in the graph and place them in a container (small plates, cups or cupcake foils work great for this!).

That’s all the preparation necessary for this station!

Graphing Station How To:

  1. When the child gets to this station, they will sort the cutouts into the correct row.
  2. Gluing is not necessary but if you want to work on that skill, the pieces can then be glued in the row.
  3. The child counts how many in each row.
  4. Incorporate math vocabulary and answering questions either by asking your own questions or by using question cards.
Calendar cutouts used as question cards.

Sample questions:

How many ___?

How many in all?

Which one has the most/greatest?

Which one has the smallest amount/least?

Do any of the rows/cutouts have the same amount?

Completed graph with question card pile
The child flips over the card, reads (with assistance if necessary) and answers the question.

The level of difficulty can be adjusted and if you have a child who is ready for more representational thinking, you could have each cutout represent a given amount (ex. one snowflake cutout=10 snowflakes falling), even cutting snowflakes in half to make it more challenging!

I encourage you to have fun doing math with your child.  It doesn’t always have to be scary and boring.  This is such an easy thing to do and the finished graph looks cool hanging on the refrigerator or pantry door!

Engage, Encourage and Empower!

Winter Themed Memory Match

I am in the process of gathering and creating materials for Andrew’s Obstacle Courses this month and am going to share one of his favorite station activities, memory match.  This was one of my first posts but feel it’s worth revisiting because I have had many new visitors since then.  (Click here to view the original detailed Memory Match post.)

Creating Your Own Thematic Memory Match Game

This game is really easy to make and as I was shopping for the holidays, I noticed all sorts of character themed memory match games for sale out there.  I love creating my own because it allows me to incorporate vocabulary for whatever themes or concepts I can find stickers for.  Right now, he is learning about the winter season in school so I will use winter themed stickers and talk about them when they get flipped over.

These are some examples of what I might ask or comment on for the card with the snowman on it:

  • What would it feel like outside if you were building a snowman?
  • What kinds of things would you bring out to put on your snowman?
  • Do you notice how the bottom snowball is larger than the top snowball?
  • What would happen if the bottom snowball was the smallest?
  • Is a snowman a real man?
  • Was the movie Frosty the Snowman fact or fiction?

(Keep in mind I wouldn’t ask all of these at one sitting, but would choose questions that were appropriate for him during that time.)

In addition to language building, this game allowed us to work on play and social skills.  Since it is a game with few rules, it was perfect for teaching him about turn taking, something he definitely needs to work on.  I discovered that we needed to do more things like this because he did not like it all when someone else found the card he was looking for!  Once again, an activity that combines what he likes to do with building skills he needs.

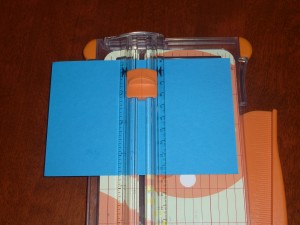
Materials needed: Â Index cards, seasonal stickers and my paper-cutter or scissors
Cut the index card in half
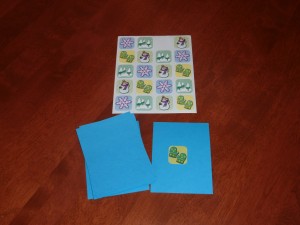
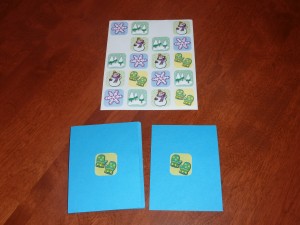
Place one sticker in the middle of one of the cards.
Place the matching sticker on another card.
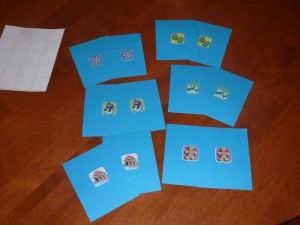
Sets of winter matching cards
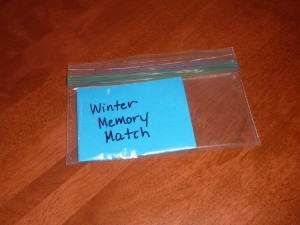
Labeled and stored in a small bag to keep them organized.

I have made a new thematic memory match game each month for two years and am now working to create some different kinds that move beyond seasonal themes.  I will share soon!

Engage, Encourage and Empower!

« Previous Page
Next Page »

Primary Sidebar

Obstacle Course Mom’s Blog

  • When People Stare, Mind Your Own Business
  • ABC’s of Peaceful Parenting Tele-class
  • What’s Perfect About This?
  • Exciting News!
  • Halloween

Categories

  • Blog
  • Cool Tool
  • Fine Motor
  • Getting Started
  • Gross Motor
  • Literacy
  • Math
  • My Obstacle Course Station Ideas
  • Oral Motor
  • Problem Solving
  • Sensory
  • Social Skills
  • Uncategorized

Archives

  • July 2012 (1)
  • May 2012 (1)
  • January 2012 (1)
  • November 2011 (2)
  • October 2011 (12)
  • September 2011 (14)
  • August 2011 (15)
  • July 2011 (19)
  • June 2011 (18)
  • May 2011 (21)
  • April 2011 (20)
  • March 2011 (22)
  • February 2011 (19)
  • January 2011 (21)
  • December 2010 (22)
  • November 2010 (6)

Meta

  • Log in
  • Entries feed
  • Comments feed
  • WordPress.org