• Skip to primary navigation
  • Skip to main content
  • Skip to primary sidebar

My Obstacle Course: Engage, Encourage and Empower

A fun, structured, systematic way to work on your child's strengths and weaknesses at home!

  • Welcome to My Obstacle Course!
  • What is My Obstacle Course?
  • Developmental Timelines
    • What Is My Child Ready For?
  • About Us
  • Blog
  • Contact Information

Archives for January 2011

Winter Themed My Obstacle Course YouTube Clip

I have gotten a lot of feedback from people telling me how it has helped them to understand what My Obstacle Course is when they see a video clip of what it looks like when I set it up.  There is one clip on my website’s home page but I thought I would show an example from a different My Obstacle Course we did last January.

While the station activities are specific to the skills that Andrew needed to work on at the time, it is my hope that seeing what it looks like will encourage you to set up an Obstacle Course of your own.  It does not have to be anything fancy and will not look the same as anybody else’s because each child is different and needs to build on skills at different levels. It will also be unique because you will use what you have in your home.  A lot of the station activities utilize things I have found around the house, including games and toys that have been sitting on shelves. I also feel that it may help to see and hear how I choose the activities in order to reinforce what he does in school and therapy.  I hope this encourages you to think about speech words/sounds, spelling words, and math fact practice in a different way.

My videography skills are not at all professional but I think the clips do their job to show what I do in order to engage, encourage and empower my son at home!

If the above links do not work, here are the url’s:

http://www.youtube.com/watch?v=ys9JQf-7KNo

http://www.youtube.com/watch?v=NUYpvCHTWTg

If there are skills that you would like to see ideas for, please let me know either at obstaclecoursemom@yahoo.com or on my Facebook page: My Obstacle Course.

Engage, Encourage, and Empower!

Sight Words

Sight words, also known as Dolch words, are specific words that are most common in reading materials at a certain reading level. They are also referred to as “the words you just have to know.” The other day I overheard some parents discussing how they needed to be doing more flash card work with their children to build knowledge of sight words. What struck me was that they both said that it wasn’t going to be fun, they knew their children wouldn’t enjoy it, but they were going to make them so they wouldn’t get behind. Does this sound familiar? I totally get this and was there years ago thinking that that was the only way to work with my child at home. He of course was having none of it which led me on this journey! 🙂

So, is there a way to practice these words at home in a way that is more interesting than sitting across from one another with white index cards? Absolutely! I have used several different ways with Andrew within My Obstacle Course, did not experience resistance and learned a great deal about which words he knew and which ones he needed more practice with.

Dolch Sight Word Lists

Most teachers will give parents these lists so they can practice them at home with their child (you may even have it under a magnet on your fridge!). If you do not have these lists or have a young child but are curious about them, here are two links to all of Dolch Sight Word lists (if you want to Google it yourself, type in “dolch sight word lists”).  They are usually divided by grade level (Pre-Primer (preschool) to 3rd grade plus nouns) but you can also print out a complete list of the 220 words.

http://www.learningbooks.net/whydolchwords.html#lists (scroll down to see the lists)

http://www.kidzone.ws/dolch/preschool.htm

Note: When I did this with Andrew I started with the pre-primer list just to make I wasn’t leaving any gaps.

My Obstacle Course Station Activities Involving Dolch Sight Words

Materials I use to make sight word activities: Computer with lists (or list print-outs), calendar cut outs to go with our theme and a marker.

My Obstacle Course Station Activities For Building Sight Word Recognition

Here are some ideas I have to make sight word recognition more engaging for you and your child. These activities can be done with children regardless of intelligibility because you are helping to expose them to language and literacy skills, they are getting this information through all learning modes – visual, auditory and kinesthetic (doing something to be involved with the words aside from seeing and saying them). If you have a young child or if this is too challenging, these can also be adapted by writing letters instead of words to build basic letter recognition. The most important thing is to start where they are with this skill so that you can build upon that knowledge.

Note:  With all of these activities, if your child is in the beginning reading stages, read the words out loud so they are hearing the word as they are looking at it.  If your child struggles with reading, go back to words that are easier to build confidence and gradually blend in words that are more challenging. This is an opportunity to build word recognition in a way that is playful and fun, without the stress of having to perform in front of teachers or classmates.

Sight Word Memory Match

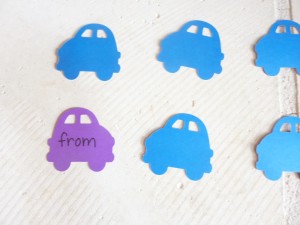
I made a double set of words to be used for memory match and Crawl/Climb and Match games.
My Obstacle Course station activity: Sight Word Memory Match
First card flipped.
A matching pair!
Continue playing until all pairs are matched up.

Sight Word Crawl/Climb and Match

My set of double words split into two piles for Crawl/Climb and Match game.
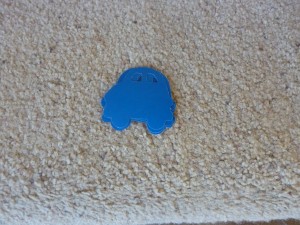
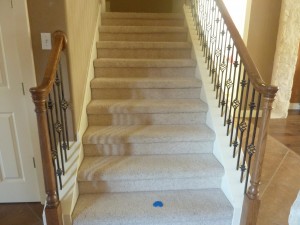
I placed one set on the bottom step (or at one end of the carpet for Crawl and Match)...
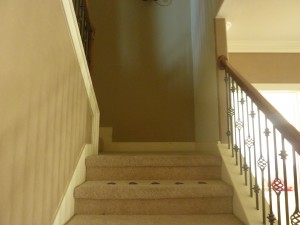
and placed the other set out on the top step like this.
My Obstacle Course station activity: Sight Word Climb and Match
A different view of the sight words set out ready to be matched.
Choose a card, read the word, climb the steps...
and find its match.
Continue until all of the sight words have been matched.

Sight Word Cards on Ring

Colorful sight word cards on a ring.

I am not crazy about sitting and doing flash card drills but I know that some people swear by this method so I found these colorful circles with a binder ring and thought they would be perfect for practicing something like this.  Since they were set up as a station, they were not a random “Work with Mommy or else!” chore, but simply a quick activity within My Obstacle Course. He either knew them or he didn’t and because they are bound together with the ring, we could flip through quickly and when there were words he didn’t know, I would take note of them, remove the ones he struggled with and use those words in other activities to increase exposure.

Colorful sight word cards on a ring.

Personal Note: Andrew was reading before he was talking (which I learned by doing My Obstacle Courses with him and providing activities for him to demonstrate his knowledge without needing to speak) so don’t assume that just because your child is not speaking that they cannot work on reading skills! Had I not learned this, he would have still been working on basic letter recognition, instead of reading at his appropriate level, because way too often people assume that if you are delayed in one area, you are delayed in all. I encourage you to provide activities for your child and find out where they are in each developmental and academic area so you can meet them there and help them progress, whether that area is considered a strength or weakness.

Engage, Encourage and Empower!

Domino Math

If you have been following my posts, you know that one thing I try to do when putting together activities for My Obstacle Courses is use things I already have, whether they are toys, pouches or calendar cutouts.  I love it when I look around the house and find something that can help me make developmental and academic skill building fun by using it in a different way.

One Christmas, years ago, we received one of those game sets with dice, cards, dominos, chess pieces and wooden circles to be used as checkers all stored inside a wooden box.  I was trying to reduce the amount of stuff and clutter that had accumulated and found this game set just sitting in a cupboard.  While we had packed and moved it a few times, we never really used the game set for it’s original purpose. Now that I was thinking with a different mindset, trying to use things around the house to help Andrew, I was glad we still had it because of all the possibilities for the pieces inside.  The box (which was broken) went, the pieces stayed!

Domino Math

Dominos

These dominos were found in the game set and while they may not seem very exciting to you, I was thrilled! You may think that all you can do with them is line them up and watch them fall down…

Lining dominos up requires steady hands and strong fine motor skills.

or match up sides that have the same.

Matching up sides that have the same amount.
Sides with same amounts matched up (4's, 3's, and 6's).

While these are both great activities for fine motor skill building (having to place them so they line up) and the latter is good for number awareness, there are other ways to use them at home, specifically to build and reinforce math skills.

I do My Obstacle Courses with Andrew so I can have fun and really engage with him. Having some unexpected tools like dominos helps to keep things interesting and since there are usually 28 in a box or package, it allows for a good deal of randomness. When I place some in a pouch and he has to reach in and take one out, neither of us know what it’s going to be and that alone turns it into a bit of a game – more fun than flash cards in my opinion! Once you have your dominos, preparing these station activities is a piece of cake!

My Obstacle Course Station Activity:  Matching Dominos With Total Number Of Dots

  • I chose 8 dominos. (The number of dominos you choose is up to you.)
  • I wrote out the total number of dots from each domino on a Post-It Note and arranged them at the station in random order.  You could put them in number order as well, I just wanted him to be really looking at the number on the paper.  Note:  Instead of writing the numbers or facts for them, you could provide a white board or chalk board and have them write the numbers or facts as they pull them out to build writing skills.
  • I placed them in the black pouch (adds some mystery!).
My Obstacle Course station activity: Matching dominos with the total number of dots.
Reach in a get a domino. Count the total number of dots ("How many dots in all?").
The first domino matched with correct number.
More dominos matched with their total number of dots.
All of the dominos from the pouch matched with their numbers.

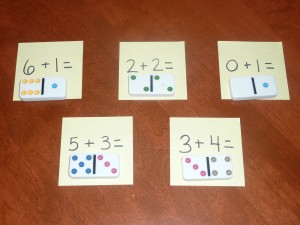
My Obstacle Course Station Activity:  Matching Dominos With Their Addition Equation

My Obstacle Course station activity: Matching dominos with addition equations.
Addition equation and domino matched up.
Dominos matched up with their addition equations.

Same activity using the colored dominos.

My Obstacle Course station activity: Match up dominos with addition equations.
A colored domino matched up with its addition equation.
Colored dominos matched up with their addition equations.

I love how easy (and inexpensive!) these activities are to set up and how by adding a little bit of mystery and randomness, they become a fun way to build math skills.

Engage, Encourage and Empower!

Stamping

My Obstacle Course station activity: Stamping the word "apple" during an apple themed course

This is one of Andrew’s favorite My Obstacle Course station activities and when I think back to when I taught kindergarten, it was one of their favorite “center” activities as well. There is just something about stamping that children seem to enjoy, perhaps it seems like grown-up activity or is something they rarely get to do. I’m not sure why, but stamps have always been a hit with the children I’ve worked with.

Note: “Centers” are stations that teachers set up and the children rotate through in order to strategically work on different skills.

Building Fine Motor Skills

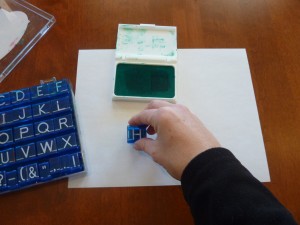
While Andrew is extremely strong, his grasp is weak and so I am always on the lookout for ways to build strength in this area. When using a stamp, you have to grasp the stamp, push the stamp into the ink and then apply pressure when stamping on paper.

Grasping a stamp helps build fine motor skills by squeezing fingers together to hold the stamp evenly.

Combining Strengths And Weaknesses For Building Skills In Multiple Areas

I found these letter stamps at a teacher supply store and knew that with Andrew’s love of letters and words, they would be perfect for motivating him to work on this fine motor weakness while he’s focused on something that is a strength. Note: The reverse of this would also be true so if you have a child who has great fine motor strength but struggles with letters and words.

My Obstacle Course Stamp Stations

When setting up my stamping station as part of My Obstacle Course, I provide the stamps, stamp pads (I made sure to get washable ink so I wouldn’t have to worry about finding permanently stamped letters on the floor or tables.), paper to stamp on and also paper towels to use either to wipe off ink when switching ink colors or as a place to “hold” the stamps until you are ready to place them back in the case.

Supplies for stamping station: paper, stamps and washable ink
My Obstacle Course station activity: Stamping space words
My Obstacle Course station activity: Stamping ocean words to go with the sticker

Stamping suggestions:

  • Stamping names
  • Stamping words to go with your theme
  • Stamping vocabulary words from a story or as part of a unit study
  • Stamping spelling or word study words

If you are looking for a fun way to engage with your child while incorporating fine motor skills and literacy, I encourage you to try setting up a stamping station!

Engage, Encourage, Empower!

Questioning Skills

Andrew did not speak intelligibly until he was about 6 and to help him get his wants and needs met when around people who didn’t understand him, we had scripted some basic questions. He was quite a master at asking the question “Can I have ____?” and once he began speaking so others could understand him, I realized that it was time to start building his questioning skills (*please read my note at the bottom of this post). I thought about how to do this in an interesting way and had to look no farther than some magazines sitting on a shelf.

Magazines

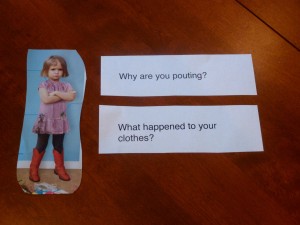
I flipped through and found some pictures that I could write questions for…

Magazine advertisement with a good picture for coming up with questions.

and cut them out.

Advertisement cut out.

I then printed out some questions…

I typed and printed some questions to go along with the picture.

and cut them into strips so they could be sorted and placed with the picture that they went with.

Question strips

One Of My Favorite Things:  One Activity Targeting Many Skills

As I got working on putting this together I realized that this would also allow me to build on another important skill for him, reading other people’s body language and facial expressions. We could discuss how the people were feeling, tie in personal experiences and even add in some pretend play by acting like we were feeling the same way (“How do you feel when you get dirt all over your clothes?” and/or “Can you make a face like hers?”). Oh I just love it when something so easy and basic provides me with ways to build many different skills. The fact that it didn’t cost me anything extra is a complete bonus!

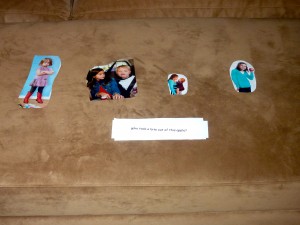
Here is how I set it up as a My Obstacle Course station:

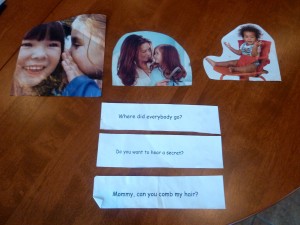
My Obstacle Course station activity: Match questions with pictures (before)
My Obstacle Course station activity: Match questions with pictures (after)

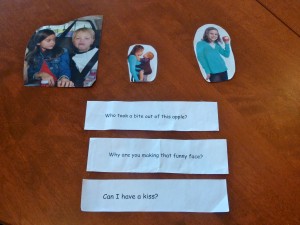
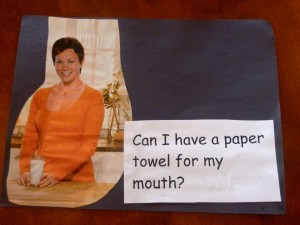
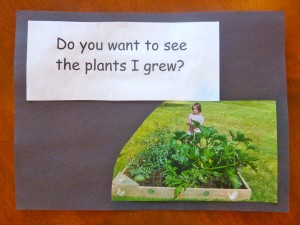
Here are some other pictures and questions I have used in the past:

My Obstacle Course station activity: Match questions with pictures

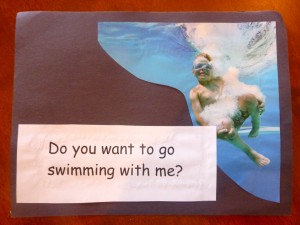
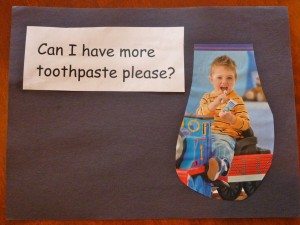
These pictures and question strips could be glued onto construction paper and turned into a question book. In my experience as a classroom teacher and at home with Andrew, children love books that they helped create. It doesn’t have to be anything fancy, pages stapled together or hole punched and tied together with yarn.  I have found that it helps build reading confidence because they have the knowledge behind the pages so even if they cannot actually read the words, they can still “read” the words as they remember them, using the pictures to help.

Picture and question glued onto black paper to make a book.

Picture and question glued onto black paper to make a book.

As an extension of this skill, I would do the same type of activity but have him come up with questions to go with the picture.

Intelligibility Does Not Indicate Intelligence

Note:  If I had only known then what I know now! If I had known that Andrew was understanding far more than anyone had thought, I would have done something like this before his speech was intelligible. This activity did not require him to speak or read since I was there to provide the auditory information for him (reading the questions) but he could look at the pictures to find the match.

One of the reasons I am doing this blog is to encourage parents to try things and activities that allow children to demonstrate their knowledge and understanding without having to speak intelligibly. Intelligibility does not indicate intelligence!  Speech is definitely something that we work on but there is more to my son than the words he speaks that others are able to understand. It is my hope that the activities I share will help give you a more well-rounded picture of your child’s abilities, building on each developmental and academic area, whether considered a strength or weakness.

Engage, Encourage and Empower!

Station Numbers

When I first began brainstorming on how to work with Andrew at home, I envisioned a treasure hunt with clues scattered about.  As I got thinking about how to make this work best for both of us, I knew that while the format of a hunt would be fun, I needed something more structured and systematic.  I was overwhelmed before I even started thinking about all of the work involved with just coming up with clever ways and clues each time.  Too hard!

While on a treasure hunt of my own at Michael’s to gather supplies and materials, I saw these blank rectangular pieces of wood and thought that they would be perfect for creating a real life dot-to-dot.  I purchased 20 of them and wrote numbers with a black permanent marker.

I decided to take it one step further and instead of using it purely as a dot to dot station, I thought that it would be cool to use them as station markers so he would know where to start, where to go next and also where to stop.  I could also have used index cards, calendar cutouts or calendar numbers but have found that the sturdier the better when making materials I’d like to use over and over again.  The wood pieces have held up really well through 3 years of My Obstacle Courses.

Rectangular wood piece with numbers written on with black permanent marker.
Station markers 1-5 (I have 20 total since I usually do 20 stations in My Obstacle Courses.)

I place them next to the station activities and he uses them to see how he is supposed to progress through the Obstacle Course.

One week's My Obstacle Course stations 1 and 2

They provide structure, make it systematic and I think that they even help to make it an “official” event for him, not just some activities thrown around the room.  With the numbers, it’s the real deal.  There is no question about where to go next, he just looks for and proceeds to the next station number.  This also eliminates him seeing more preferable station activities and running to those.

It has the same effect as writing out the directions by placing some distance between me and the activity.  It’s not me telling him what to do, the number is there and we need to go in order.  He knows that he needs to finish one station, even if that means with assistance from me, before moving on to the next.

Station number 20

I have found this to be such a simple but helpful addition to My Obstacle Courses.  I use them each time we do one and it helps me at every stage, from planning to implementing, because of the structure it provides.  I love easy to make materials that help to make my life easier!

Engage, Encourage and Empower!

« Previous Page
Next Page »

Primary Sidebar

Obstacle Course Mom’s Blog

  • When People Stare, Mind Your Own Business
  • ABC’s of Peaceful Parenting Tele-class
  • What’s Perfect About This?
  • Exciting News!
  • Halloween

Categories

  • Blog
  • Cool Tool
  • Fine Motor
  • Getting Started
  • Gross Motor
  • Literacy
  • Math
  • My Obstacle Course Station Ideas
  • Oral Motor
  • Problem Solving
  • Sensory
  • Social Skills
  • Uncategorized

Archives

  • July 2012 (1)
  • May 2012 (1)
  • January 2012 (1)
  • November 2011 (2)
  • October 2011 (12)
  • September 2011 (14)
  • August 2011 (15)
  • July 2011 (19)
  • June 2011 (18)
  • May 2011 (21)
  • April 2011 (20)
  • March 2011 (22)
  • February 2011 (19)
  • January 2011 (21)
  • December 2010 (22)
  • November 2010 (6)

Meta

  • Log in
  • Entries feed
  • Comments feed
  • WordPress.org