• Skip to primary navigation
  • Skip to main content
  • Skip to primary sidebar

My Obstacle Course: Engage, Encourage and Empower

A fun, structured, systematic way to work on your child's strengths and weaknesses at home!

  • Welcome to My Obstacle Course!
  • What is My Obstacle Course?
  • Developmental Timelines
    • What Is My Child Ready For?
  • About Us
  • Blog
  • Contact Information

Archives for December 2010

Writing Out Directions

A lot of parents that I have talked with have expressed concern that their children don’t necessarily want to do what they ask them to do.  I COMPLETELY understand!!  I would ask my son to come and play blocks with me…nothing.  I would get on the floor and play cars, driving them around his feet, up and down his arms…nothing.  I would play, he would spin.

The boy is a spinning genius!! Â This is great until I want him to do something with me.

This was something that I really struggled with until I began writing out the directions for things I wanted him to do during the Obstacle Course.  For some reason, he did not associate what was written out with me.  I was merely the person reading the directions.  He would study the sheet of paper and I would point to each word as I read and then he would begin to do the activity.

What Is He Able To Do? vs.

Does He Understand What He is Supposed To Be Doing?

Having had the pleasure of sitting in on his neuropsychological evaluation, I realized that the language used in standardized testing was a bit different from language and vocabulary we used at home.  I decided that this would be a good opportunity to sneak in vocabulary to help him understand expectations.  I could also provide activities that would help show him how to apply that vocabulary as well as demonstrate what he knew.  For him, some things just need to be real explicit and then he usually gets it.  Writing out the directions seemed to help out tremendously!

My Obstacle Course station direction: Bounce and catch the ball 10 times.

More Purpose, Less Auditory Clutter

Because the directions were written out, I found myself using more purposeful language and not over-talking which could create even more confusion and frustration at times.  Since I had planned the activity to help with certain skills, I also got to choose the vocabulary to use in the directions and would repeat them unless it became apparent that he had no clue where to start.  If that happened, I would help him through the activity with more demonstration and modeling than words.  I would also make sure to use those directions again in different scenarios so he wouldn’t generalize them to one situation but rather get a broad exposure to how to apply them in a variety of ways.  I encourage you to try this very basic strategy with your child and see if it makes the same kind of difference it made for us!

My Obstacle Course station directions: Find all of the acorns!

Nothing Fancy Required

The directions I provide for station activities are not fancy documents.  Sometimes it’s easier for me to type up a bunch on the computer, print them out and then cut them into strips to place at the stations.  Sometimes I write them out on index cards or calendar cut-outs.  Whatever is easiest for me at the time, that’s what I do.

My Obstacle Course station directions: What comes next?

An Empowered Parent

This empowered me big time because I was learning about my child, how he learned, what he understood and what sorts of things stumped him.  With this knowledge, I could then attend meetings or talk with his teachers and not only have a good idea about what he could or could not do, I had specific examples to back it up!  I was no longer at the mercy of the professionals, waiting for them to tell me about my child, I was a key team member!

Easy Math Organizers

Engage

In My Obstacle Course stations, I like to include math activities that get my son involved in what the concept really is, not just pencil/paper math memorization.  Try this if your child is just learning their basic math facts or is having some difficulties because they just don’t get what they are supposed to be doing.  This idea can help them get a better understanding of what the process is when presented with addition and subtraction equations and also help them practice their facts in a fun way.

I love to use dice because it adds randomness, and I have found that bits of randomness helps keep things interesting.  While there is a time and place for practicing math facts with pencil and paper (in fact, that can be added to this activity if you’d like- either written out by you or your child on a dry erase board, chalkboard or sheet of paper), I think that practicing with actual items is important when forming a good understanding for something that progresses into more abstract concepts.

These easy to make math organizers are perfect for practicing math facts with dice and manipulatives (fancy word for items used for counting).  These organizers allow the child to have a space for the manipulatives to go, along with the number, so they get a good visual of what they are really doing.

Ice Cube Trays

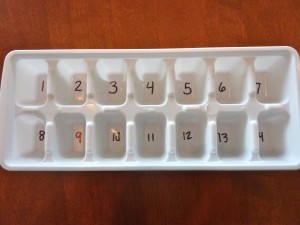
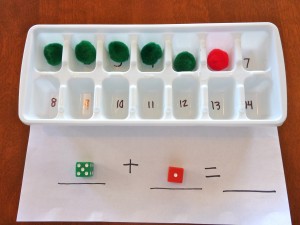
An ice cube tray with numbers 1-14 written with permanent marker on the bottom.

Egg Cartons

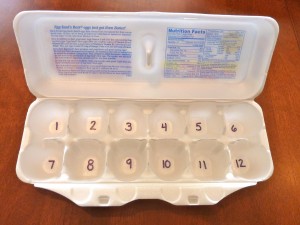
Clean and dry an egg carton. Write numbers 1-12 with permanent marker on the bottom.

Basic Number Charts

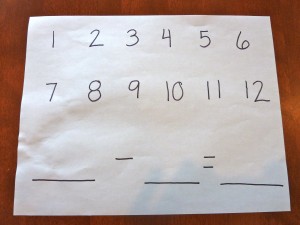
Take a blank sheet of paper and write numbers 1-12 on it. Write an addition equation with blank lines where the numbers being added (addends) and the answer (sum) would be.
Take a blank sheet of paper and write numbers 1-12 on it. Write a subtraction equation with lines where the starting number (minuend), the number being subtracted  (subtrahend) and the answer (the difference) would be.

See it in action:

Ice Cube Tray + Dice + Manipulatives=Fun Math Fact Practice


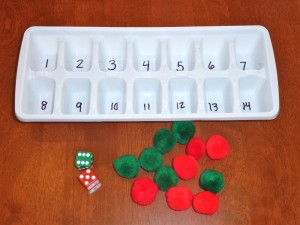
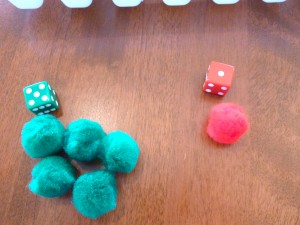
Step 1: Take an ice cube tray math organizer. Add 2 dice (I used red and green dice to go with the holiday theme) and 12 manipulative items or counters (I used 6 red and 6 green colored puffs to provide additional visual cues).
Step 2: Roll the dice. Step 3: Count out correct number of manipulatives to go with the number rolled on each die.
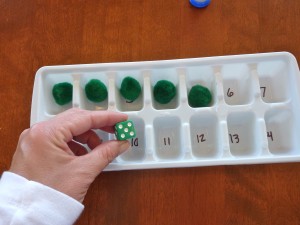
Step 4: Place the manipulatives from one die into the ice cube tray, starting with 1 and moving across.
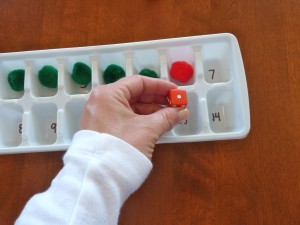
Step 5: Place the manipulatives from the other die into the tray.
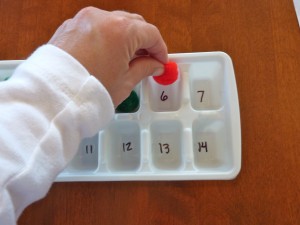
Step 6: The section of the tray that has the last manipulative in it is the sum.

Easy Add On:

It may help your child understand the relationship between the equation and what they are doing with the organizer by providing a place for the dice.

Modalities of Learning:

Visual– math organizer with numbers written; items placed on numbers to show the process

Kinesthetic– manipulating the items (counters) to demonstrate what the process is;

Empower:  This aspect is so helpful to see if your child is understanding and if not what aspect of the process is causing issues.  Great information to pass on to their teachers and/or therapists so they can help build skills from where your child is!

Auditory– talking through the process with your child

Encourage:

A note for those of you biting your nails because you don’t have colored dice or puffs just sitting around your house.  You can use other items you have in your house that can be counted and in future posts I will show ideas of things to use that you may not have even thought about for math.  Having been a teacher, I enjoy keeping with themes and will share with you items I find to help keep the activities interesting, colorful and kid-friendly.

Tunnels

One of the great things about My Obstacle Courses is that multiple areas of development are mixed and matched giving me more bang for my buck, especially when needing to build skills that my son wasn’t crazy about practicing.  I had learned about the importance of crawling for brain development (cross-patterning, using both sides of your body at the same time (ex. right arm with left leg, left arm with right leg when you walk and run), helps make brain connections and the distance from the floor to your eyes is around the same distance you read things at- fascinating stuff- more to come!) and wanted a way to get him crawling more.  Just as most things are with him when it comes to something I want him to do, he wasn’t crazy about just getting on the ground and crawling with me.  I figured that if I could just make it part of the obstacle course, he would do it.

Hidden Treasure

One day as I was scouring my house trying to find things to use, I found some collapsable tunnels that he had gotten as a gift one year.  Those tunnels and tents would make perfect stations, not only making it more visually appealing for him but it also made it more of an adventure to have to go through them on the way to the next station, not always knowing what was going to be waiting for him on the other side.  It worked!  Sure enough, he began crawling, as long as it was part of the Obstacle Course.

"What do I get to do next?"
My Obstacle Course station idea: Â square collapsable tunnelÂ
My Obstacle Course station idea: small round tunnel
My Obstacle Course station idea: Tent-like collapsable tunnel is used to "hide" parts of an activity. Â

What a great, easy way to add a bit of fun and adventure to My Obstacle Course!  Since they fold up flat, when you are done, just stow them away for the next time.

Thematic Memory Match

One of my original goals when I began doing My Obstacle Courses with my son was to work on building his play skills, particularly turn taking since he is an only child and doesn’t have to do that very often.  As I looked through his toy closet, I noticed that we had accumulated a number of different memory match games (Sesame Street characters, shapes, colors, etc.) and I also remembered how much I used to love playing this game as a child.  I decided to try it out with my son and found it to be a perfect game for introducing turn taking and following directions when playing card games.

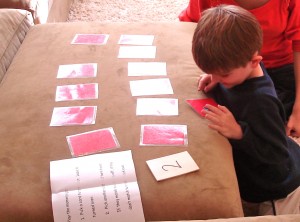
My son studying the card he flipped over. He loves the mystery of not knowing what is going to be on the other side of the cards!!

I realized that I could make my very own memory match games that would be unique to our theme and would allow me to work on attention to details and building vocabulary.  I could change it up frequently and easily by using thematic stickers and index cards.  It is so easy to make and the possibilities are endless!  Most importantly, my son loved the mystery of what stickers would be waiting for him when he flipped them over!!

How to make your very own thematic memory match game:

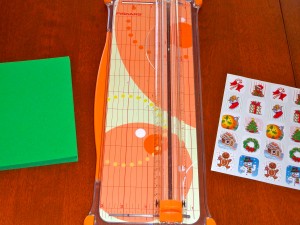
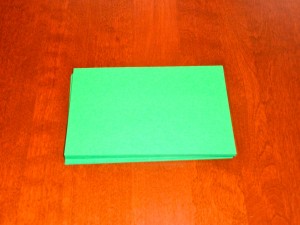
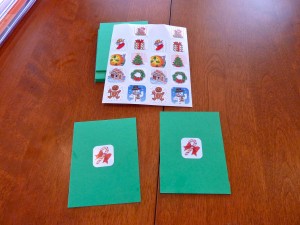
These are the three things I need to make a thematic memory match game: 10 4x6 index cards (will make 20 playing card size pieces), paper cutter (scissors work but the cutter is quicker and straighter), and a sheet of thematic stickers.
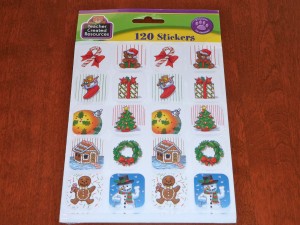
Step 1: Choose a package of stickers. If they don't have matching stickers on the same sheet like this one does, you can use the same sticker from two separate sheets.
Step 2: Get 4x6 index cards. I usually use blank colored cards but white ones work as well.
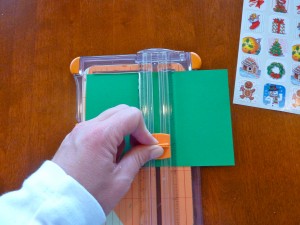
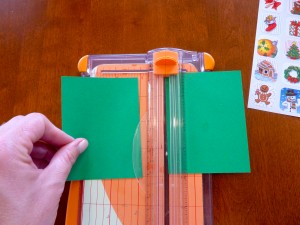
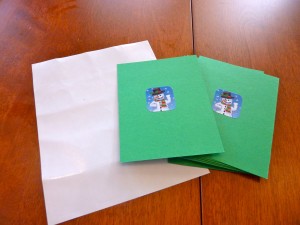
Step 3: Cut the card in half so you have two "playing card" size pieces.
Index card after cutting in half.
Thematic stickers with cut index cards- ready to put the game together!
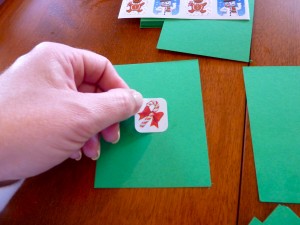
Step 4: Choose a sticker and place it in the middle of the card.
Step 5: Place the matching sticker on another card.
Continue with the other stickers...
until you have a full set ready for a game of Thematic Memory Match!

See it in action!

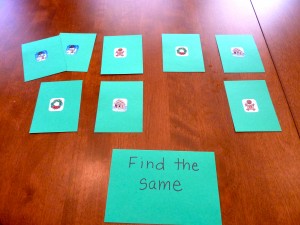
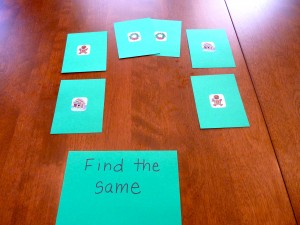
When first introducing this game to your child, you may want to start with a few cards facing up and working on finding the cards that are the same.
Matching up the cards that are the same. Next person's turn!
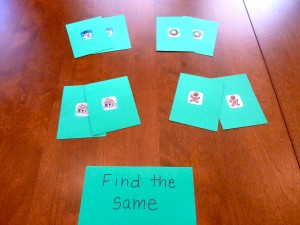
Another pair matched! Who's turn now?
Continue until all cards have been matched up into pairs.

Too easy?  Ready for a challenge?

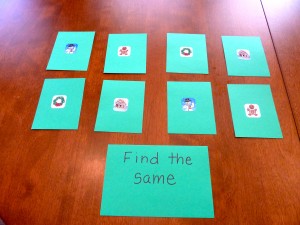
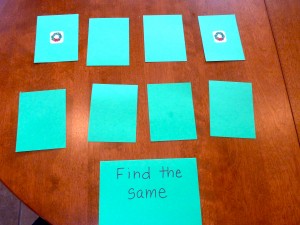
Thematic Memory Match game with cards face down.
Flip one card over at a time. Talk about what it is, any specific details about the sticker, any details or information about the object to help the child relate (Where or when do we see it? Is it real or make believe?)
Flip over another card. If they match, remove them from the game area. If they do not match, flip them both over and the next person takes their turn. It is important to watch what the other person flips over because it could help make a match later on!
Continue taking turns and finding matching pairs until they are all matched up.

Easy Add Ons:

  • More cards can be added to make it even more challenging.
  • If your child is ready for and is motivated by competition, keep track of the number of matched pairs to determine a winner.
« Previous Page

Primary Sidebar

Obstacle Course Mom’s Blog

  • When People Stare, Mind Your Own Business
  • ABC’s of Peaceful Parenting Tele-class
  • What’s Perfect About This?
  • Exciting News!
  • Halloween

Categories

  • Blog
  • Cool Tool
  • Fine Motor
  • Getting Started
  • Gross Motor
  • Literacy
  • Math
  • My Obstacle Course Station Ideas
  • Oral Motor
  • Problem Solving
  • Sensory
  • Social Skills
  • Uncategorized

Archives

  • July 2012 (1)
  • May 2012 (1)
  • January 2012 (1)
  • November 2011 (2)
  • October 2011 (12)
  • September 2011 (14)
  • August 2011 (15)
  • July 2011 (19)
  • June 2011 (18)
  • May 2011 (21)
  • April 2011 (20)
  • March 2011 (22)
  • February 2011 (19)
  • January 2011 (21)
  • December 2010 (22)
  • November 2010 (6)

Meta

  • Log in
  • Entries feed
  • Comments feed
  • WordPress.org