• Skip to primary navigation
  • Skip to main content
  • Skip to primary sidebar

My Obstacle Course: Engage, Encourage and Empower

A fun, structured, systematic way to work on your child's strengths and weaknesses at home!

  • Welcome to My Obstacle Course!
  • What is My Obstacle Course?
  • Developmental Timelines
    • What Is My Child Ready For?
  • About Us
  • Blog
  • Contact Information

Archives for December 2010

Holiday Hershey Kiss Patterning

Here is a great way to motivate a child who loves chocolate to work on some patterning skills.  A VERY easy My Obstacle Course station idea that requires little in preparation other than purchasing the Kisses and with the holiday break fast approaching, I am looking for every activity I can to help me keep my son engaged in purposeful activities!
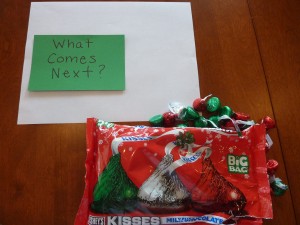
All that is needed for a Holiday Hershey Kiss Patterning Station: Holiday Hershey Kisses, a card that says "What Comes Next?" and an optional white sheet of paper used for specifying work space.

I have found that when working on patterns with my son, using the phrase, “What comes next?” works really well.  I incorporate the term “pattern” while we are doing the activity  (ex. “Oh, look at this pattern!  or “What comes next in this pattern?”) but feel like sometimes the less words I use in the directions, the better.

An "ABAB" pattern, which uses only two colors, alternating between the two (in this case, green-red-green-red).
The child adds the Hershey Kiss that comes next in the pattern...
until that pattern reaches the end of the paper or the Hershey Kisses are used up.
A Different Pattern: ABCABC . This pattern uses three colors repeated in the exact same order. The example shown is green-red-silver .
More of the ABCABC pattern.
Another pattern option: AABBCC
More of the AABBCC pattern.

These are obviously only a few of the patterning possibilities so feel free to use patterns that you feel your child can do and if it turns out to be too difficult, work through it with them!

Note:  My son does not like chocolate, in fact when he was younger, I have a vague memory of chasing him around our Phoenix apartment trying to get him to eat chocolate pudding.  He did not but I did!  Even so, I still use these holiday themed Hershey Kisses with him to practice patterning.  It helps to keep things interesting and is also a sensory activity because he slowly works up to smelling the kisses before placing them where they belong in the pattern.
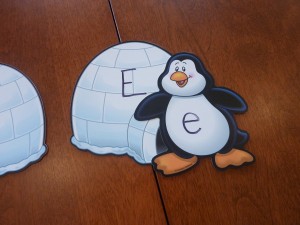
Winter Themed Uppercase and Lowercase Letter Matching Game

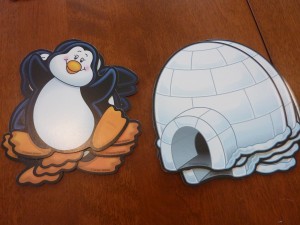
I was at the teacher supply store looking for some ideas for a winter themed Obstacle Course and found a package of these cute penguin and igloo cutouts.  I think their original purpose was for a bulletin board but I decided to use them to create an Uppercase and Lowercase Letter Matching Game.  It is so easy to prepare a station activity like this when the difficult work of cutting and theme-making is done for me!

Penguin and Igloo Bulletin Board Cutouts to be turned into an Uppercase and Lowercase Letter Matching Game!

(Note:  This idea can be adapted to use different kinds of paper, cutouts or items such as magnet letters, letter blocks, or wood letters- and I will do future posts on some of these.  I’m just showing a sample activity that I thought was cute and works well for building this skill in a Winter Themed My Obstacle Course.)

How to make the Uppercase and Lowercase Letter Matching Game:

1.  Choose which cutout is going to have the uppercase letter and which one will have the lowercase.  In my game, I chose the igloo to have the uppercase letter and the penguin to have the lowercase letter.

2.  Write the letters on each.

Igloo with uppercase letter, penguin with lowercase letter

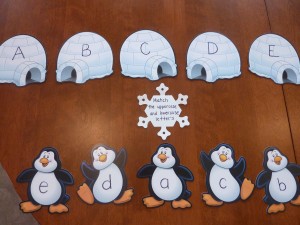
3.  Choose the letters that you want your child to match and separate them.  Arrange them so they are not in the same order on the top and the bottom.

Letters chosen, cutouts separated and placed in order ready to be matched. I used a snowflake calendar cutout to write the directions - "Match the uppercase and lowercase letters."

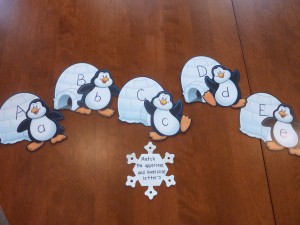
4.  Your child matches up the letters!  Take note of any letters that give your child difficulty so you know to focus on those in the future.

Letters matched!

See how easy it is!!  Activity stations like this don’t have to be elaborate, super fancy things.  Something like this is quick and easy to make and also provides you with a lot of really useful information about your child’s letter awareness.  You could even add in saying the sounds the letters make for even more literacy exposure!

(While I found these at my teacher store, Teacher Heaven, you could also click here to go right to the Carson-Dellosa webpage for the bulletin board cutouts if you are interested.  (Note:  I have no ties with this company, just sharing information.)  They come in a package of 16 penguins and 16 igloos, so you could either purchase two packages or choose which letters your child needs to work on and only use those letters.)

Ball Play a Problem? Try Something Sparkly!

My son is one of those children that doesn’t like to play ball- throwing, tossing, catching or kicking – doesn’t matter, because right now* he could care less. (*Note:  I say “right now” because there have been things in the past that he didn’t care about (ex. handwriting) but now he does (because he’s obsessed with names and wants to write them 🙂 ) so don’t dismiss things that your child is not into because they may just not be ready for it.  If at first they aren’t into it, try and introduce it again later! )

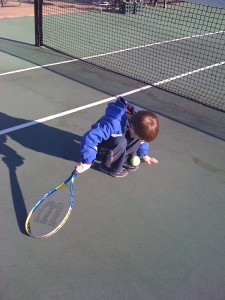
What playing ball sports usually looks like in our family- I am attempting to teach him about tennis (surprisingly at his request, although the whole experience lasted about 3 minutes). If you look closely, he has placed the ball upon his shoe and is quite proud of himself!

There are those of you out there who probably cannot believe this, thinking about your own child who would go to “ball” school if they had one.  However, while I once felt all alone, I have met many other parents who have children similar to Andrew.  These children tend to find this an activity that is quite difficult for them, they do not see the purpose in it, and aren’t into playing team games, especially when you add unpredictable kids, loud whistles, yelling and of course all of the rules to remember so the loud whistles and yelling don’t occur.

What I had never really thought about before was all that goes into something as basic as passing a ball-

  • one has to be able to see the ball
  • one has to be able to visually track the ball
  • one has to be able to plan and coordinate lots of muscles in order to throw or catch the ball


For a while I didn’t know if he could do it or not because he wouldn’t look at me or the ball when I would throw it to him.  This resulted in many “mother of the year” moments, bopping him in the chest with a ball  (Now, I wasn’t the only one to do that, the neuropsychologist evaluating him did the same thing!).  While I have no aspirations for him to play professional sports, we do work on ball skills with him to build his visual perception and tracking and motor planning skills.

When the same old, same old doesn’t cut it, try something sparkly to catch their attention!

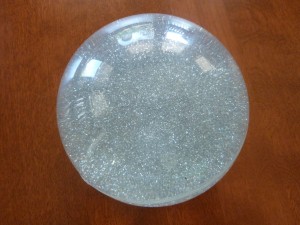
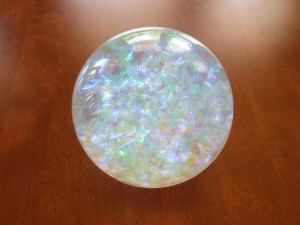
I found these two balls at Michael’s Arts and Crafts store and thought they would be the perfect addition to a winter themed Obstacle Course. They were also sparkly enough to catch his attention!

My Obstacle Course station idea: "Snowball" tossing

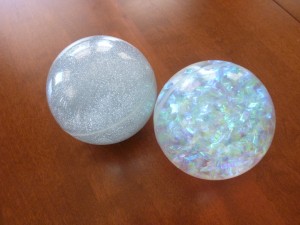
One was filled with some sort of liquid and glitter.  When I saw this sparkly ball it reminded me of a wintery night with the falling snow lit up by the streetlights.

Snowy night ball

The other one was the same size but reminded me more of a large snowflake inside.

Snowflake ball

When he first saw the ball, he was fascinated in the same way that a snow globe fascinates him.

A regular ball becomes a very cold snowball when used in a winter themed Obstacle Course!

In order to build his pretend play skills, I told him that we were going to pretend that they were snowballs and they were VERY cold so we had to pass them back and forth before our hands got too cold.  We tried it, starting close together at first while passing it back and forth.  Eventually we took some steps back and he would actually look at the ball while I had it and would watch it while I tossed it back to him so he could see what was happening inside the ball.  He was engaged because he got to see something he found interesting and I was empowered because I got to see where he was with his ball skills!

Calendar Cutout Matching

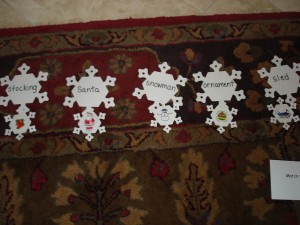
My Obstacle Course station activity: Calendar Cutout Matching - Holiday Words and Pictures

Matching has been an important activity for us in My Obstacle Courses, especially when Andrew’s speech was not intelligible.  He didn’t need to speak intelligibly to show what he knew because he could demonstrate his knowledge by matching pictures, letters, words and numbers.  This simple activity gave me a great deal of information, specifics about his understanding for a variety of skills, topics and themes that no one else was able to get.

Calendar cutouts have become an essential item for me when setting up these matching stations.  They make it so easy to add a bit of fun and tie the stations together by carrying the theme throughout the course.

Where I get themed calendar cutouts: Teacher supply stores usually carry cutouts like this but it you don’t have access to one in your area, here is a link for the snowflake cutouts shown in the pictures:  http://www.creativeteaching.com/p-1812-snowflake-two-color-calendar-cut-outs.aspx

See it in action!

These are some sample calendar cutout matching activities I have done with Andrew.  They are specific to skills he was working on so please adapt the activity to help your child with skills they are working on.

Fun Way to Practice Speech Sounds

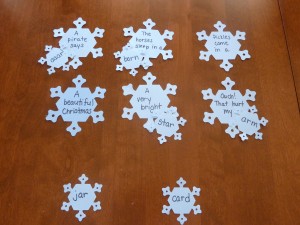
Words and clues to match (these words were chosen to help him practice the /ar/ sound his speech therapist was working on with him)
We would read the clue and he would match it with the correct word. Â He would also say the word 5 times to practice the sound.Â
More words matched with their clues
All words matched up with their clues

Matching Words and Pictures

Winter pictures and words to be matched
Word and picture matched
Words and pictures matched

The pictures for the activity above were cut out from a worksheet I got from one of my favorite websites, www.EnchantedLearning.com.  They have lots of thematic activity ideas and printable materials that can be easily adapted into fun My Obstacle Course stations.  While there is a subscription fee to access all of their materials, they do have some free stuff.

Other Calendar Cutout Matching Activities (I will do more posts showing these in action):

  • uppercase/lowercase letters
  • rhyming words
  • opposites
  • pictures with words
  • speech sounds paired with word clues
  • addition equation with sum

Button Sorting

Years before I had Andrew, I was a teacher.  I taught kindergarten for 4 years and loved it!  I loved it because of the emphasis on play and discovery when given common household items, such as buttons.  One year I requested that families send in any unused buttons that they may have lying around their drawers or sewing kits.  I filled half of a shoebox with a marvelous collection of buttons.  The children would have a ball playing with and sorting the buttons.  They were encouraged to find new and unique categories for a button sort.  An activity like this helps with visual discrimination and also basic problem solving, being able to group like items in a logical manner.  My students always had so much fun doing this!

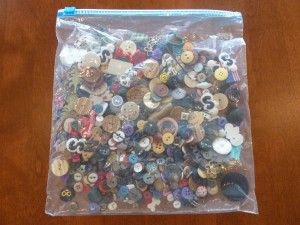
Now this might just be me, but when I was a child, I loved playing in button boxes.  I recall mine being stored in an old cigar box and remember quite clearly how it was kind of a treasure hunt each time the box was opened.  I would sort them by color, shape, size and the number of holes they had.  I have my own collection of buttons now to use in the same way with Andrew and you may have your own that you can use with your child.

My Button Bag

Using buttons as a station in My Obstacle Course:

  1. Pour some of your buttons into a bowl
  2. Look to see what ways they could be sorted and choose 3 or 4 ways, including a misfit category for any buttons that don’t belong in the other categories
  3. Write those categories on a piece of paper or on an index card, providing a picture clue as well (nothing fancy, anyone who has seen me draw knows I am an expert at stick figures!).  This not only helps them to know how to sort, but also shows them what the category word looks like.
  4. Provide a specific place for them to place the buttons- muffin liners and the cups from Easter Egg dying kits work great!

This only takes a few minutes and you have a station ready for them to get sorting!

No Buttons?  No Problem!

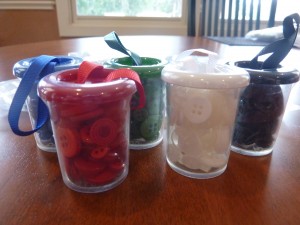
I was at Michael’s the other day and in the $1 section I came across these cute containers of buttons.  Each one held buttons of a certain color and when I looked closely, there were a variety of sizes, they had different styles and had either 2 or 4 holes.  They came in red, black, blue, white and green and I thought they would be perfect for an Obstacle Course sorting station!

Containers of buttons found at Michael's Arts and Crafts store
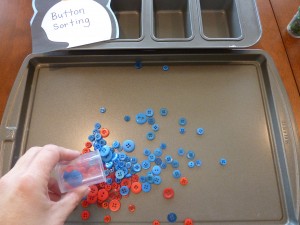
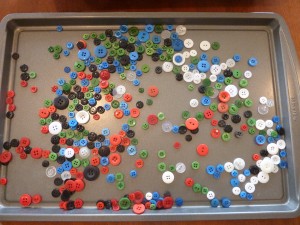
Pouring the buttons onto a rimmed cookie sheet so they can be sorted while also stay contained.
More buttons!
All of the button containers emptied onto the tray.
Mix the buttons well and then they are ready for sorting. Just choose how you want your child to sort them- color, size, number of holes?

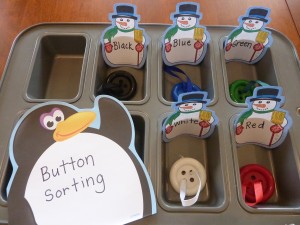
Sorting By Color

Using a small loaf pan to sort buttons by color. Â Paper cups or styrofoam bowls work just as well if not better because you can write the color directly on them! Â I also used the container lids as a visual cue as to go along with the color word.
A cute, small pad of paper and a pen are all you need to add some literacy to this activity.
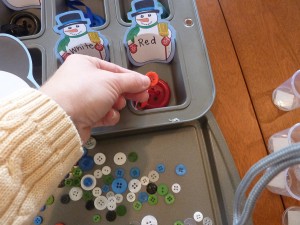
Your child can go through the buttons, sorting them one color at a time (like Andrew would) or each button as it is picked up.
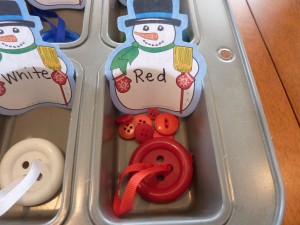
Red buttons!

Sorting By the Number of Holes

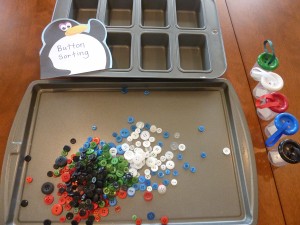
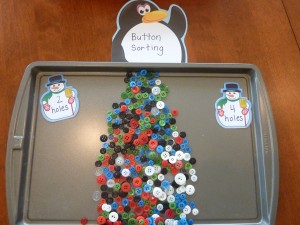
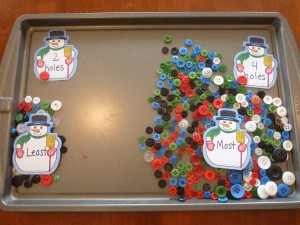
Using the cookie tray to sort buttons by number of holes, 2 or 4. I used the snowman pad of paper to make an easy label for how to sort.
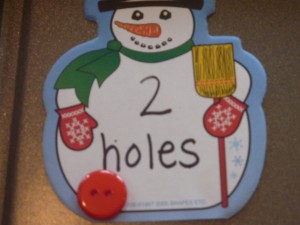
2 hole label and button
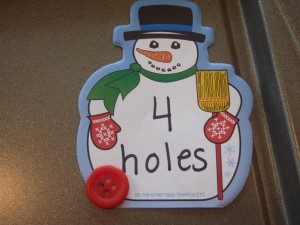
4 hole label and button
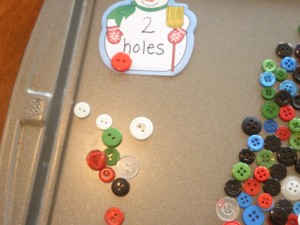
Buttons sorted with 2 holes
All buttons sorted by number of holes.
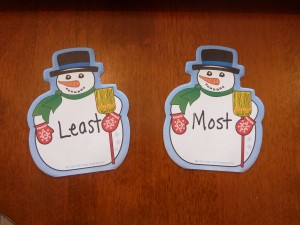
Use the pad of paper to incorporate math vocabulary "most" and "least"
Have your child place the "most" and "least" labels on the correct pile.

Extension:

After the buttons are sorted you could have your child count them, one by one if that is what they are able to do, or by groups of 2, 5 or 10 to work on skip counting.

Jingle Bell Patterning

Last year I was wandering the aisles of Michaels Arts and Crafts store, looking for things to incorporate into My Obstacle Course.  Since it was December, the store was filled with lots of items symbolic of the holiday season, just like it is now.  During the next few weeks I’ll share what I discovered and how I have used it.

Jingle Bell, Jingle Bell, Jingle All the Way!  Oh What Fun It is to…

Pattern Jingle Bells!

One thing I found and was quite excited about using was a package of jingle bells.  Now it might just be me, but these days when I find something like this my mind starts racing excitedly about how I could use it to help my son.

In the package that I found, there were red, green and gold jingle bells (I was just there today and found a package with silver and blue.).  Immediately I thought about patterning.  When I got them home and looked more carefully, I noticed that they each had a loop on the top, obviously for stringing.  My son did not like the usual lacing pieces I had purchased to work on this skill with him, but something sparkly and noisy might just get his attention (and it did!!).

If at first they don’t succeed, try something different!

I knew from previous attempts that stringing with a loose lace was fairly challenging for him so I decided to use pipe cleaner, which has the same result but provides some structure for fingers just learning how to push and pull things through for stringing.

My Obstacle Course Station Idea: Jingle Bell Patterning- AABB and ABC

How to make  Jingle Bell Patterns using a pipe cleaner:

Step 1: Gather one pipe cleaner and jingle bells needed for pattern (this pattern is going to be ABAB which requires two colors of bells)
Step 2: Make a loop or twist at the end of the string or pipe cleaner so the bells do not fall off
Step 3: String the bells onto the pipe cleaner...
and pull down towards the end.
Step 4: Begin the pattern that you want your child to continue.
Step 5: Have your child string the jingle bells onto the pipe cleaner, figuring out what comes next to make the pattern!

Whenever I introduce a new concept like patterning (“What comes next?”), I like to provide a model for him to follow (“Make the same”) so he can associate what the direction means with what the outcome is supposed to be.  I figure he’s no different from me in that when I am trying a new recipe, I like to have an idea of what it should look like when it’s finished!

« Previous Page
Next Page »

Primary Sidebar

Obstacle Course Mom’s Blog

  • When People Stare, Mind Your Own Business
  • ABC’s of Peaceful Parenting Tele-class
  • What’s Perfect About This?
  • Exciting News!
  • Halloween

Categories

  • Blog
  • Cool Tool
  • Fine Motor
  • Getting Started
  • Gross Motor
  • Literacy
  • Math
  • My Obstacle Course Station Ideas
  • Oral Motor
  • Problem Solving
  • Sensory
  • Social Skills
  • Uncategorized

Archives

  • July 2012 (1)
  • May 2012 (1)
  • January 2012 (1)
  • November 2011 (2)
  • October 2011 (12)
  • September 2011 (14)
  • August 2011 (15)
  • July 2011 (19)
  • June 2011 (18)
  • May 2011 (21)
  • April 2011 (20)
  • March 2011 (22)
  • February 2011 (19)
  • January 2011 (21)
  • December 2010 (22)
  • November 2010 (6)

Meta

  • Log in
  • Entries feed
  • Comments feed
  • WordPress.org